Workflows (Automations) — Setup & Usage
Workflows (previously Automations) live under Setup → Others. They’re organized into two tabs: Automations (Smart Lists + Triggers) and Sequences.
What’s inside
- Automations — Build dynamic Smart Lists and attach actions i-e Triggers.
- Sequences — Target specific patients (manual adds) with the same step types as Triggers.
Scope
This page documents Smart Lists, Triggers, steps (Email, SMS, Task, Wait, If/Else with branches), Trigger Detail/Analytics, and Sequences.
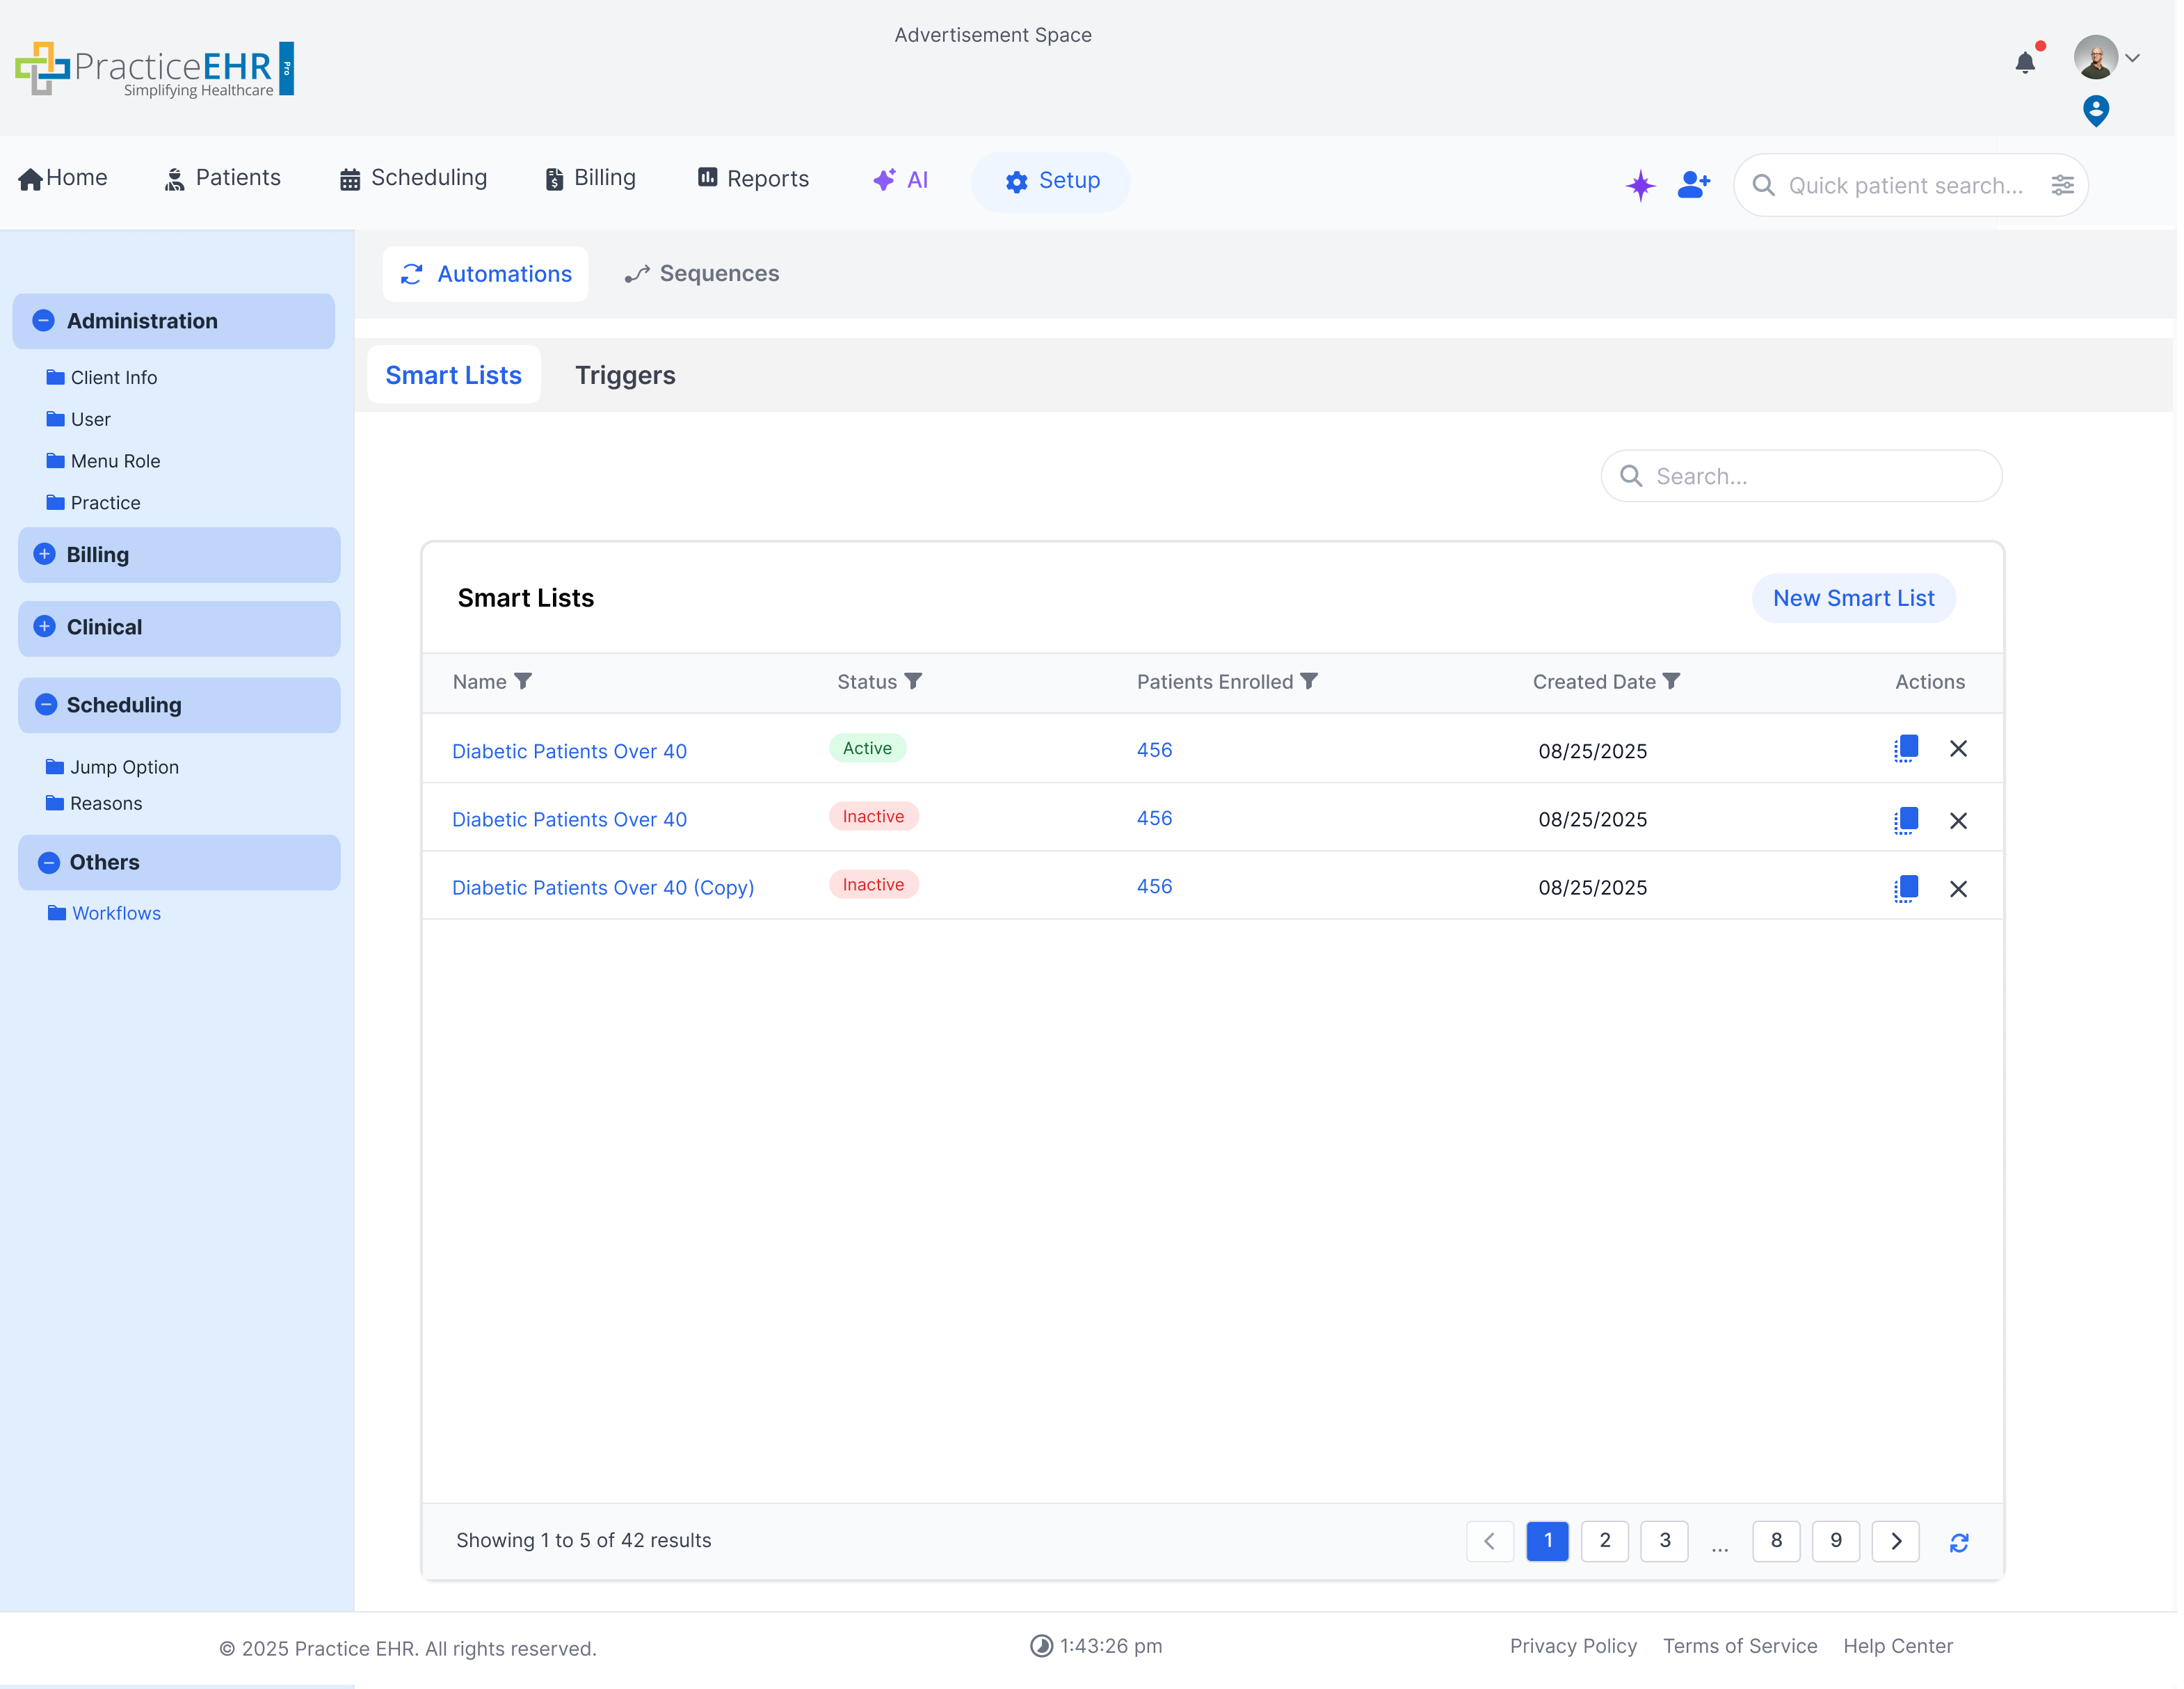
Smart Lists — Grid
Filterable, searchable cohorts. Create, copy, or delete lists.
Description
The grid shows Name, Status, Patients Enrolled, and Created Date. Search is available on the top bar. Each row supports Delete (X) and Copy actions; use the header button to create a new list.
Spec
- The smart list grid contains information such as the name, status, patients enrolled and created date of the list
- Users can search for lists using the general search bar present at the top of the gri.
- Users have the option to delete a list using the ‘X’ icon or make a copy of the list using the copy icon present in the actions column
- Users can also create a new smart list by the using the button present in the grid’s header
Edit Trigger
The edit trigger screen allows users to update the trigger’s details, adjust smart lists, toggle active status, and refine the steps within the canvas.
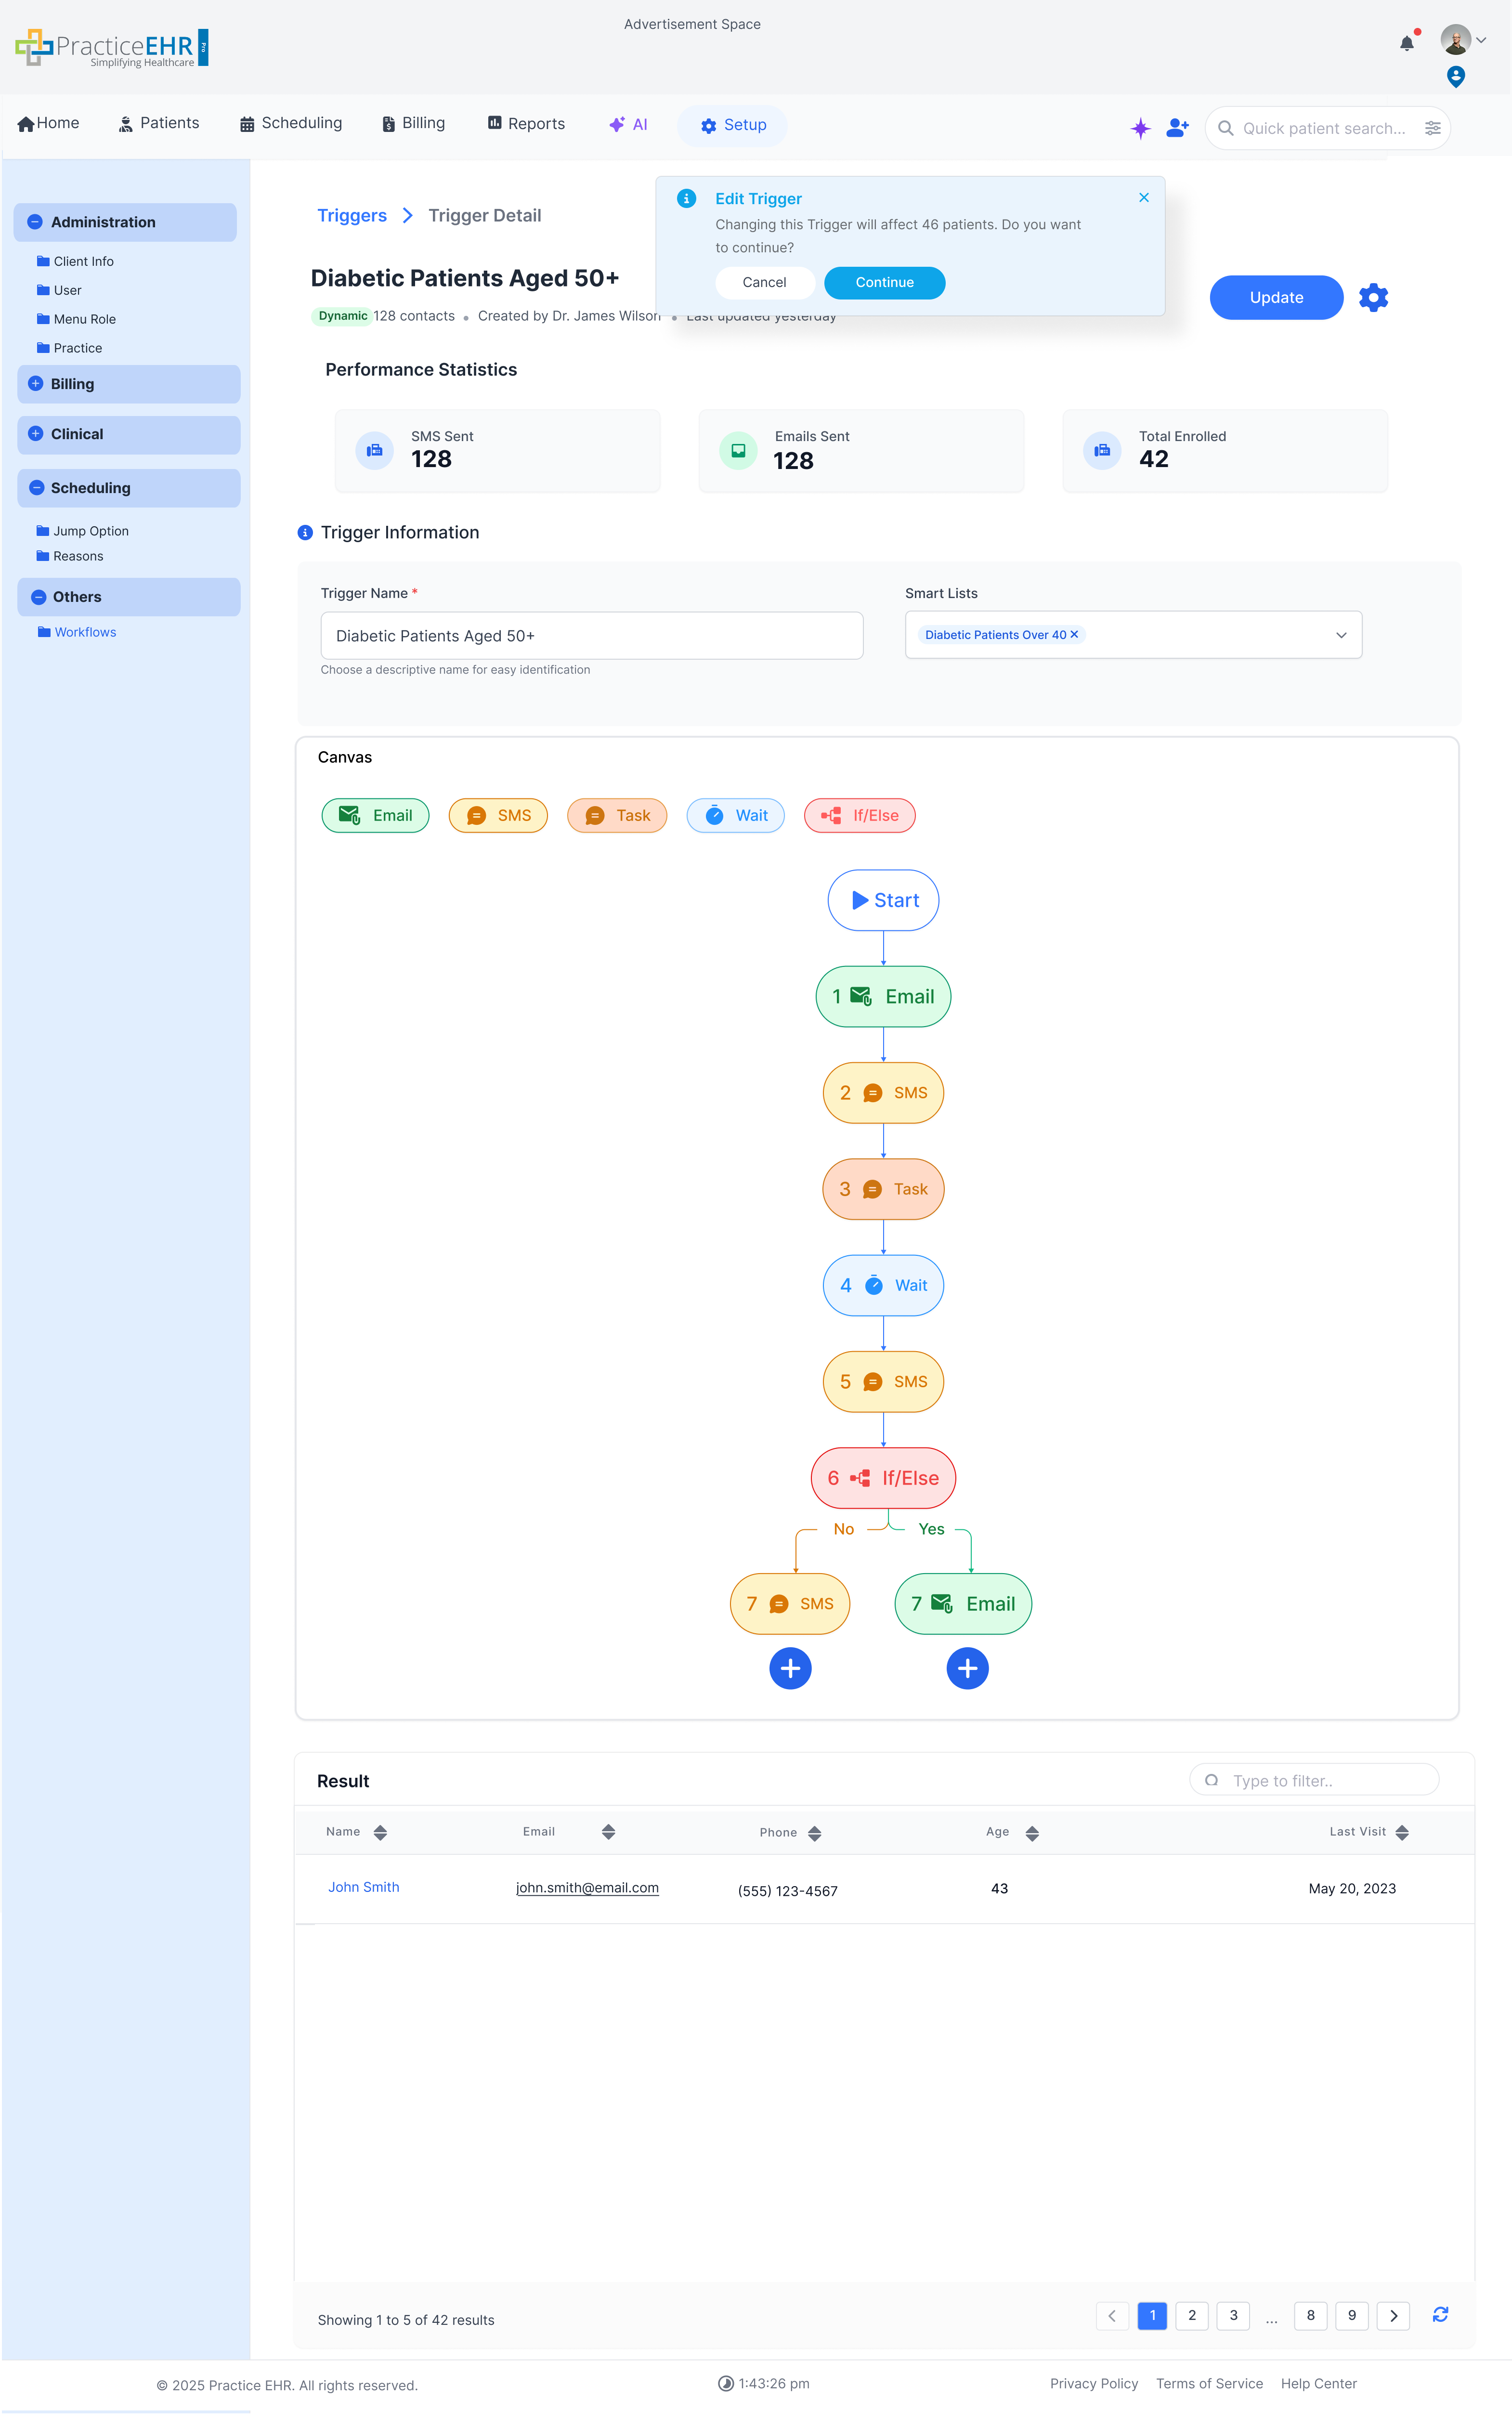
Description
The Edit Trigger screen enables modification of trigger settings, smart lists, occurrence, and active status. Users can also adjust the step sequence within the canvas and review linked patients in the result grid.
Editable Fields
- Trigger Name — rename or correct the trigger label.
- Smart Lists — add, remove, or replace patient smart lists.
- Active Toggle — enable or disable the trigger.
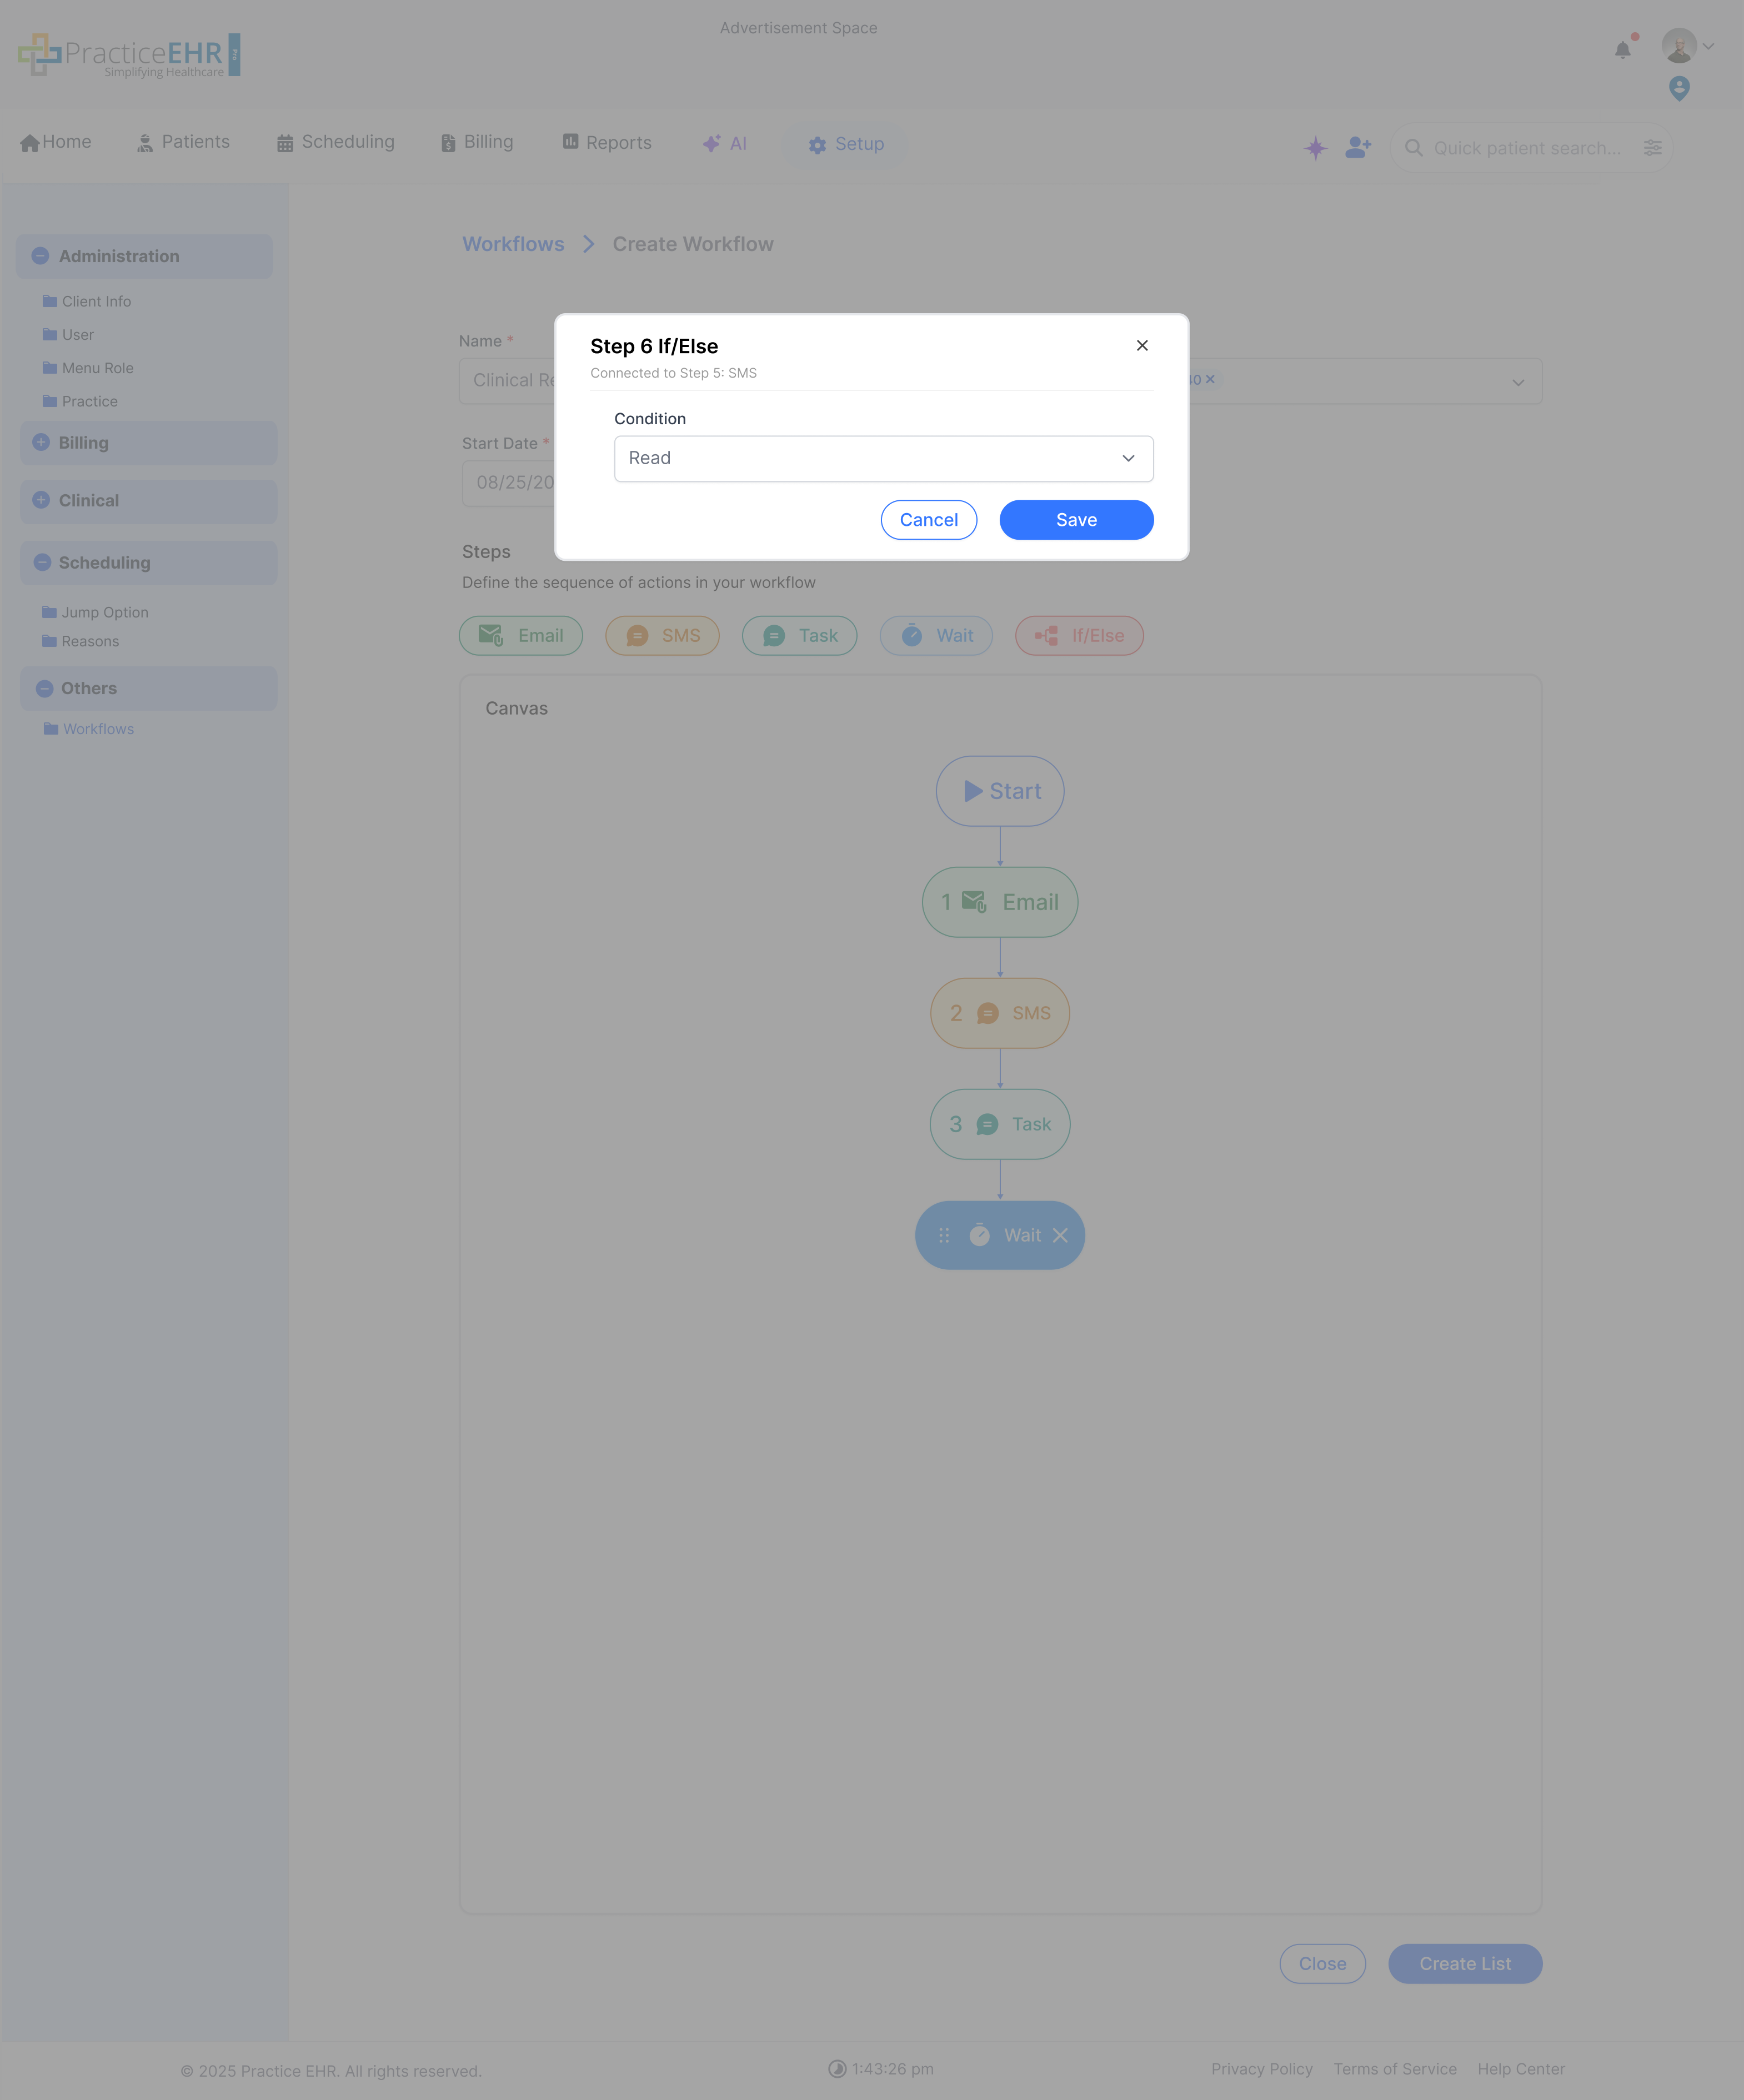
- Canvas Steps — rearrange, add, or delete steps (Email, SMS, Task, Wait, If/Else).
- Alert Shows alert after editing the trigger as shown in image.
Create Smart List
When the user clicks on the new smart list button
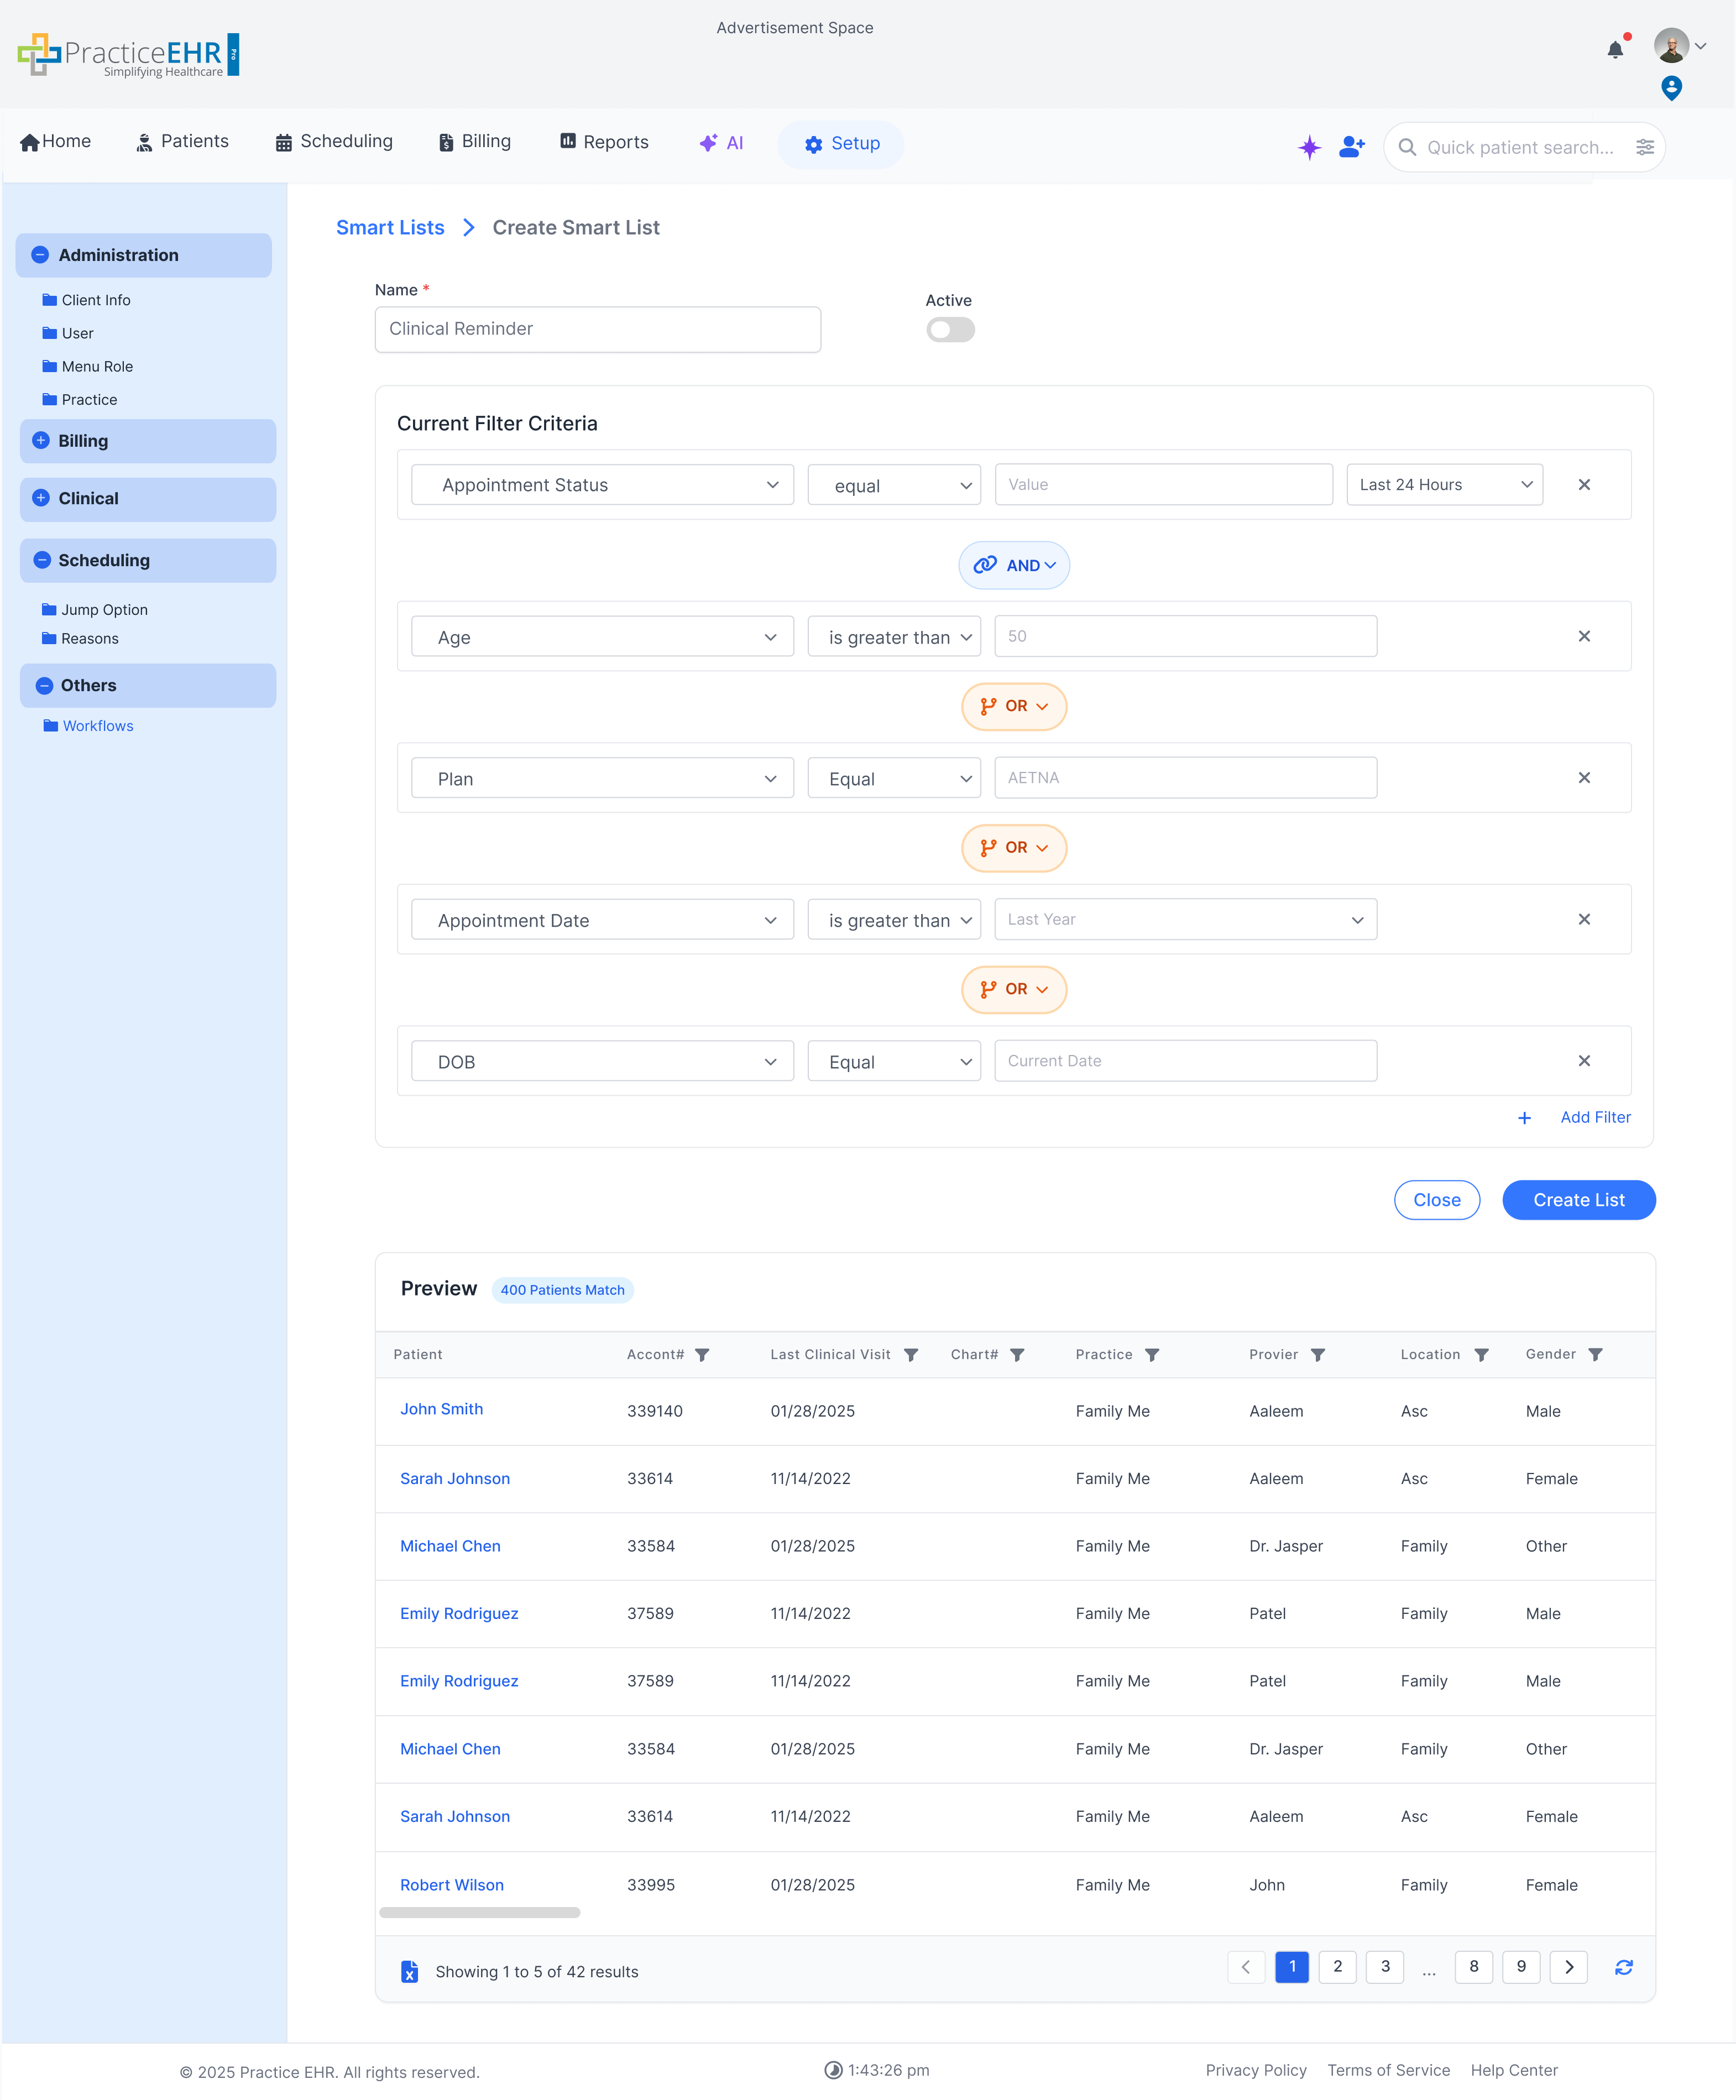
Inputs
- Name (required)
- Active Toggle — users can set the smart list as active or inactive.
-
Current Filter Criteria
- Set specific filters combined with AND and OR operators to create a unique list of patients.
-
When the user clicks the Add Filter link (bottom right of the container), a filter row appears where:
- The first dropdown selects the attribute (e.g., Appointment Status).
- The second dropdown selects the condition (e.g., equals).
- The third field sets the value (e.g., In Progress).
- A fourth dropdown defines the unenrollment criteria (e.g., 24 hours). If an appointment remains “In Progress” longer than this duration, the patient is automatically unenrolled from the list.
- Preview Grid — shows how many patients satisfy the current filter criteria.
Smart List Detail
When the user clicks on the name hyperlink of a smart list in the smart lists grid
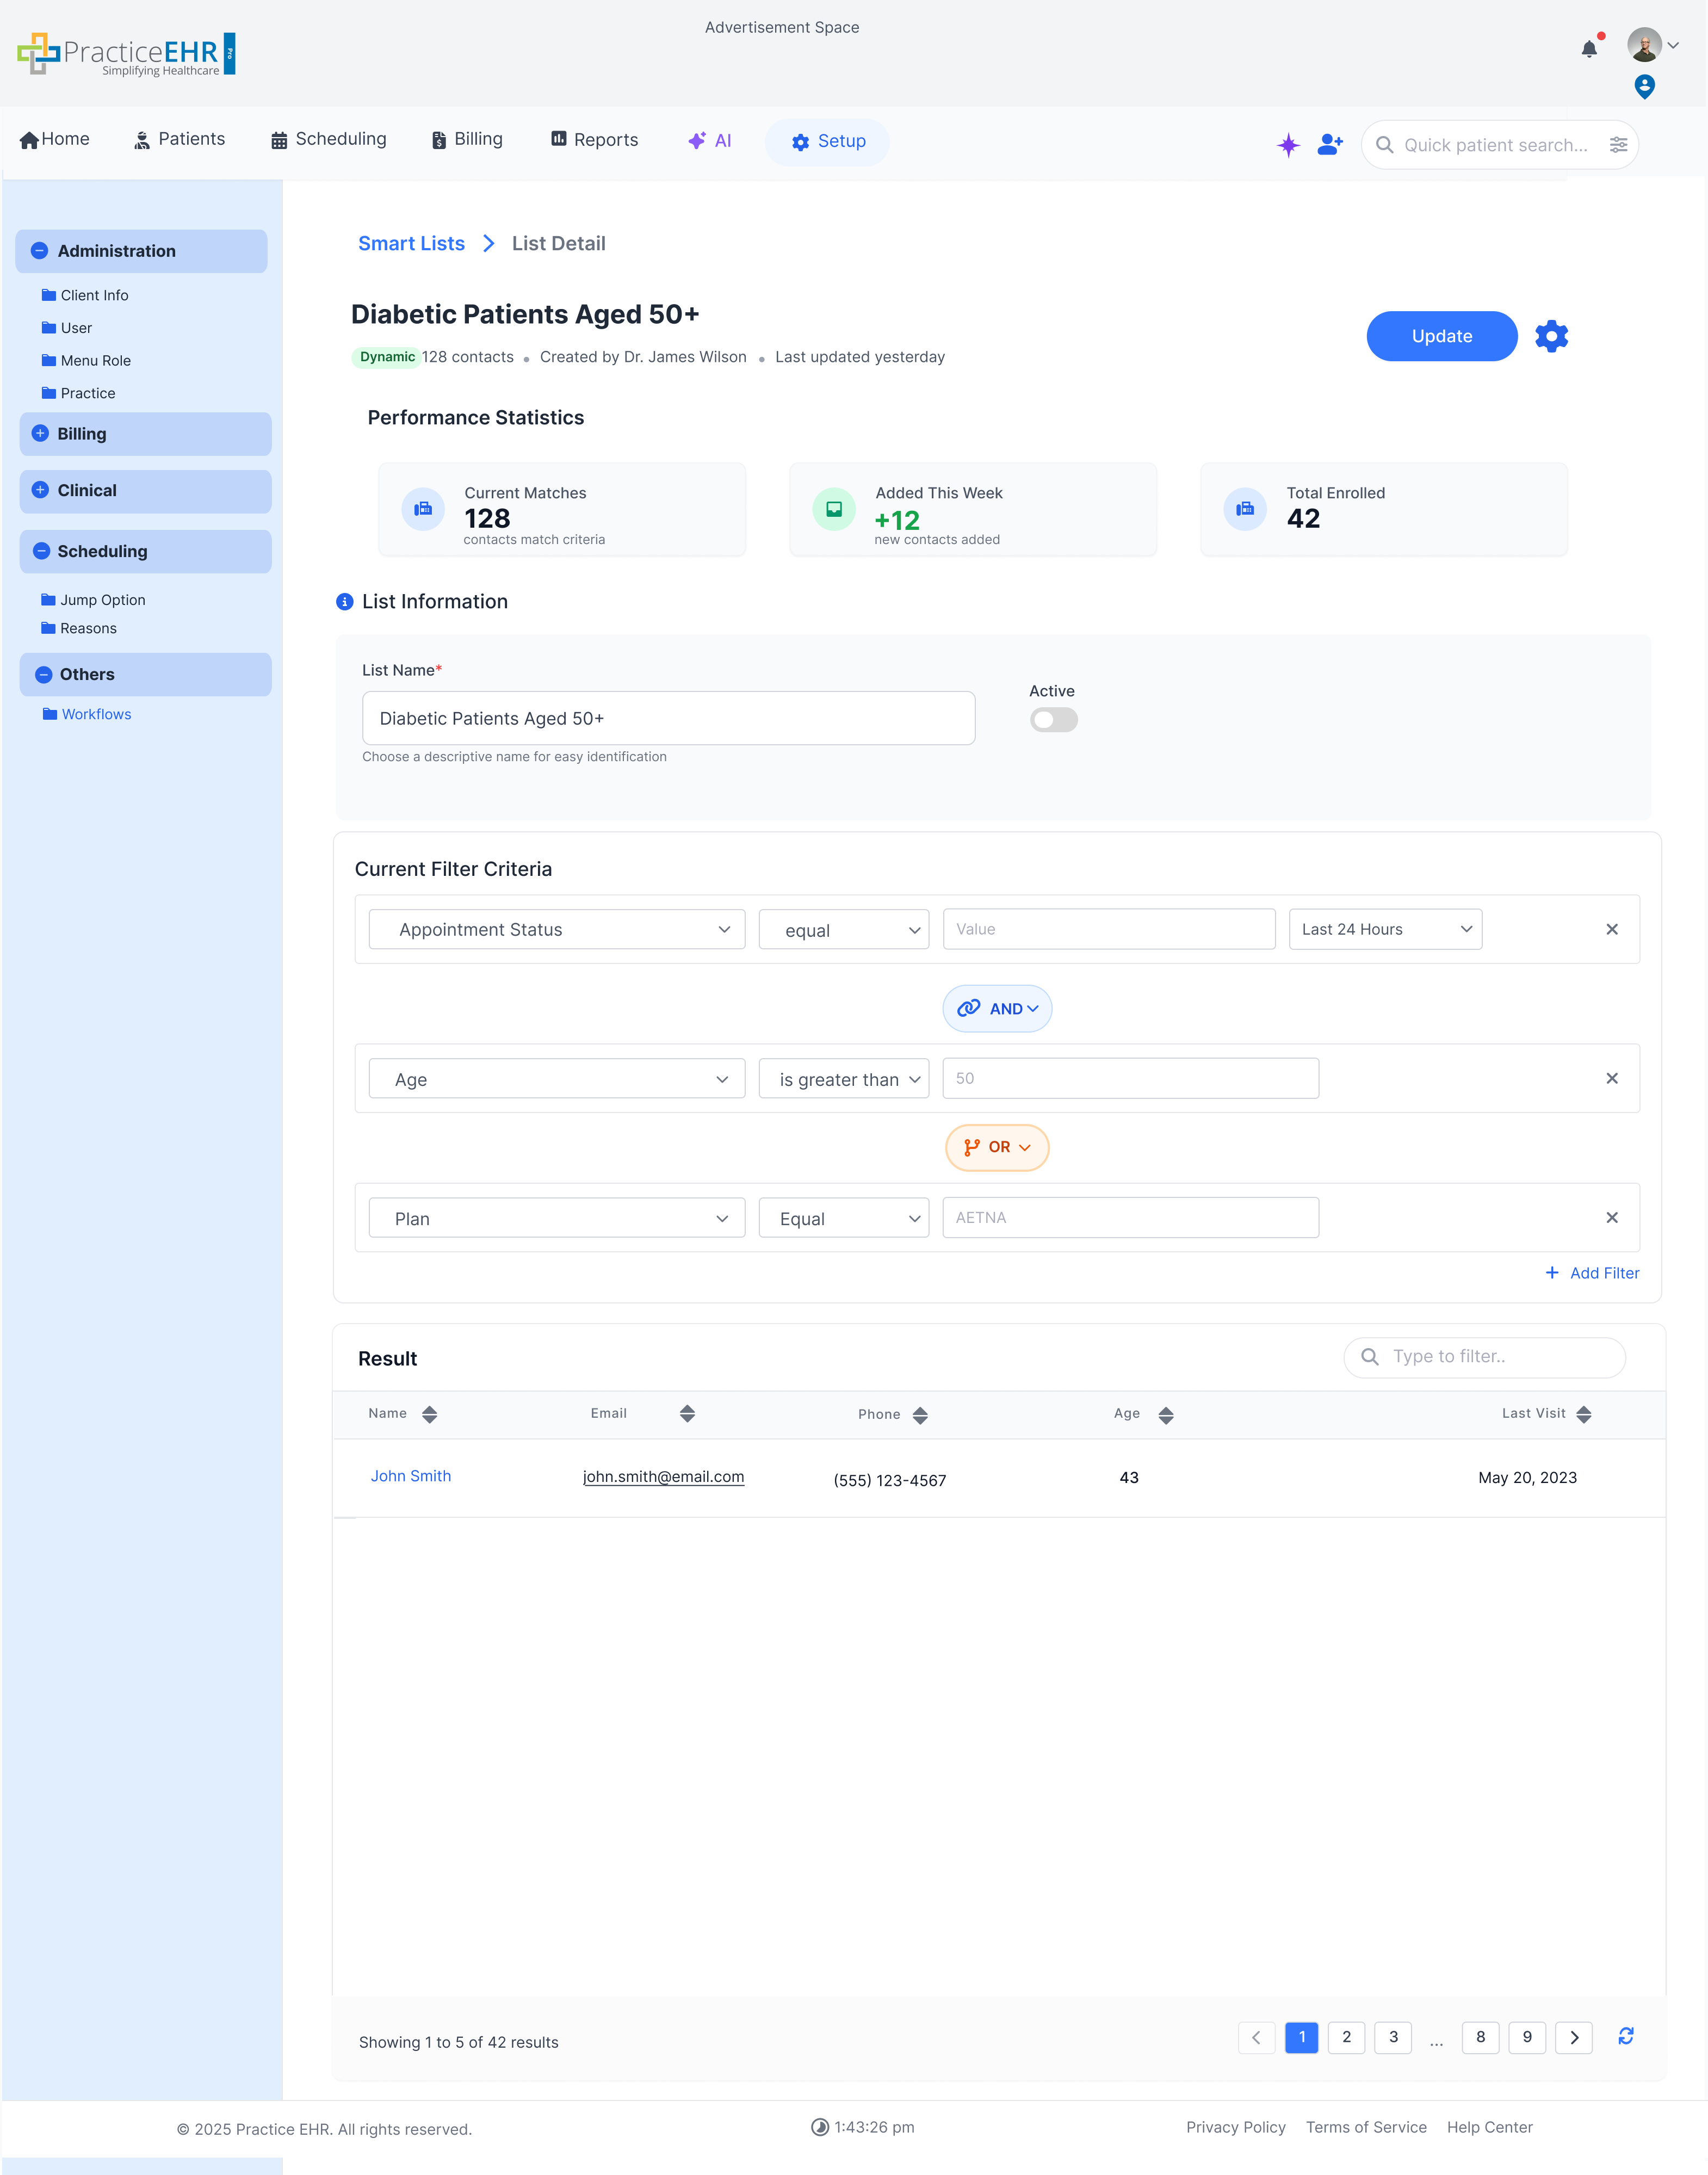
Description
The Smart List detail window shows performance metrics in the form of KPI cards such as Total Matches, Added this Week and Total Enrolled.
A result grid is present at the bottom that shows the patients that satisfy the current filter criteria.
Editing the Smart List
The smart list can be edited directly from the list detail window.

Description
From the detail window, users can update key properties of the smart list and refine who appears by adjusting filters.
What You Can Edit
- The user can change the name and status of the list from this window.
- The user can modify current filters or add new filters directly from the detail window.
- When the user clicks the Update button, an alert appears to confirm the action.
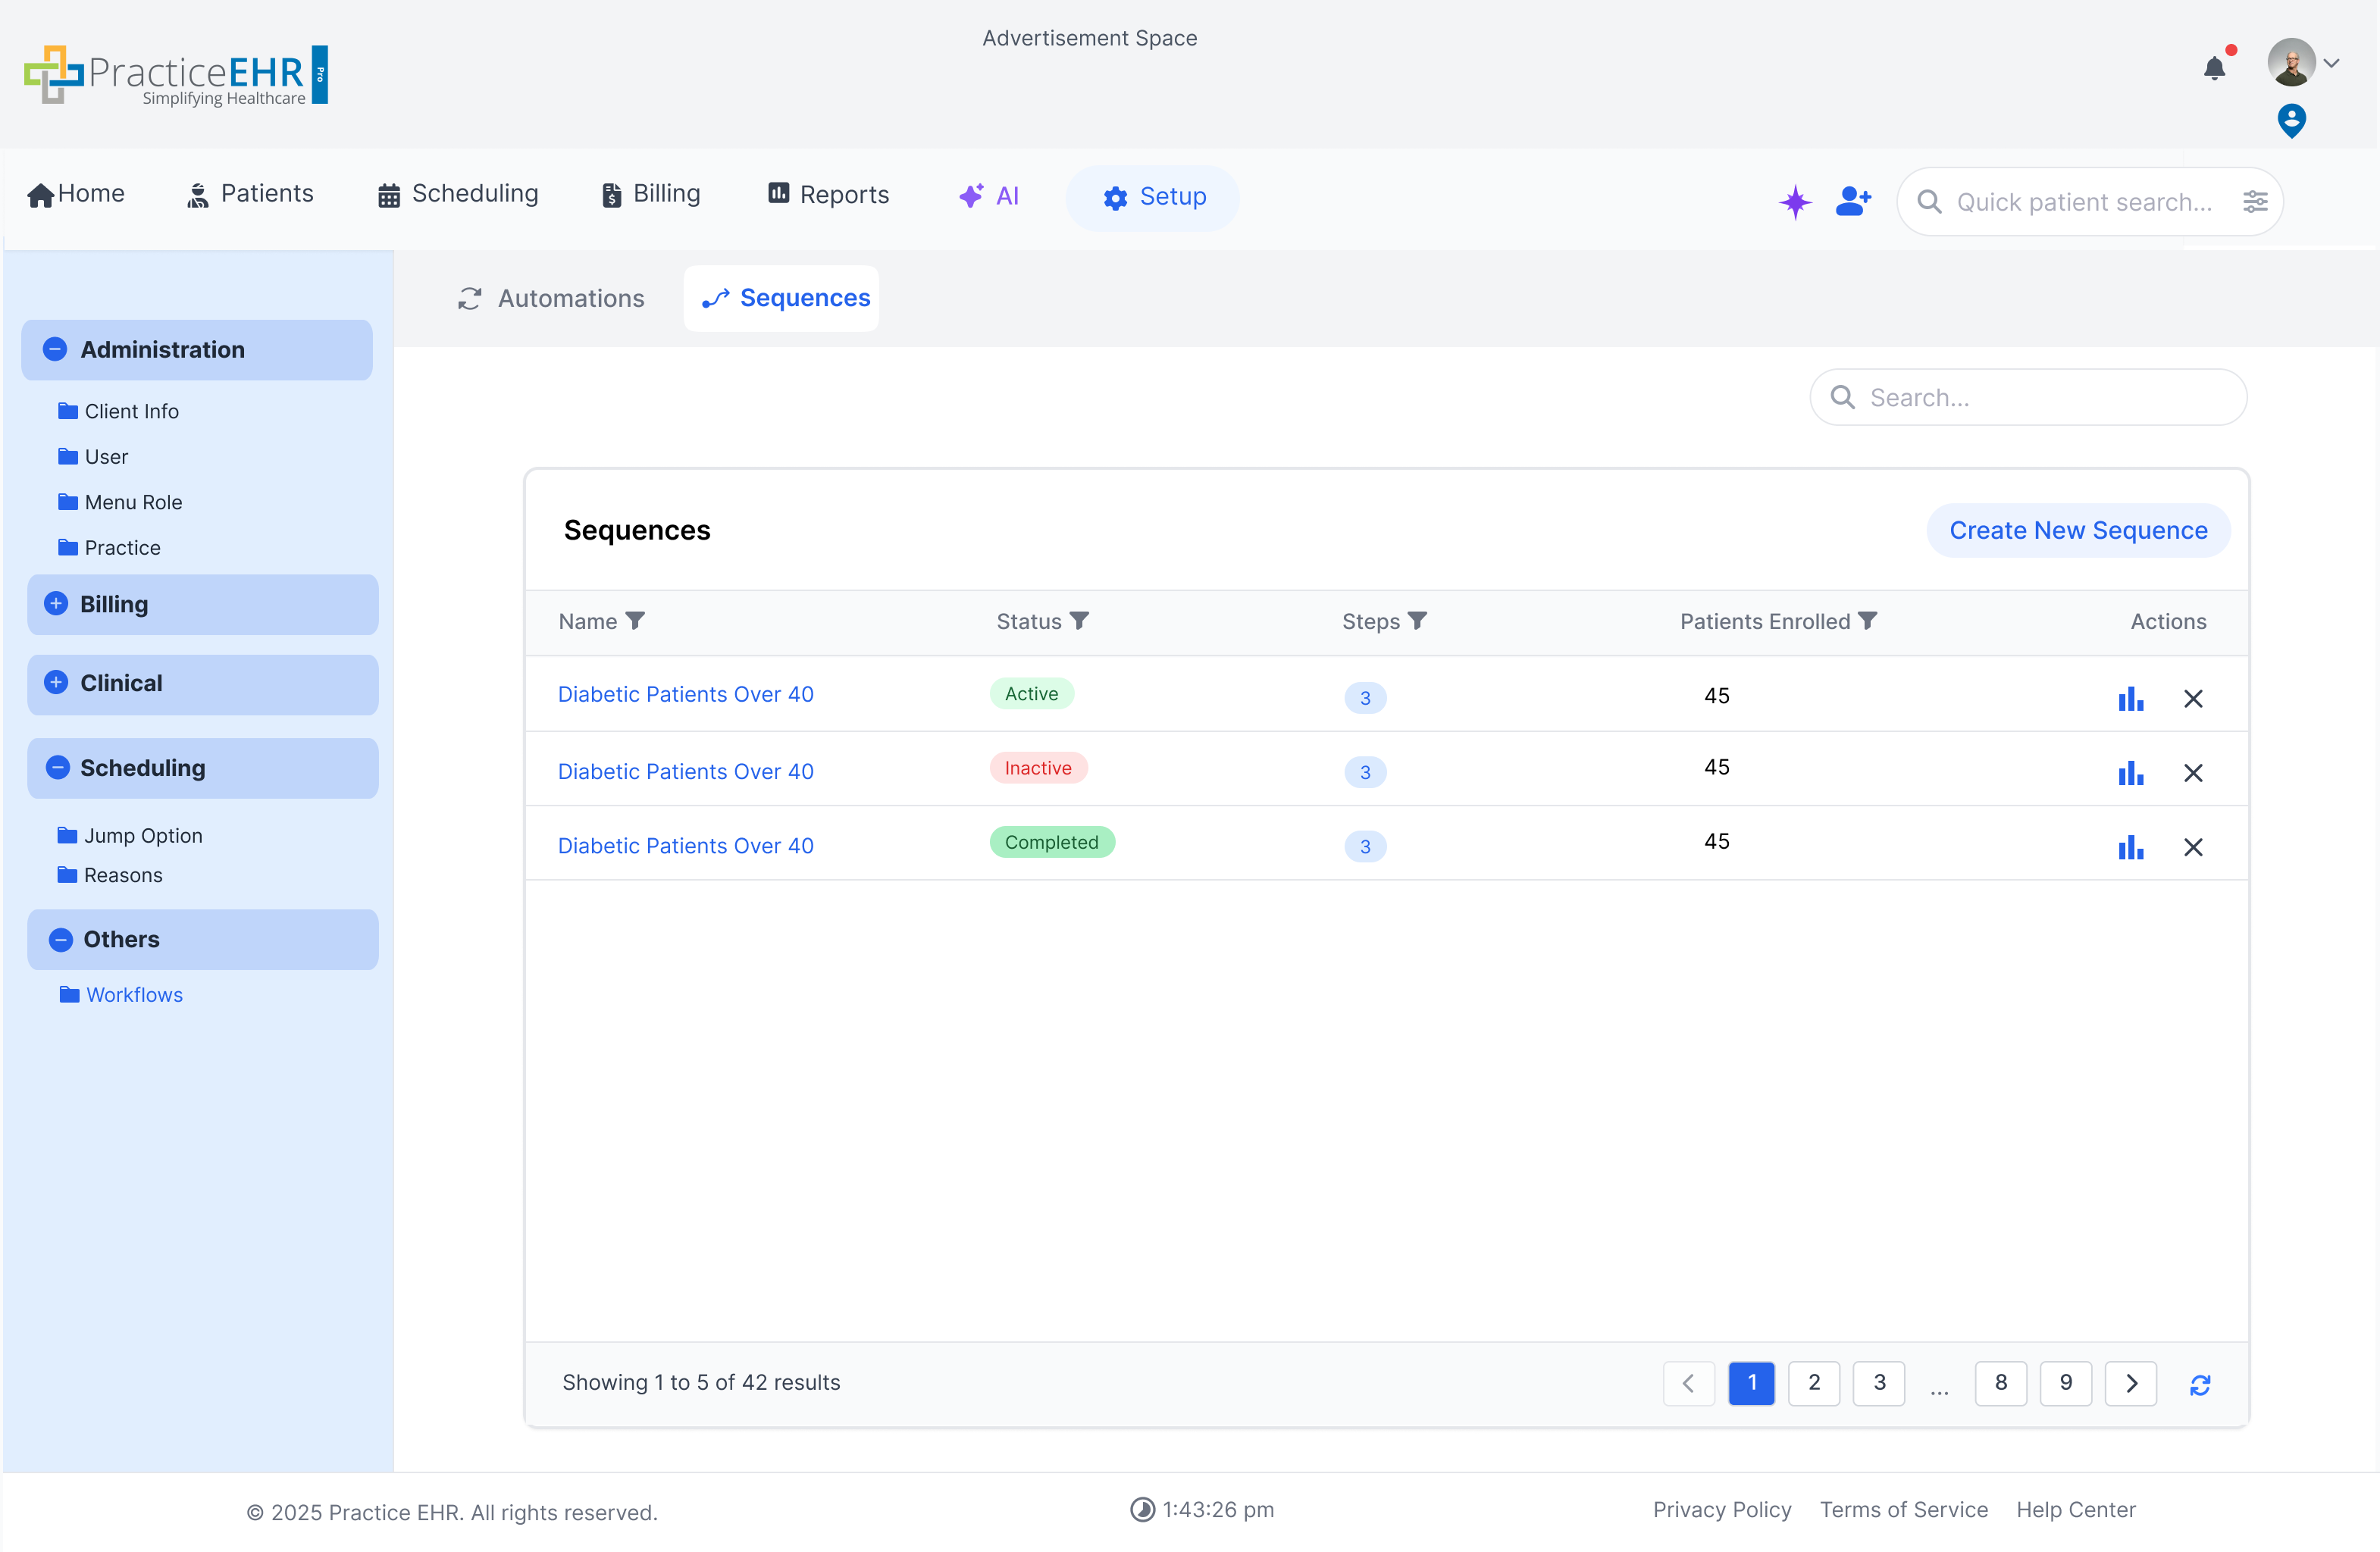
Triggers — Grid
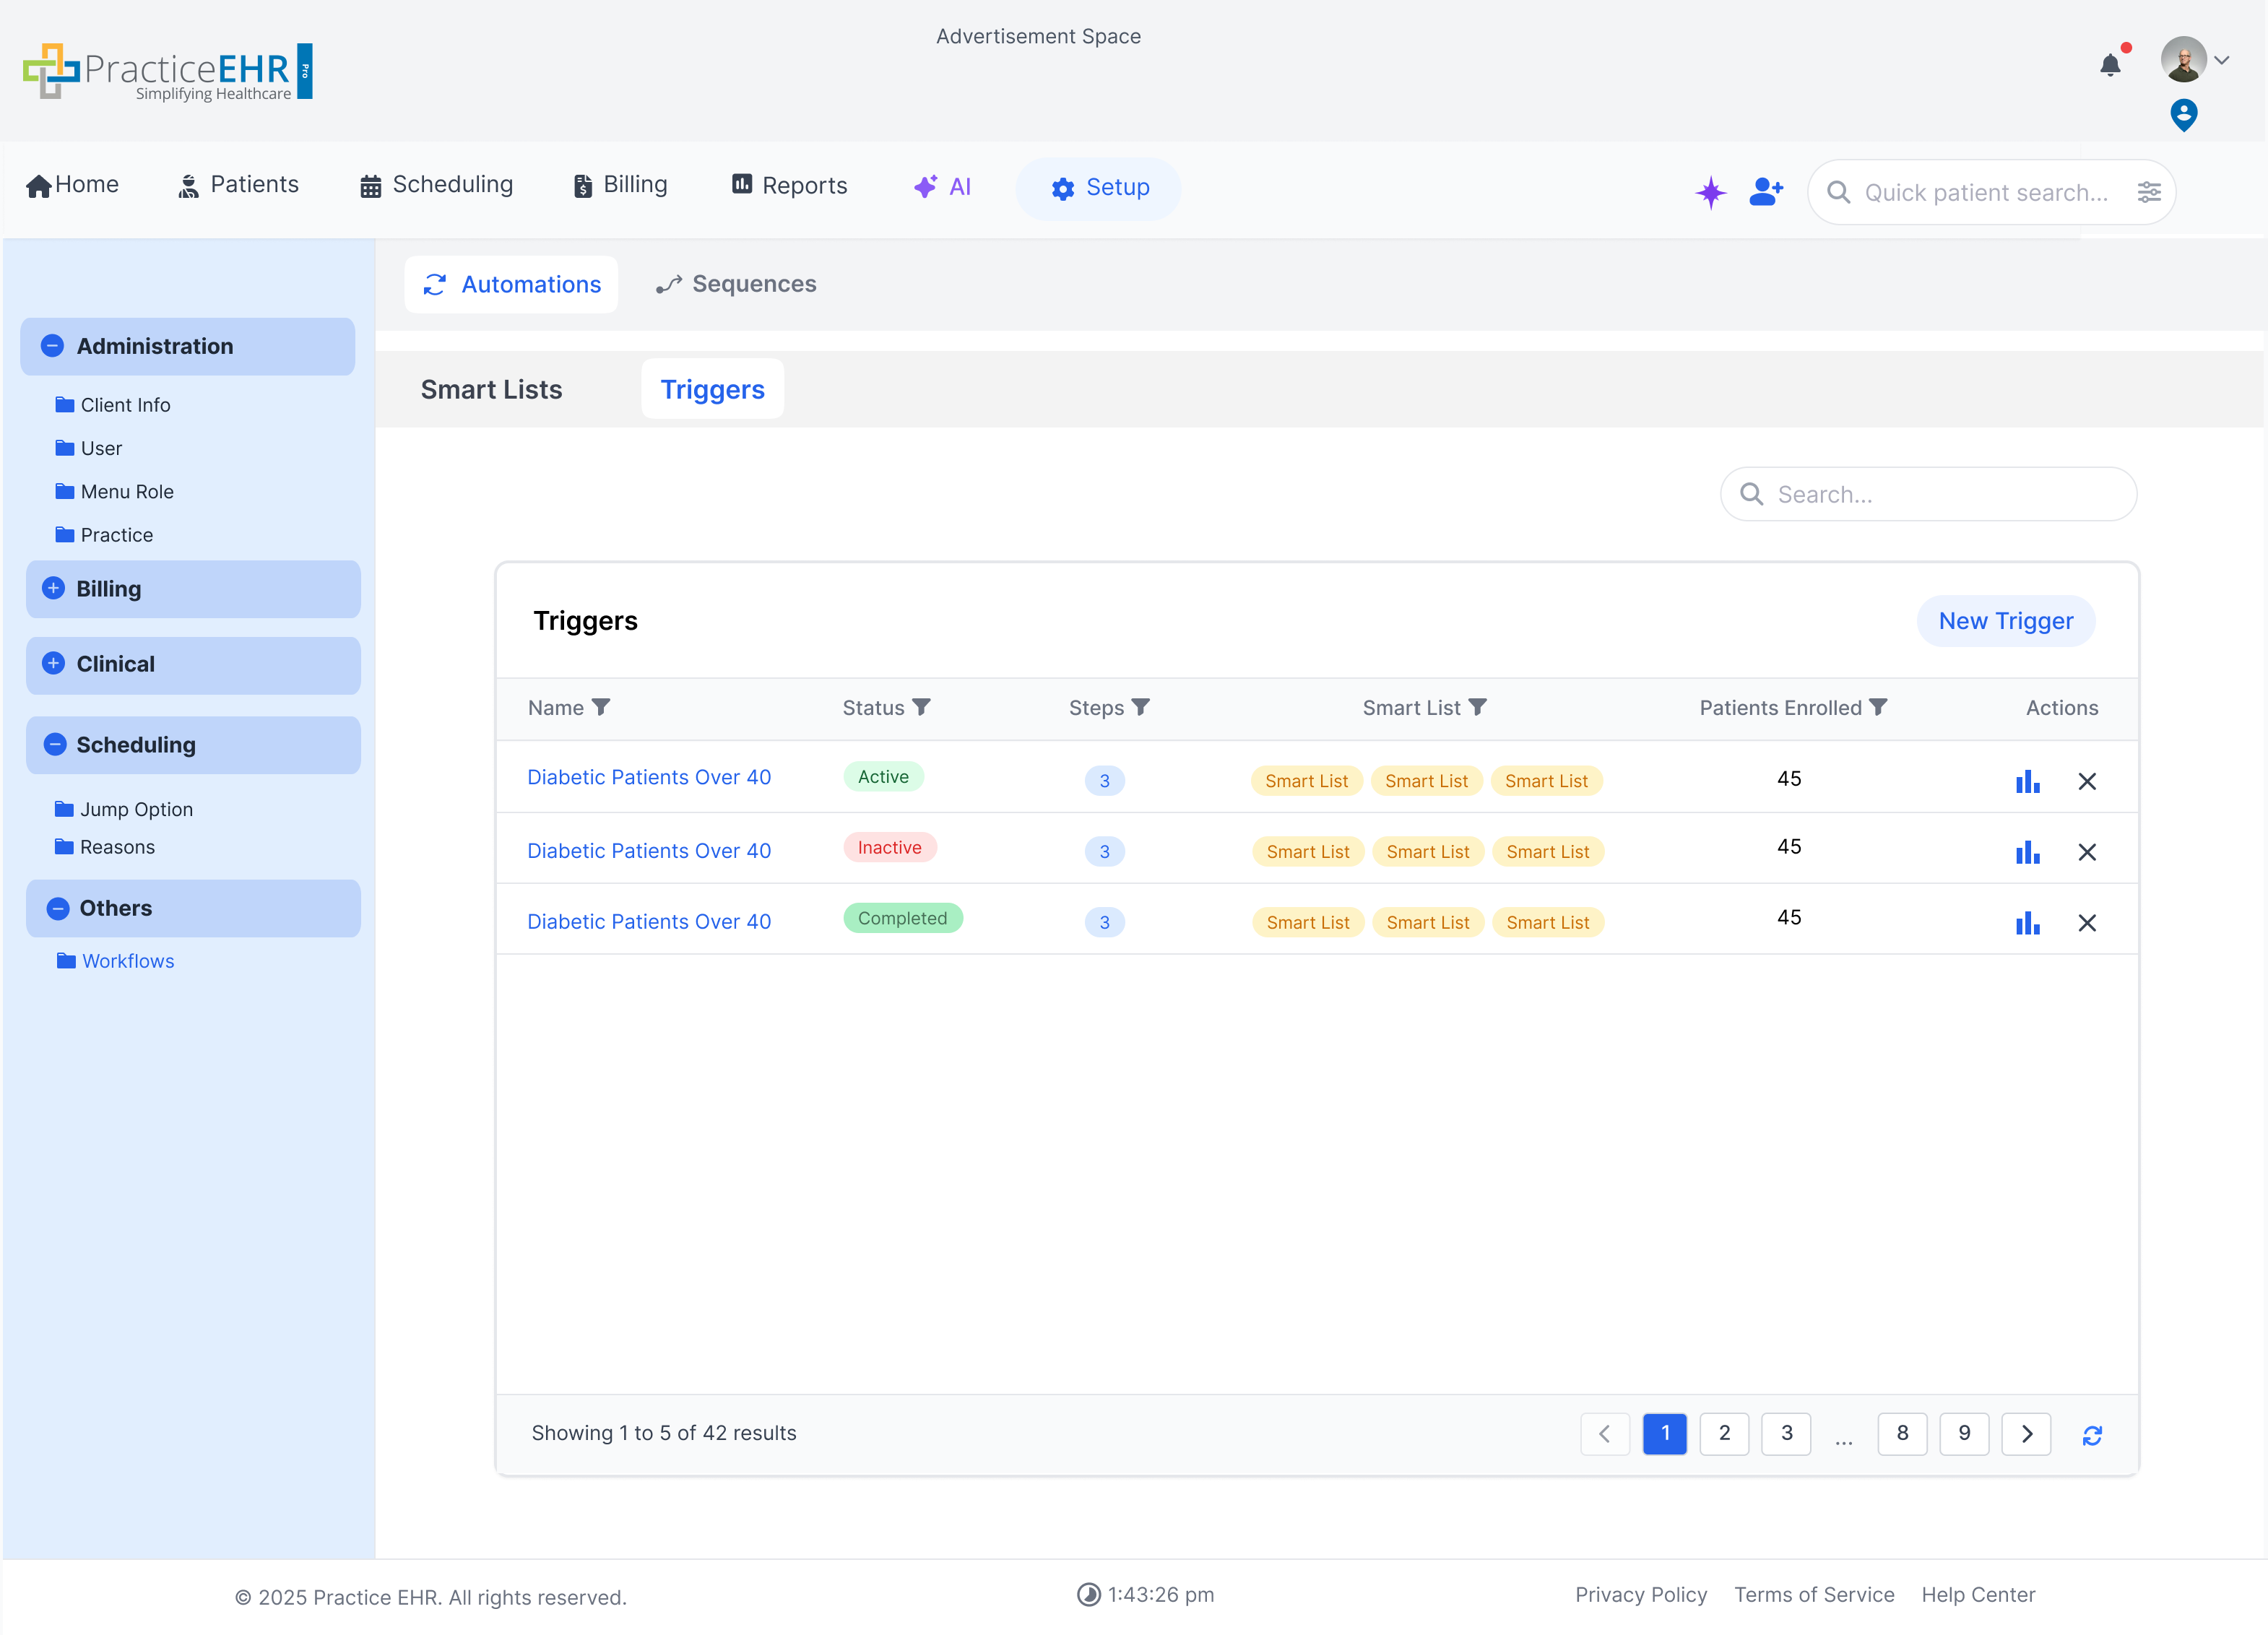
Description
Manage all automation triggers in one place: review status, see linked smart lists and enrolled patients, open analytics, and create new triggers.
This screen lists all triggers in a grid.
- Grid Columns: Name, Status, Steps, Linked Lists, Enrolled Patients.
- Status Pills: Active Inactive Completed
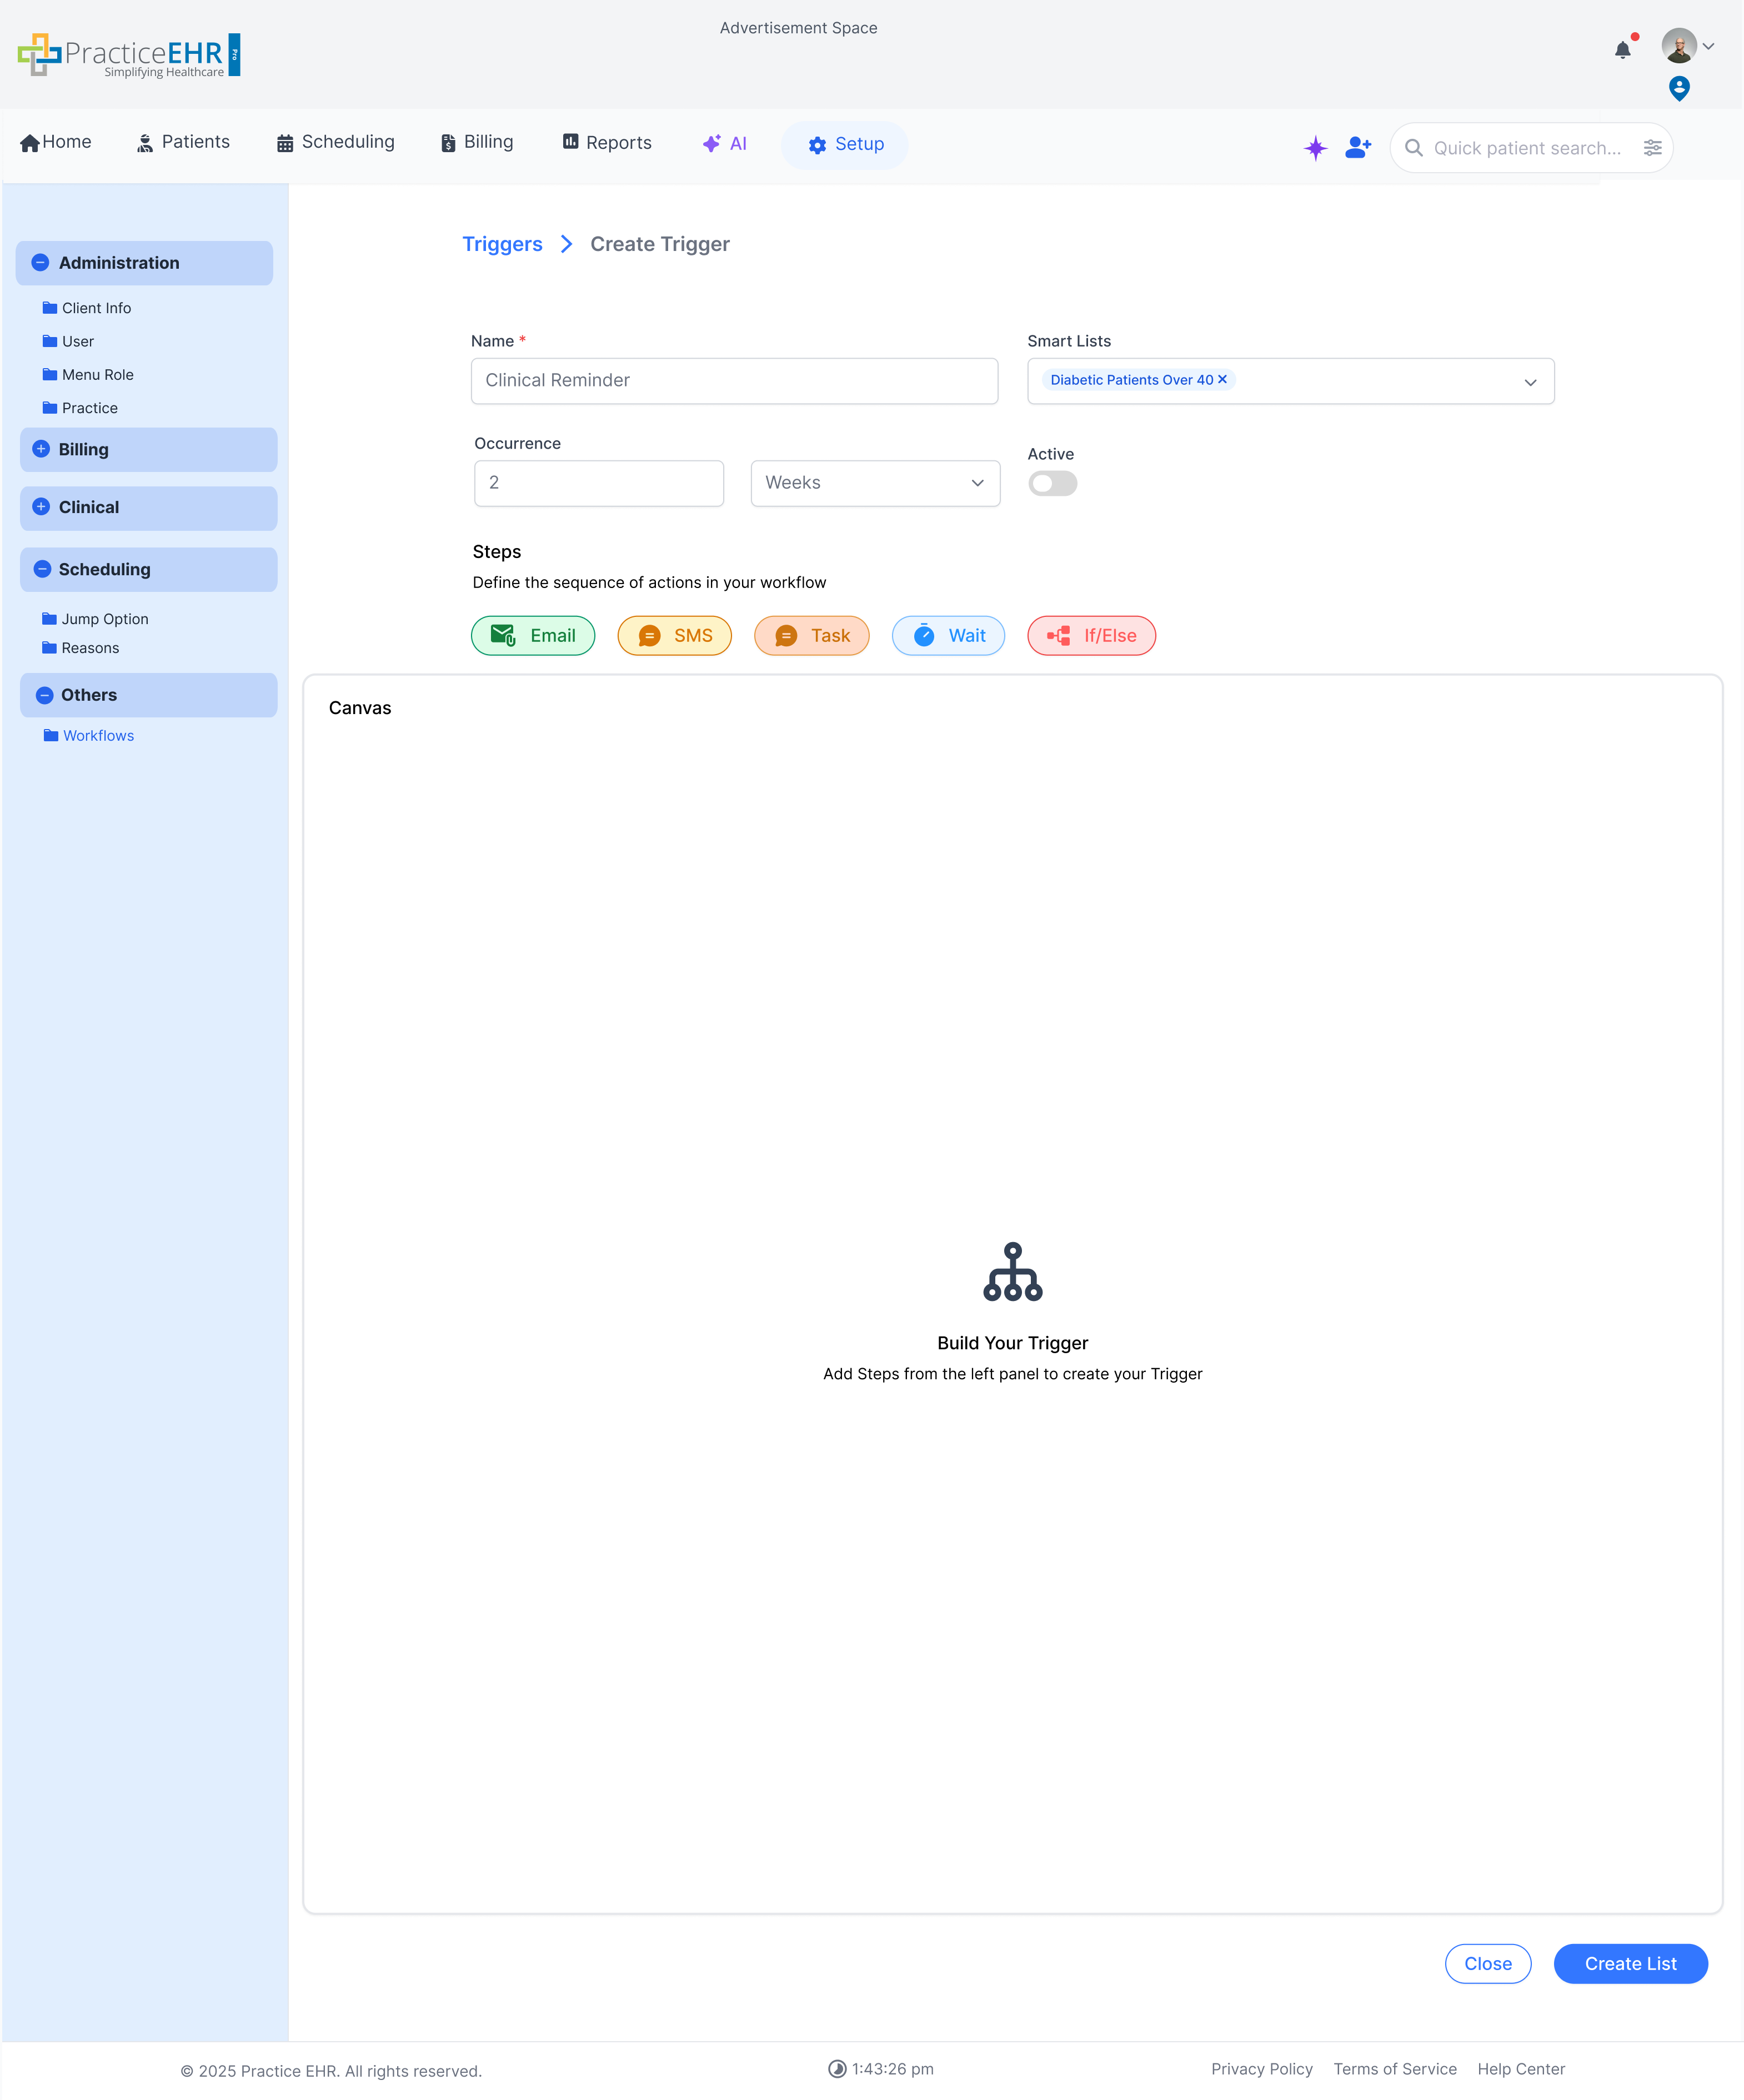
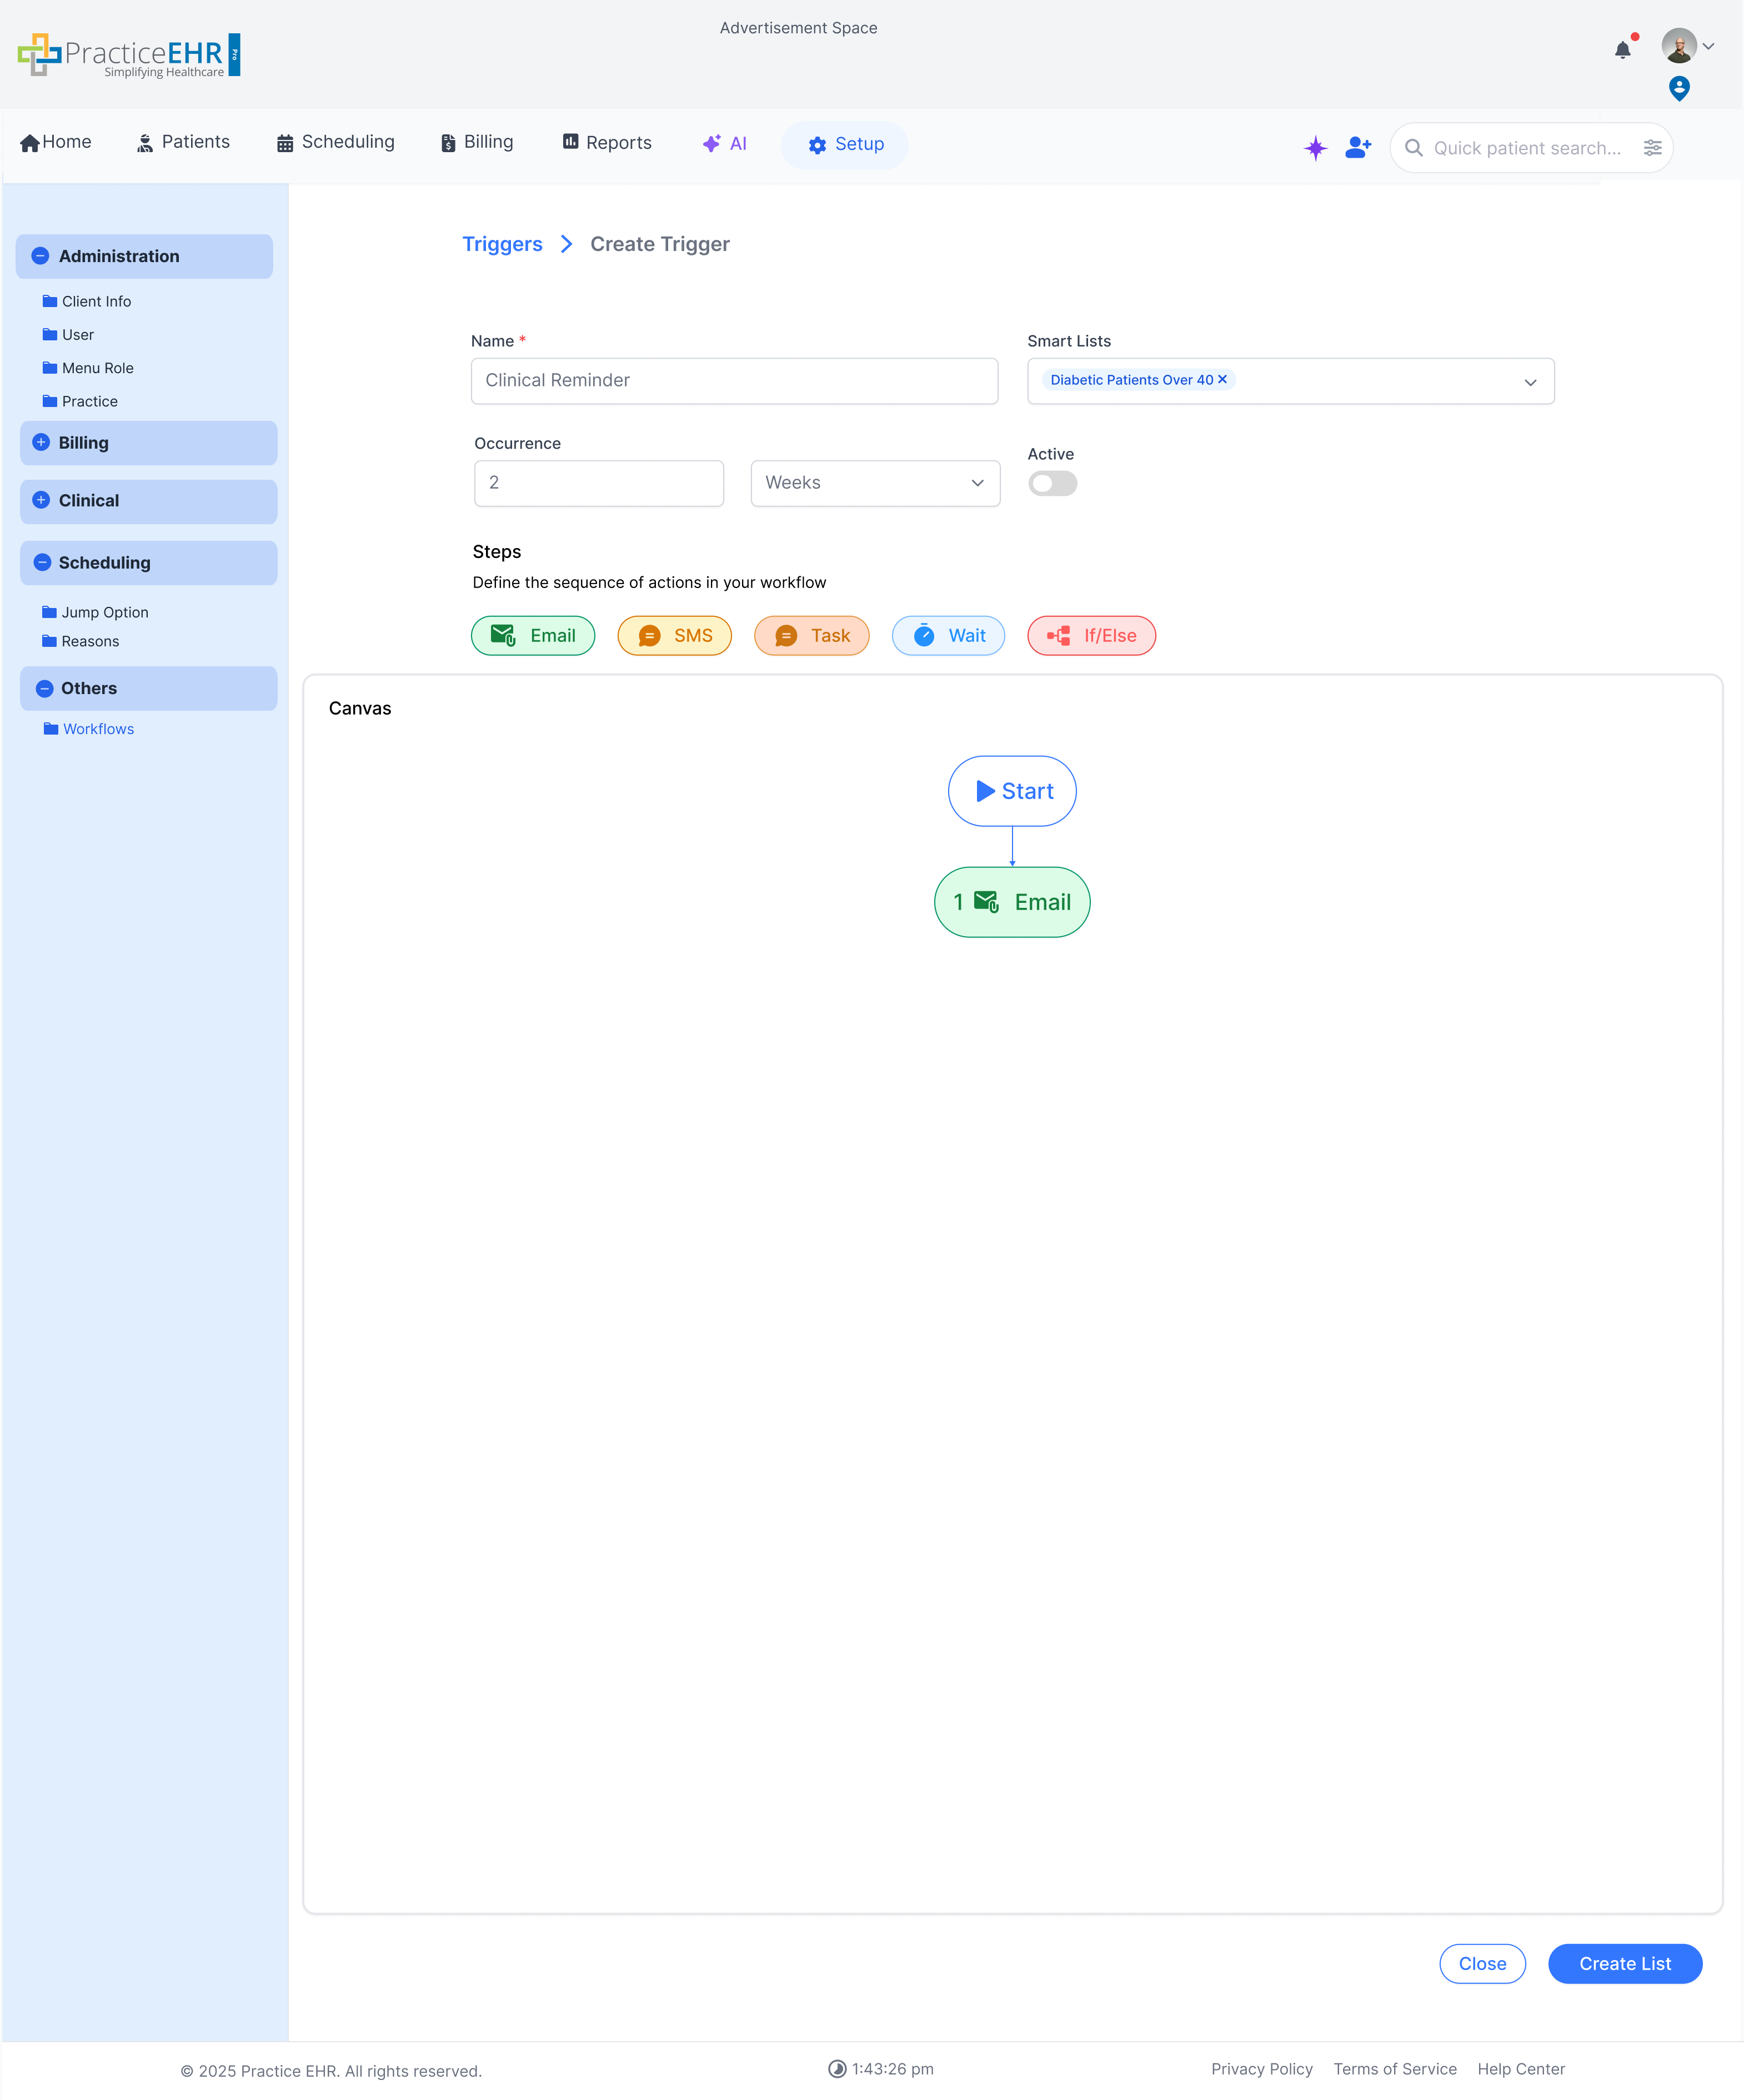
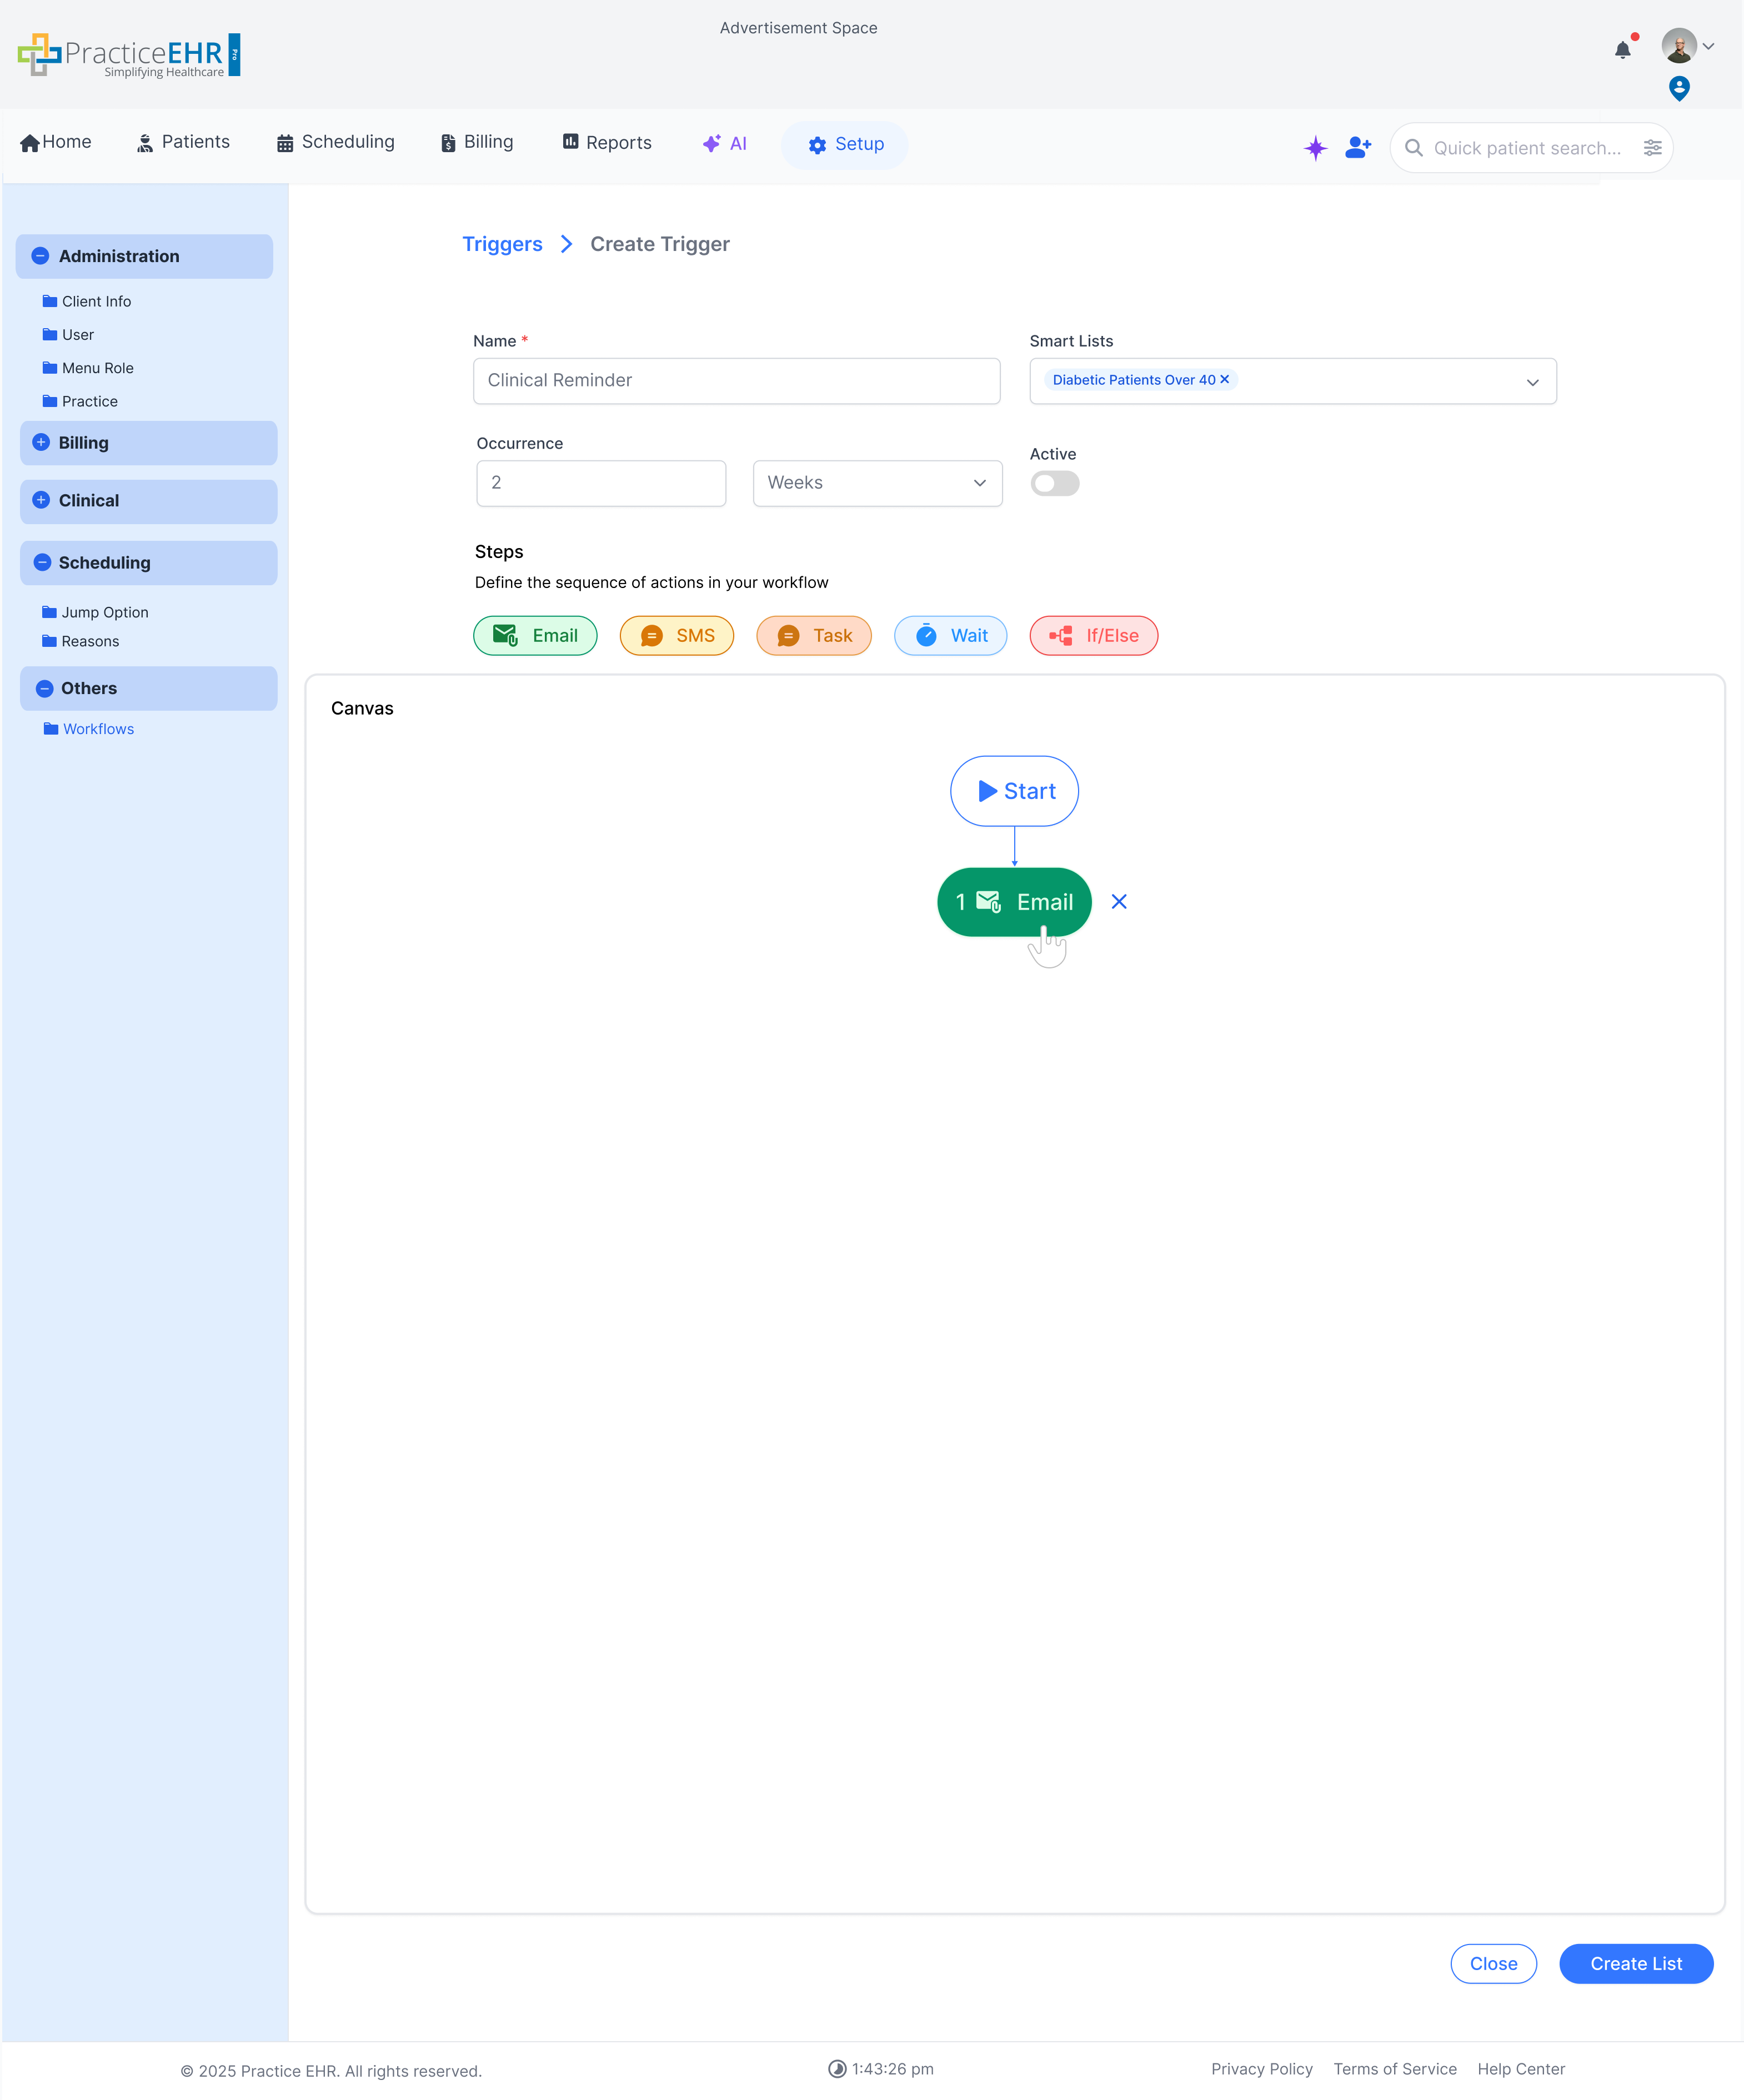
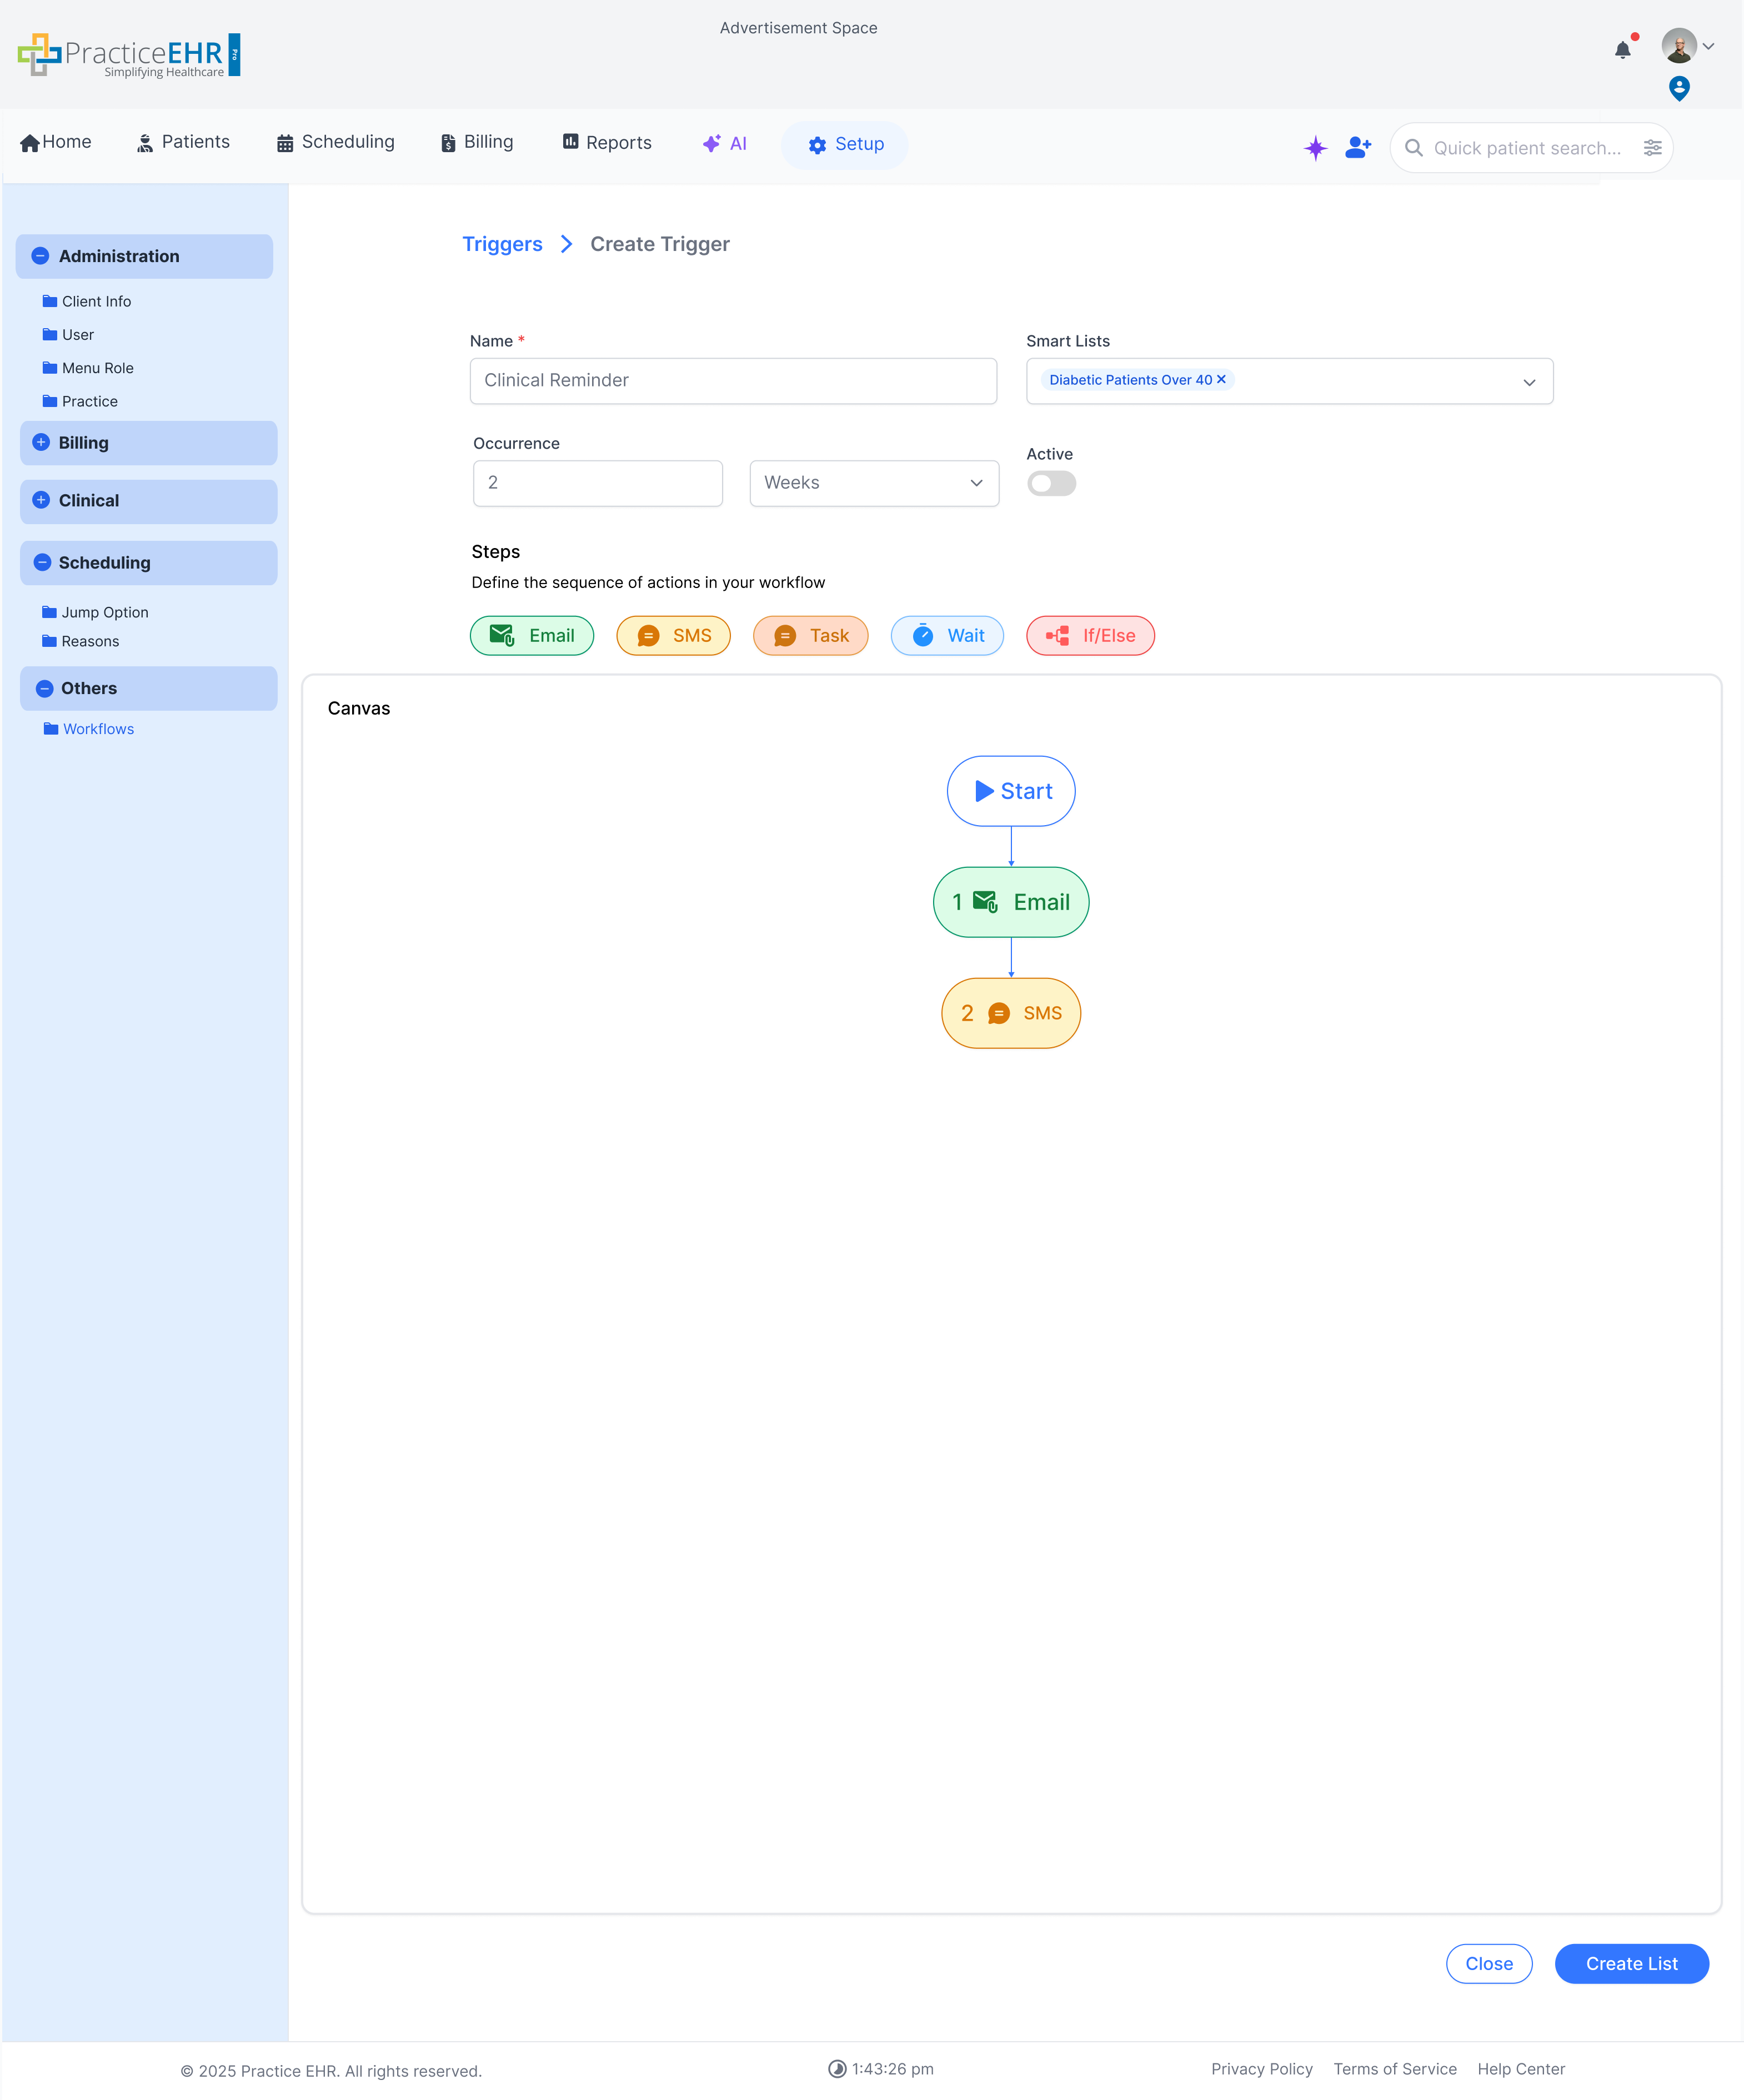
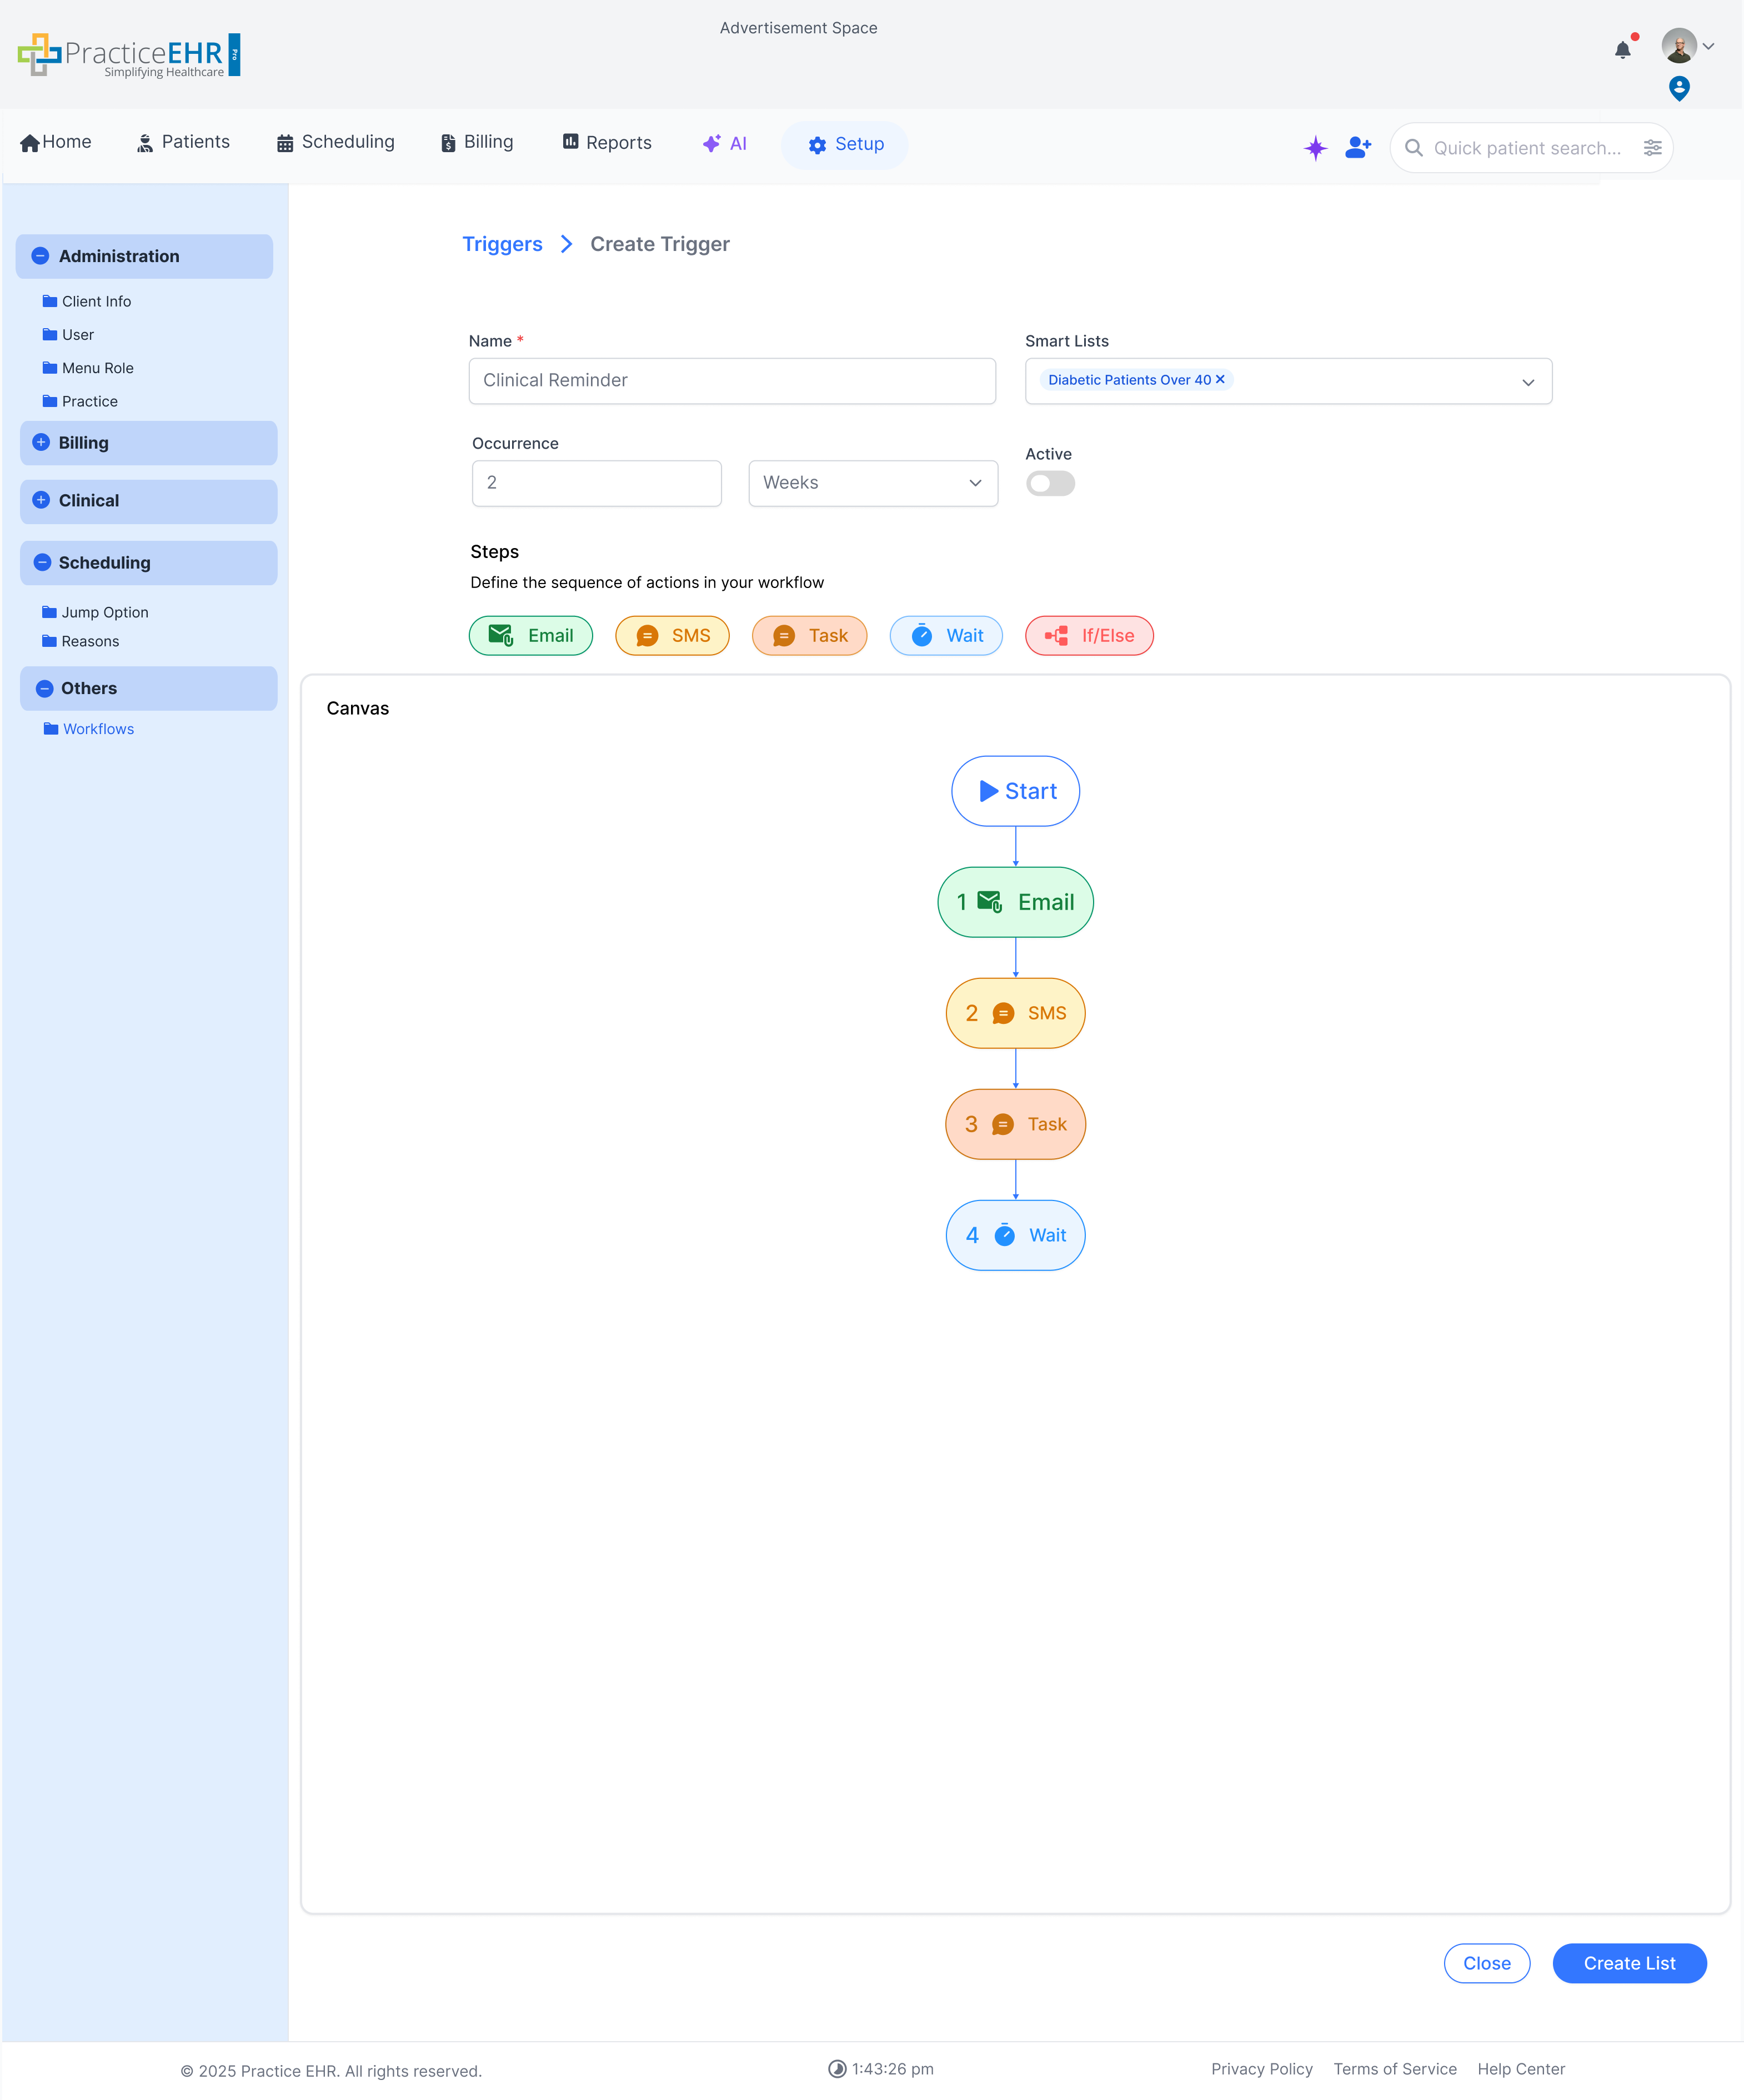
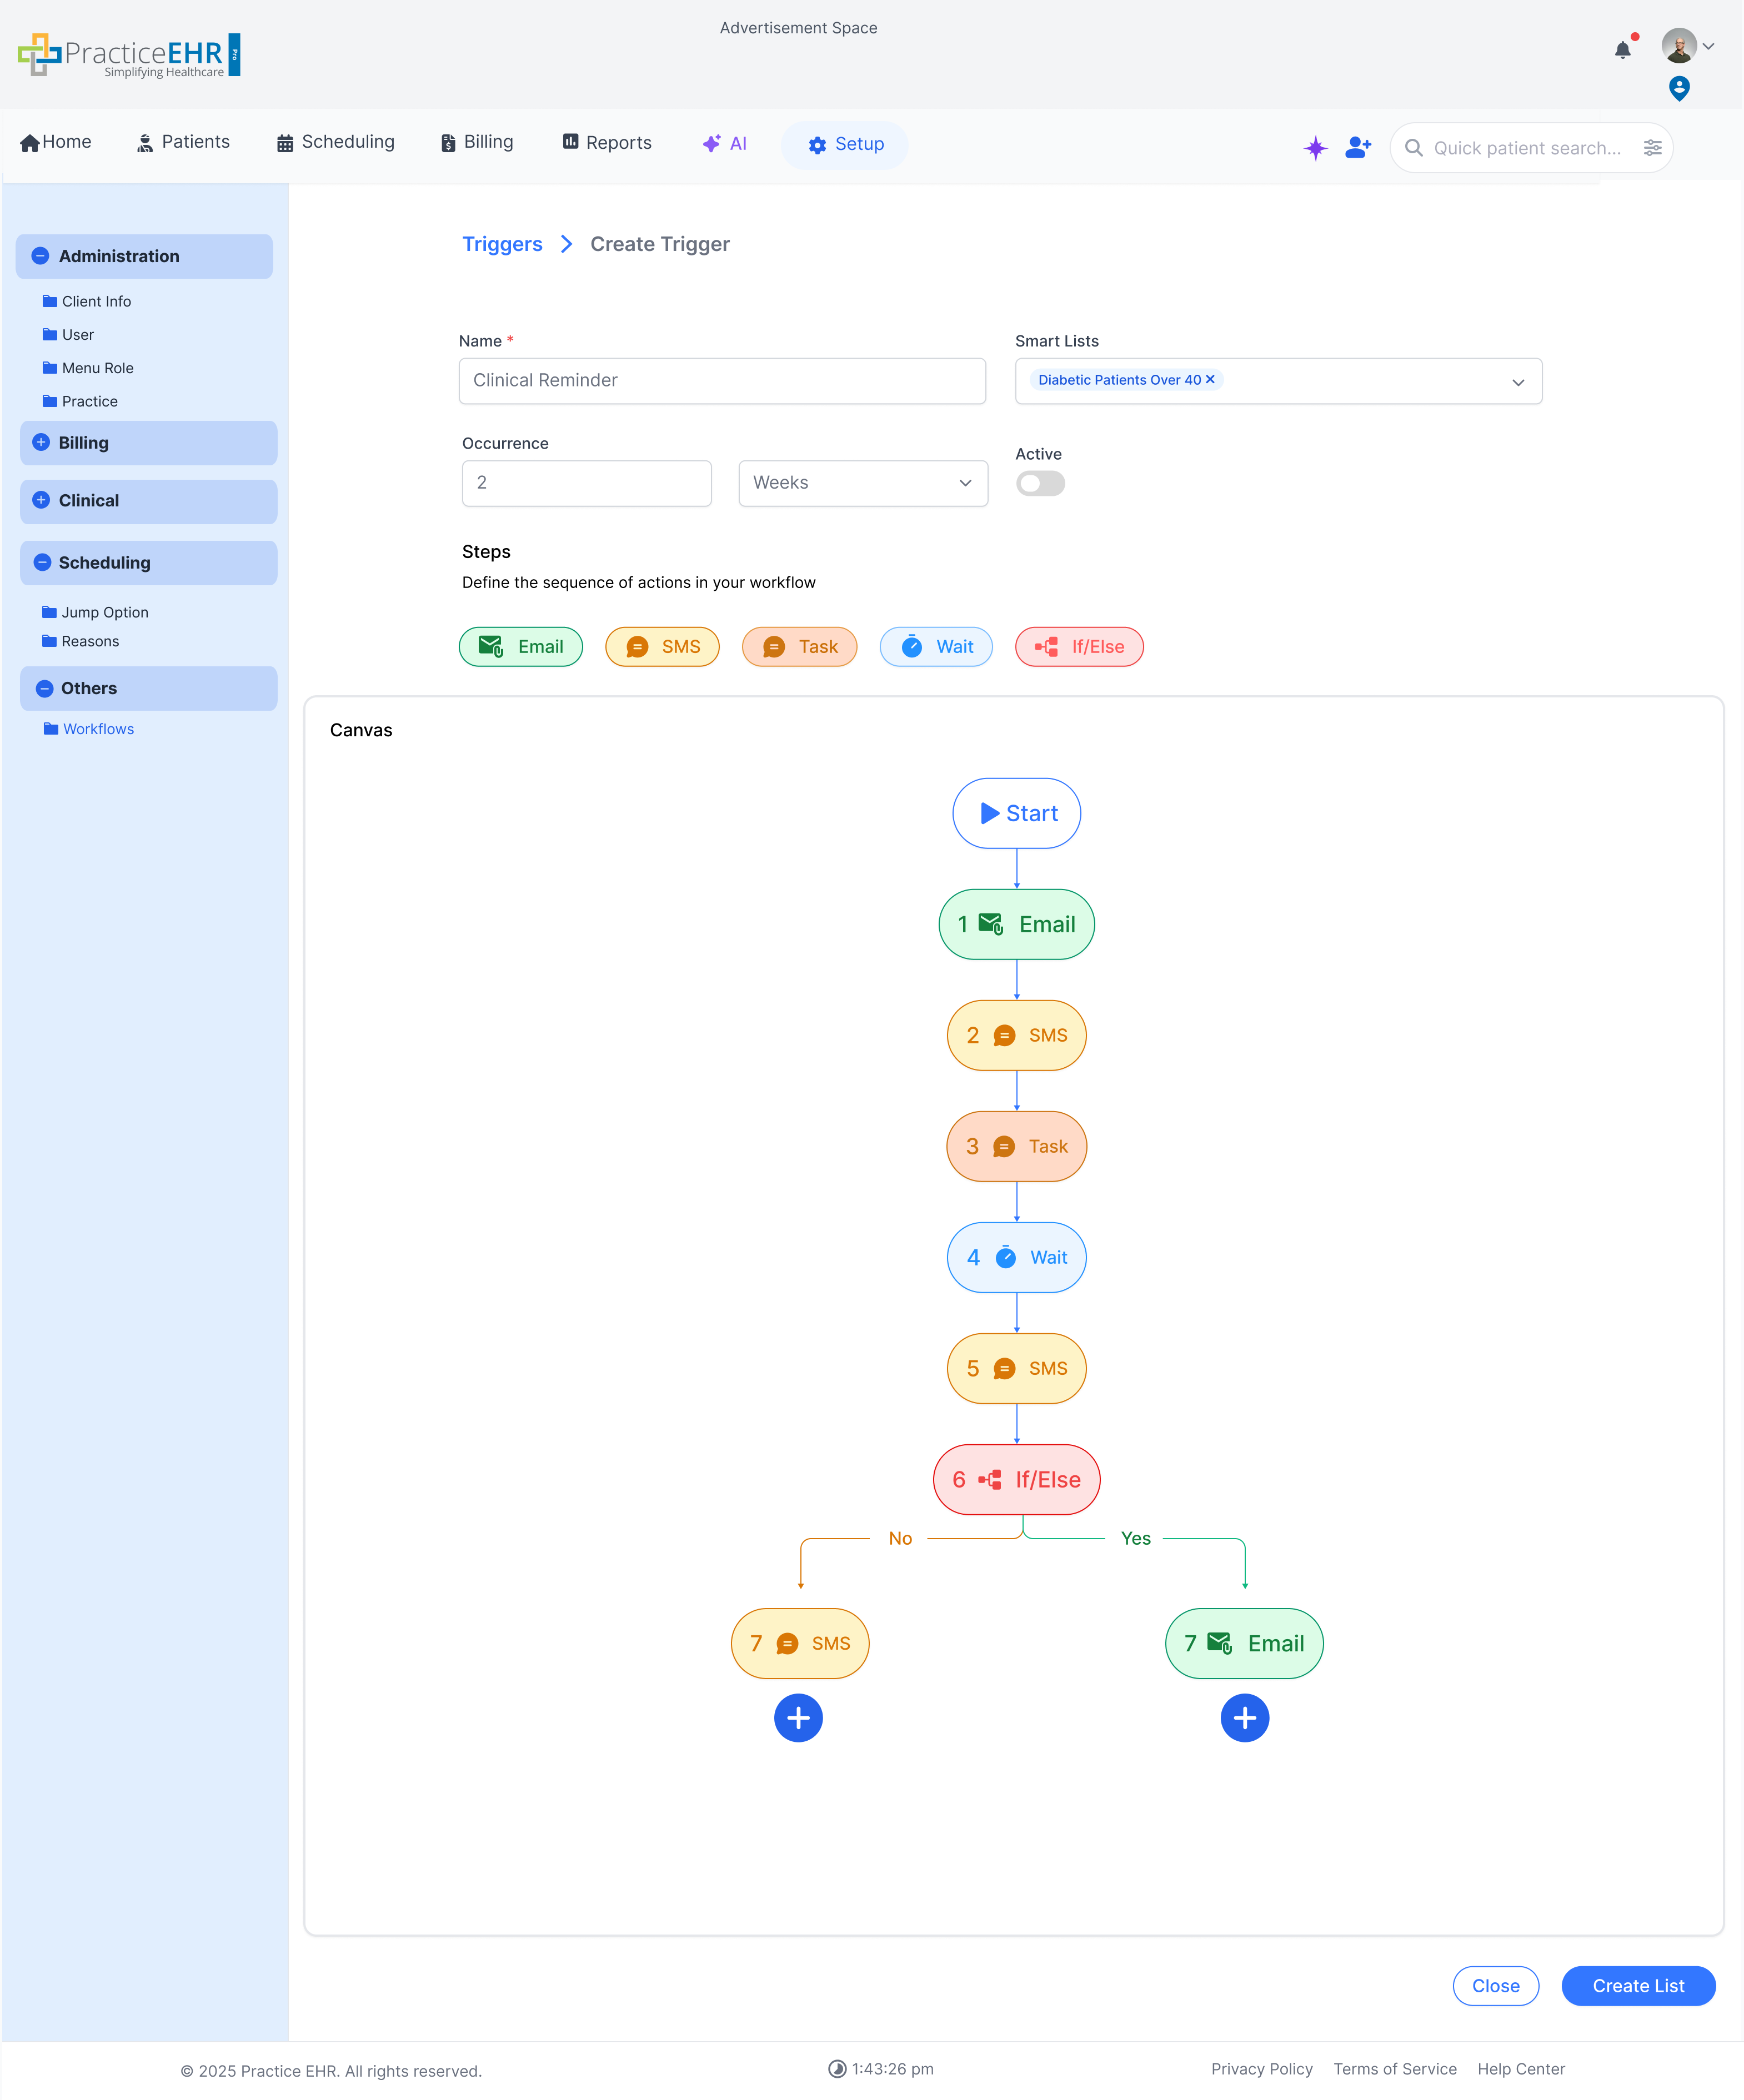
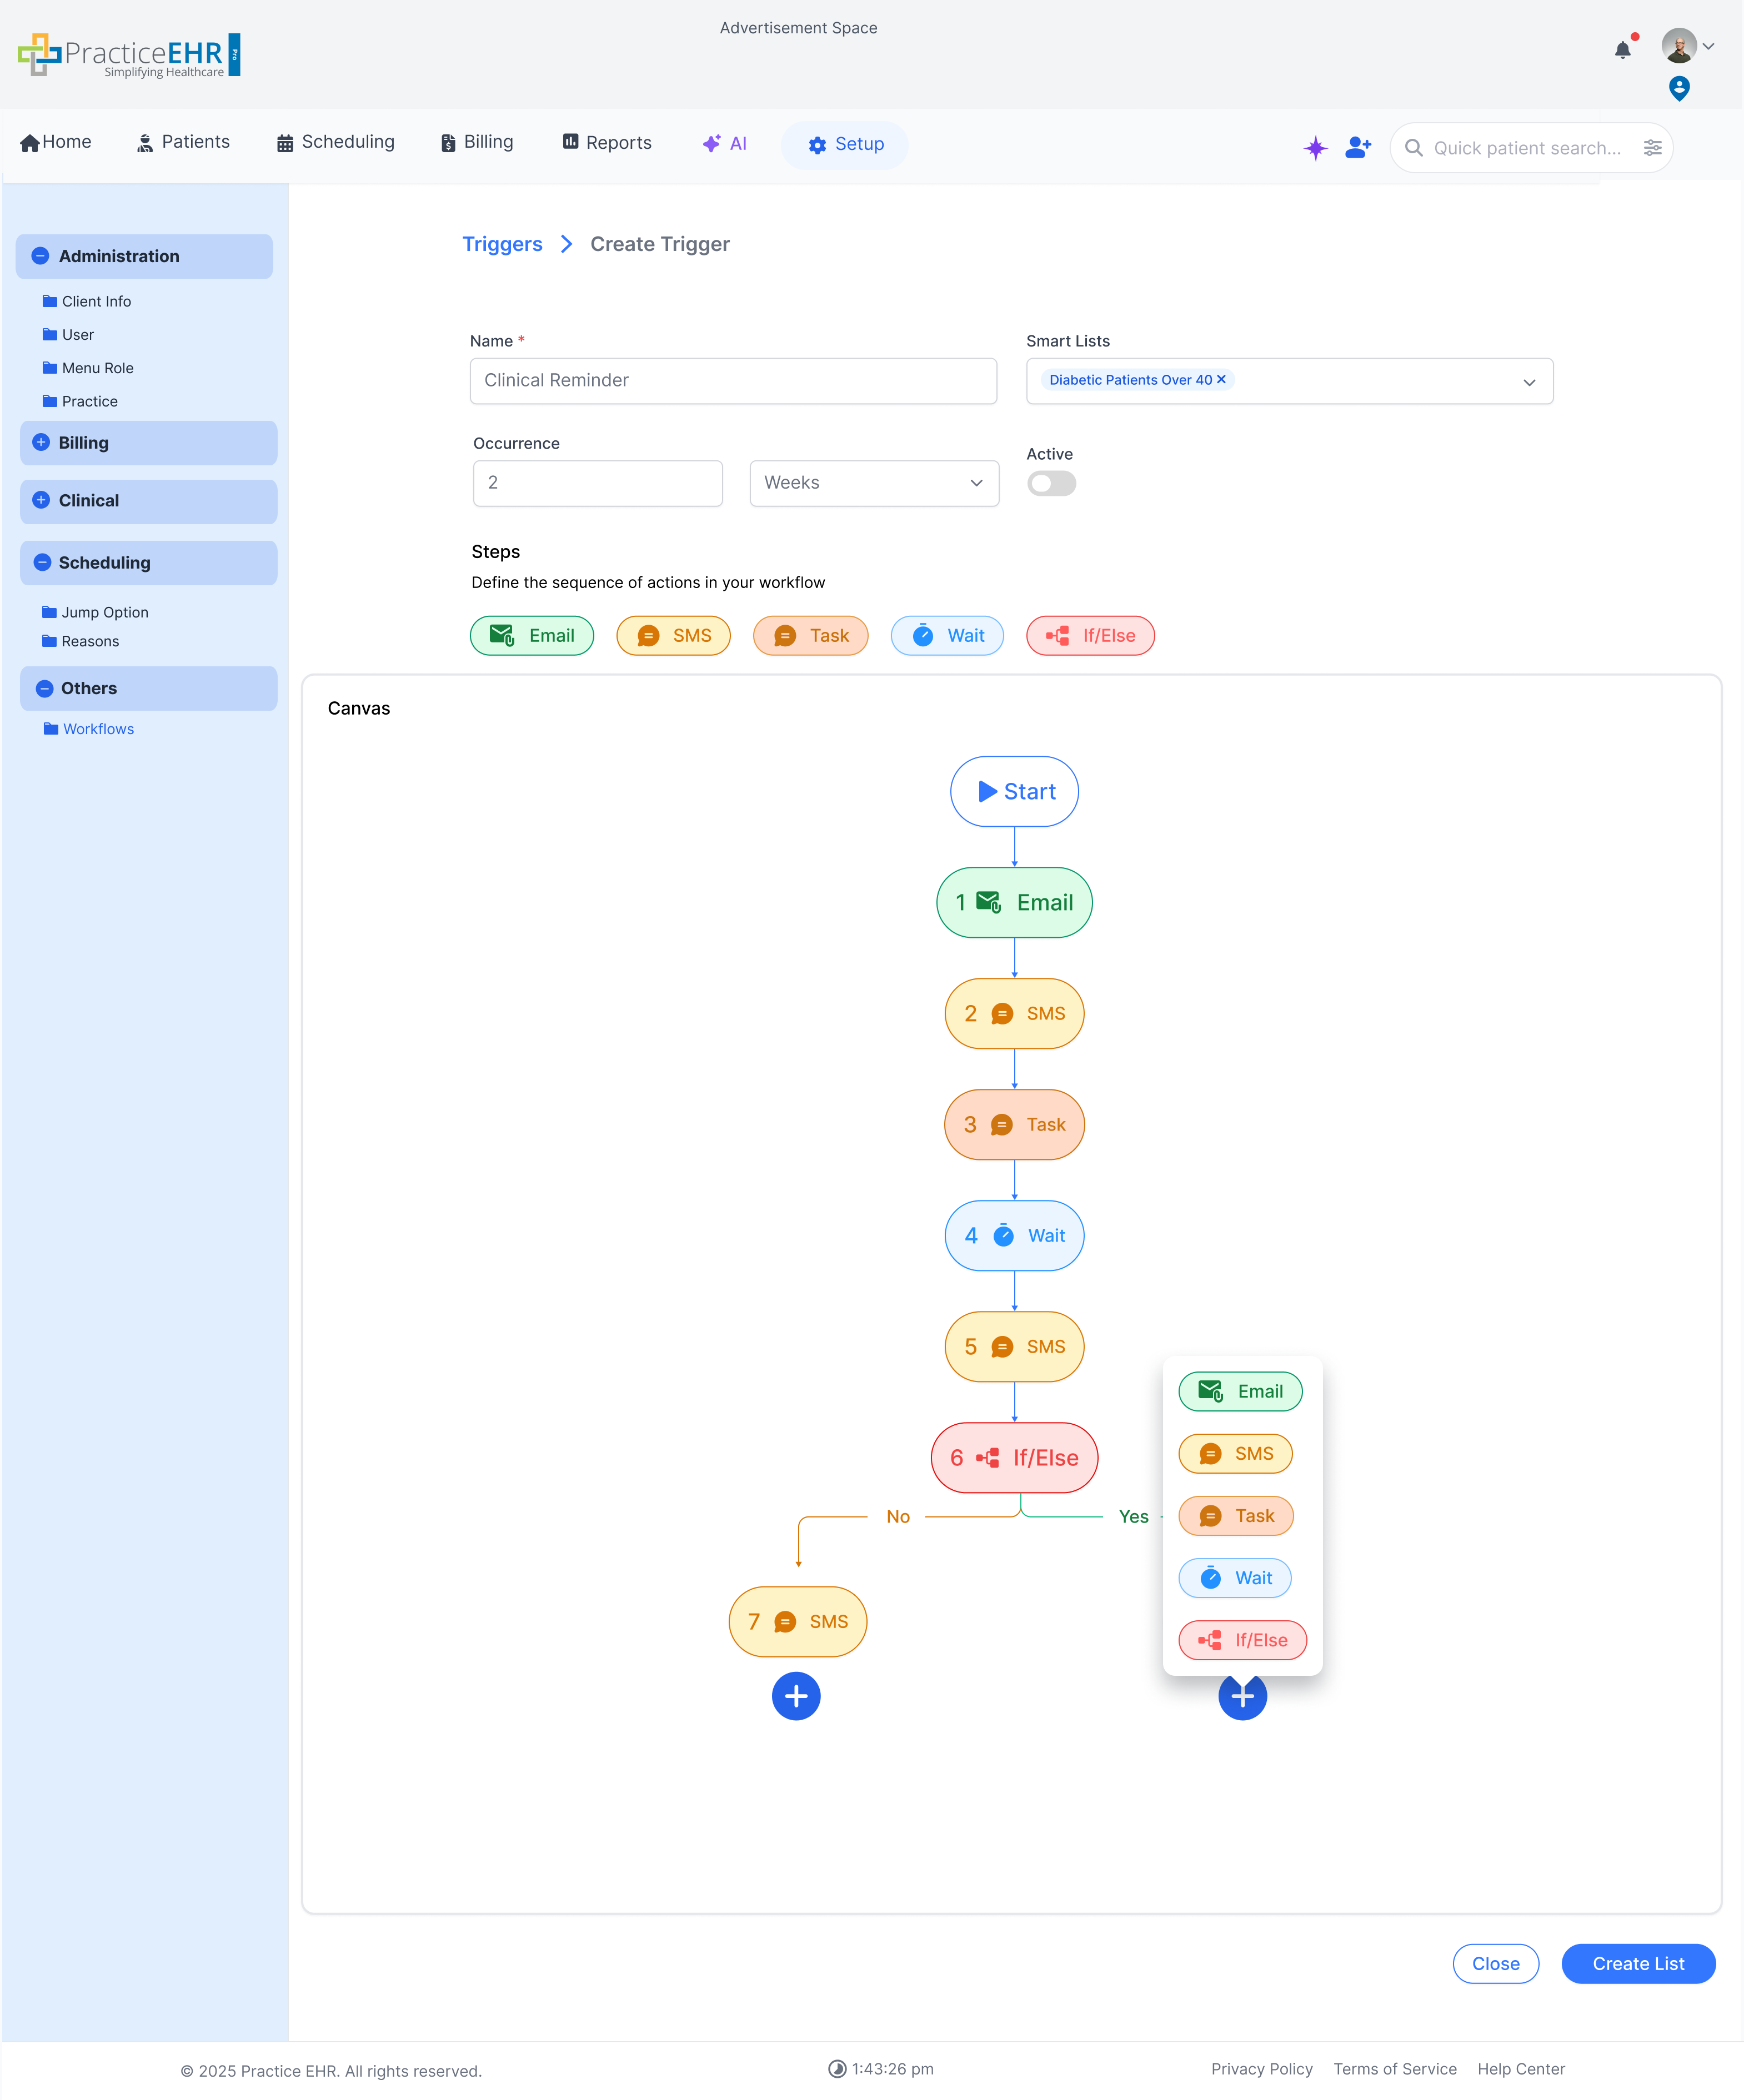
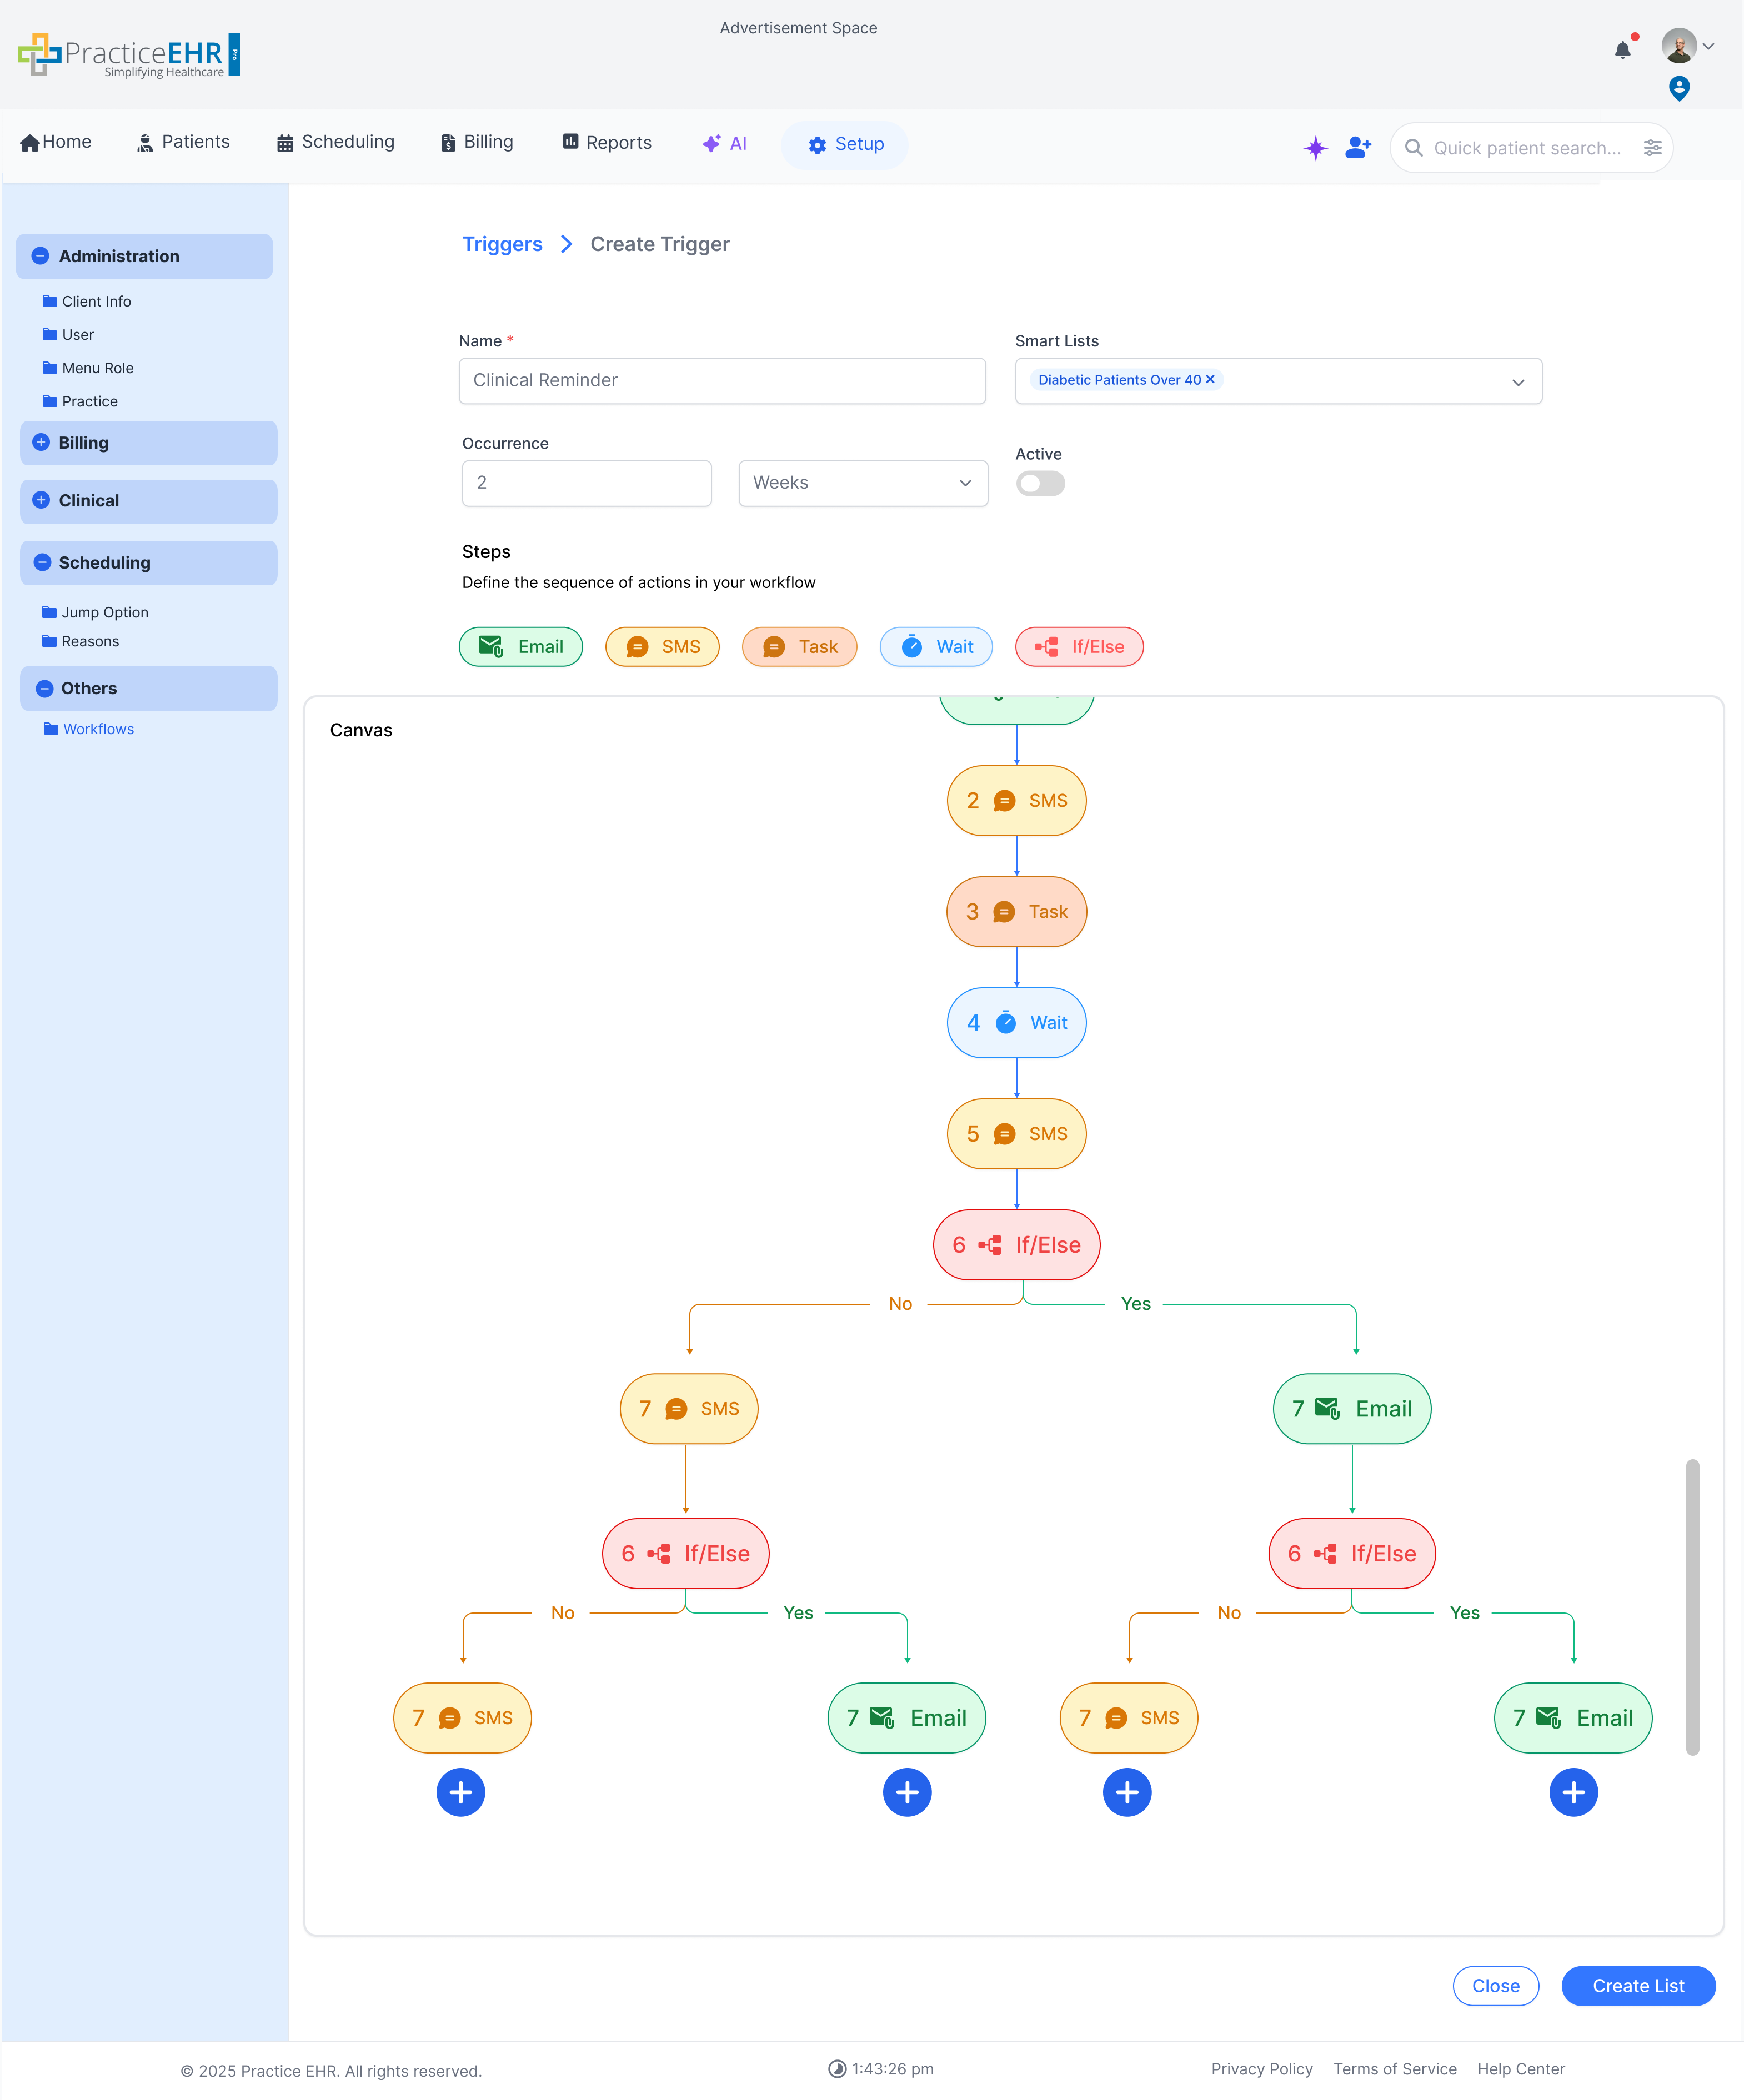
Create Trigger
This is not the UI of Create trigger Canvas, This is just an interactive example.
-
Start
Create Trigger
Screens showing full trigger details: KPIs, linked patients, quick edits, and step configuration.
clicking on the blue arrow buttons allow you to switch between different screens.


Description
This flow of 18 screens demonstrates the Trigger detail module: performance cards, recipient grids, and editing options for name, smart lists, and steps.
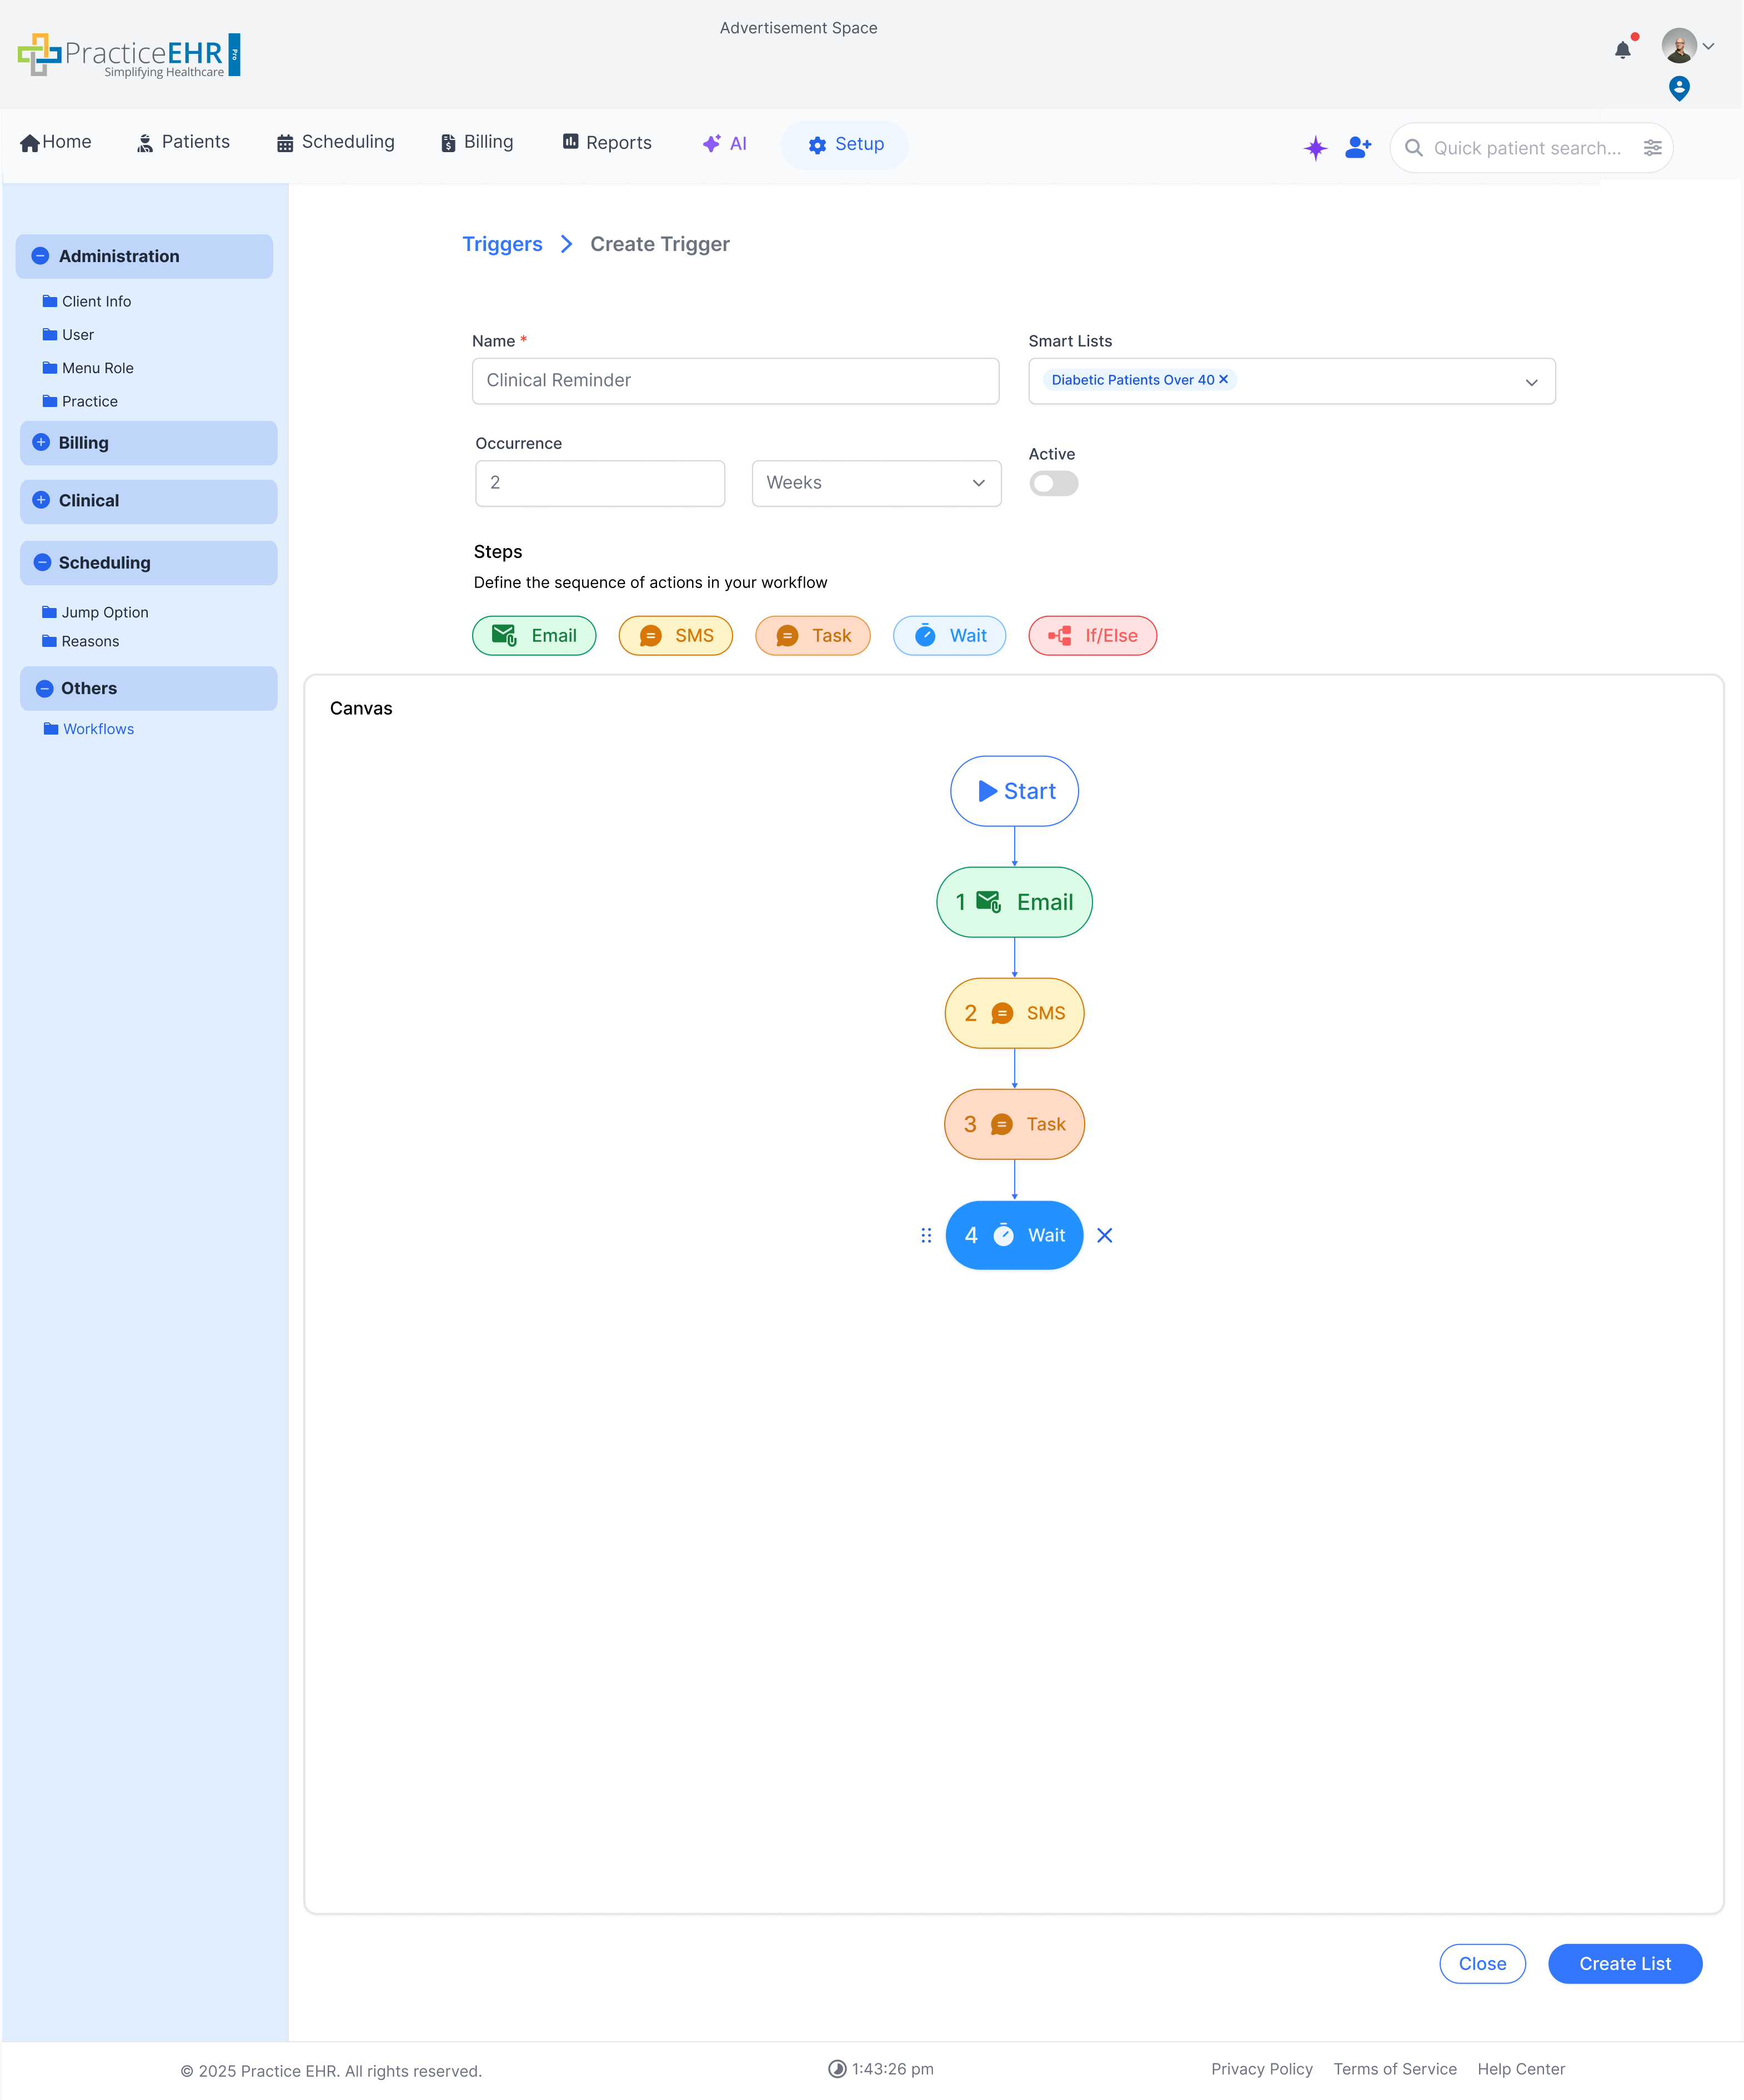
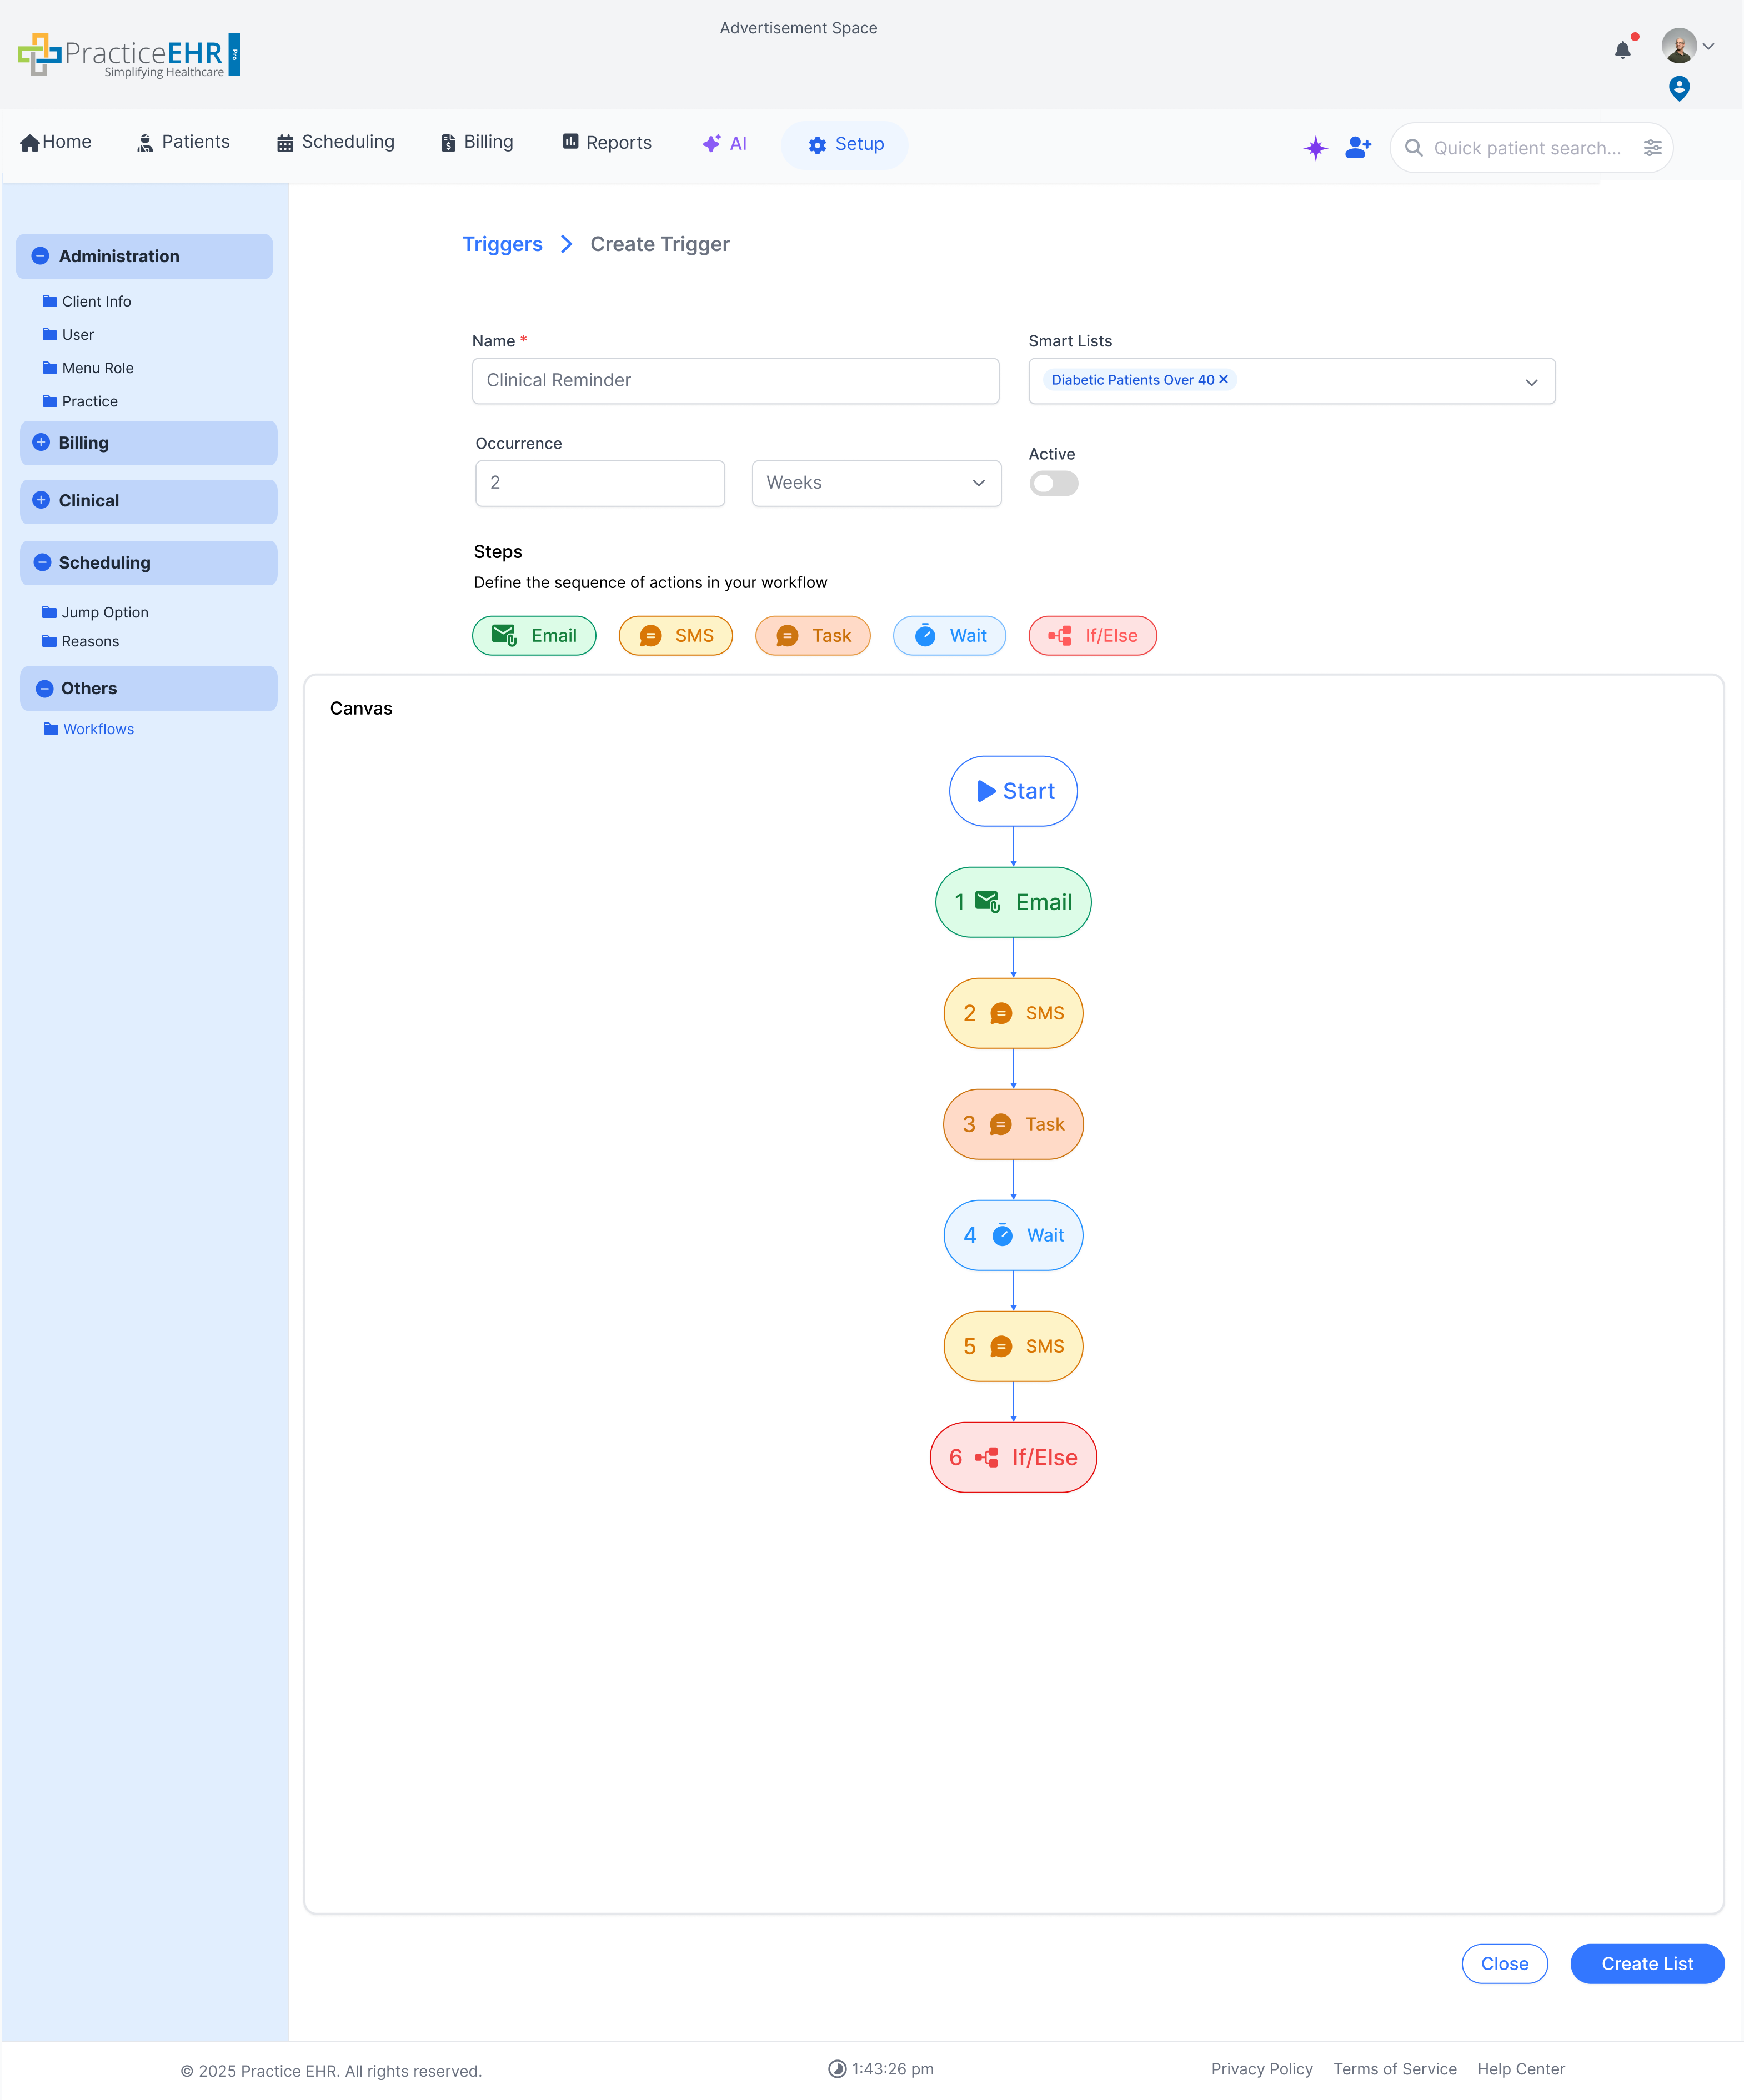
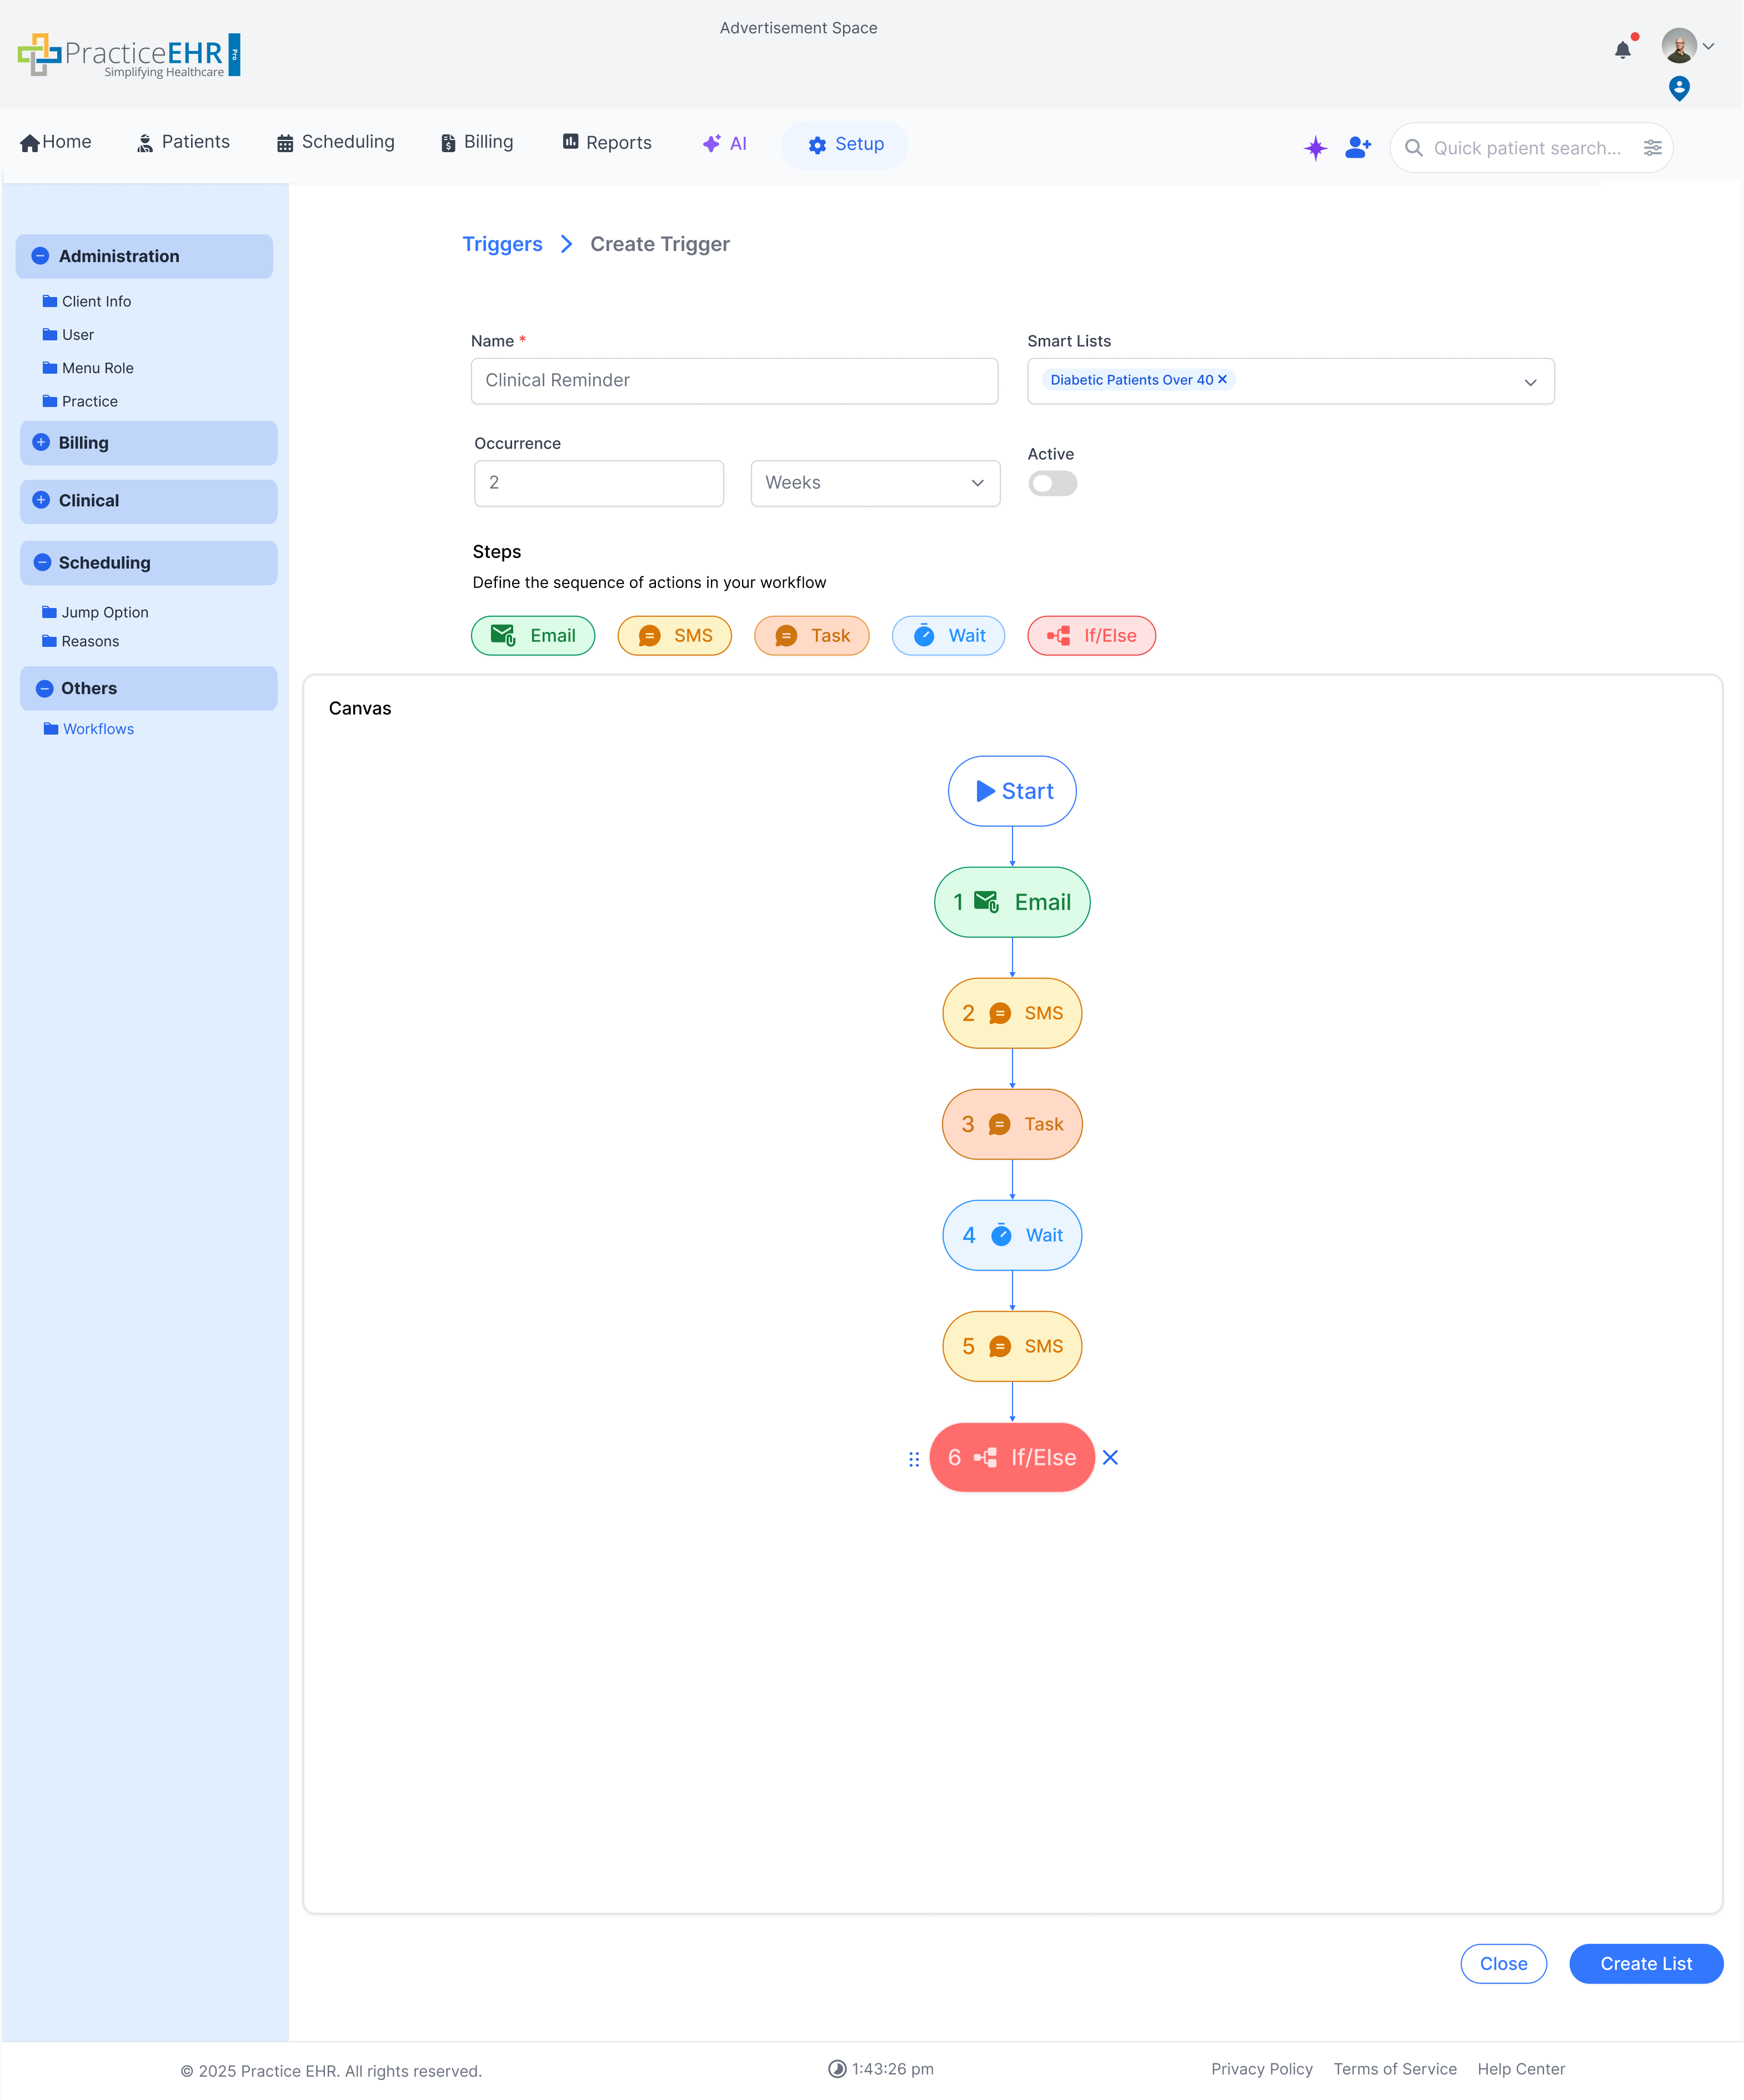
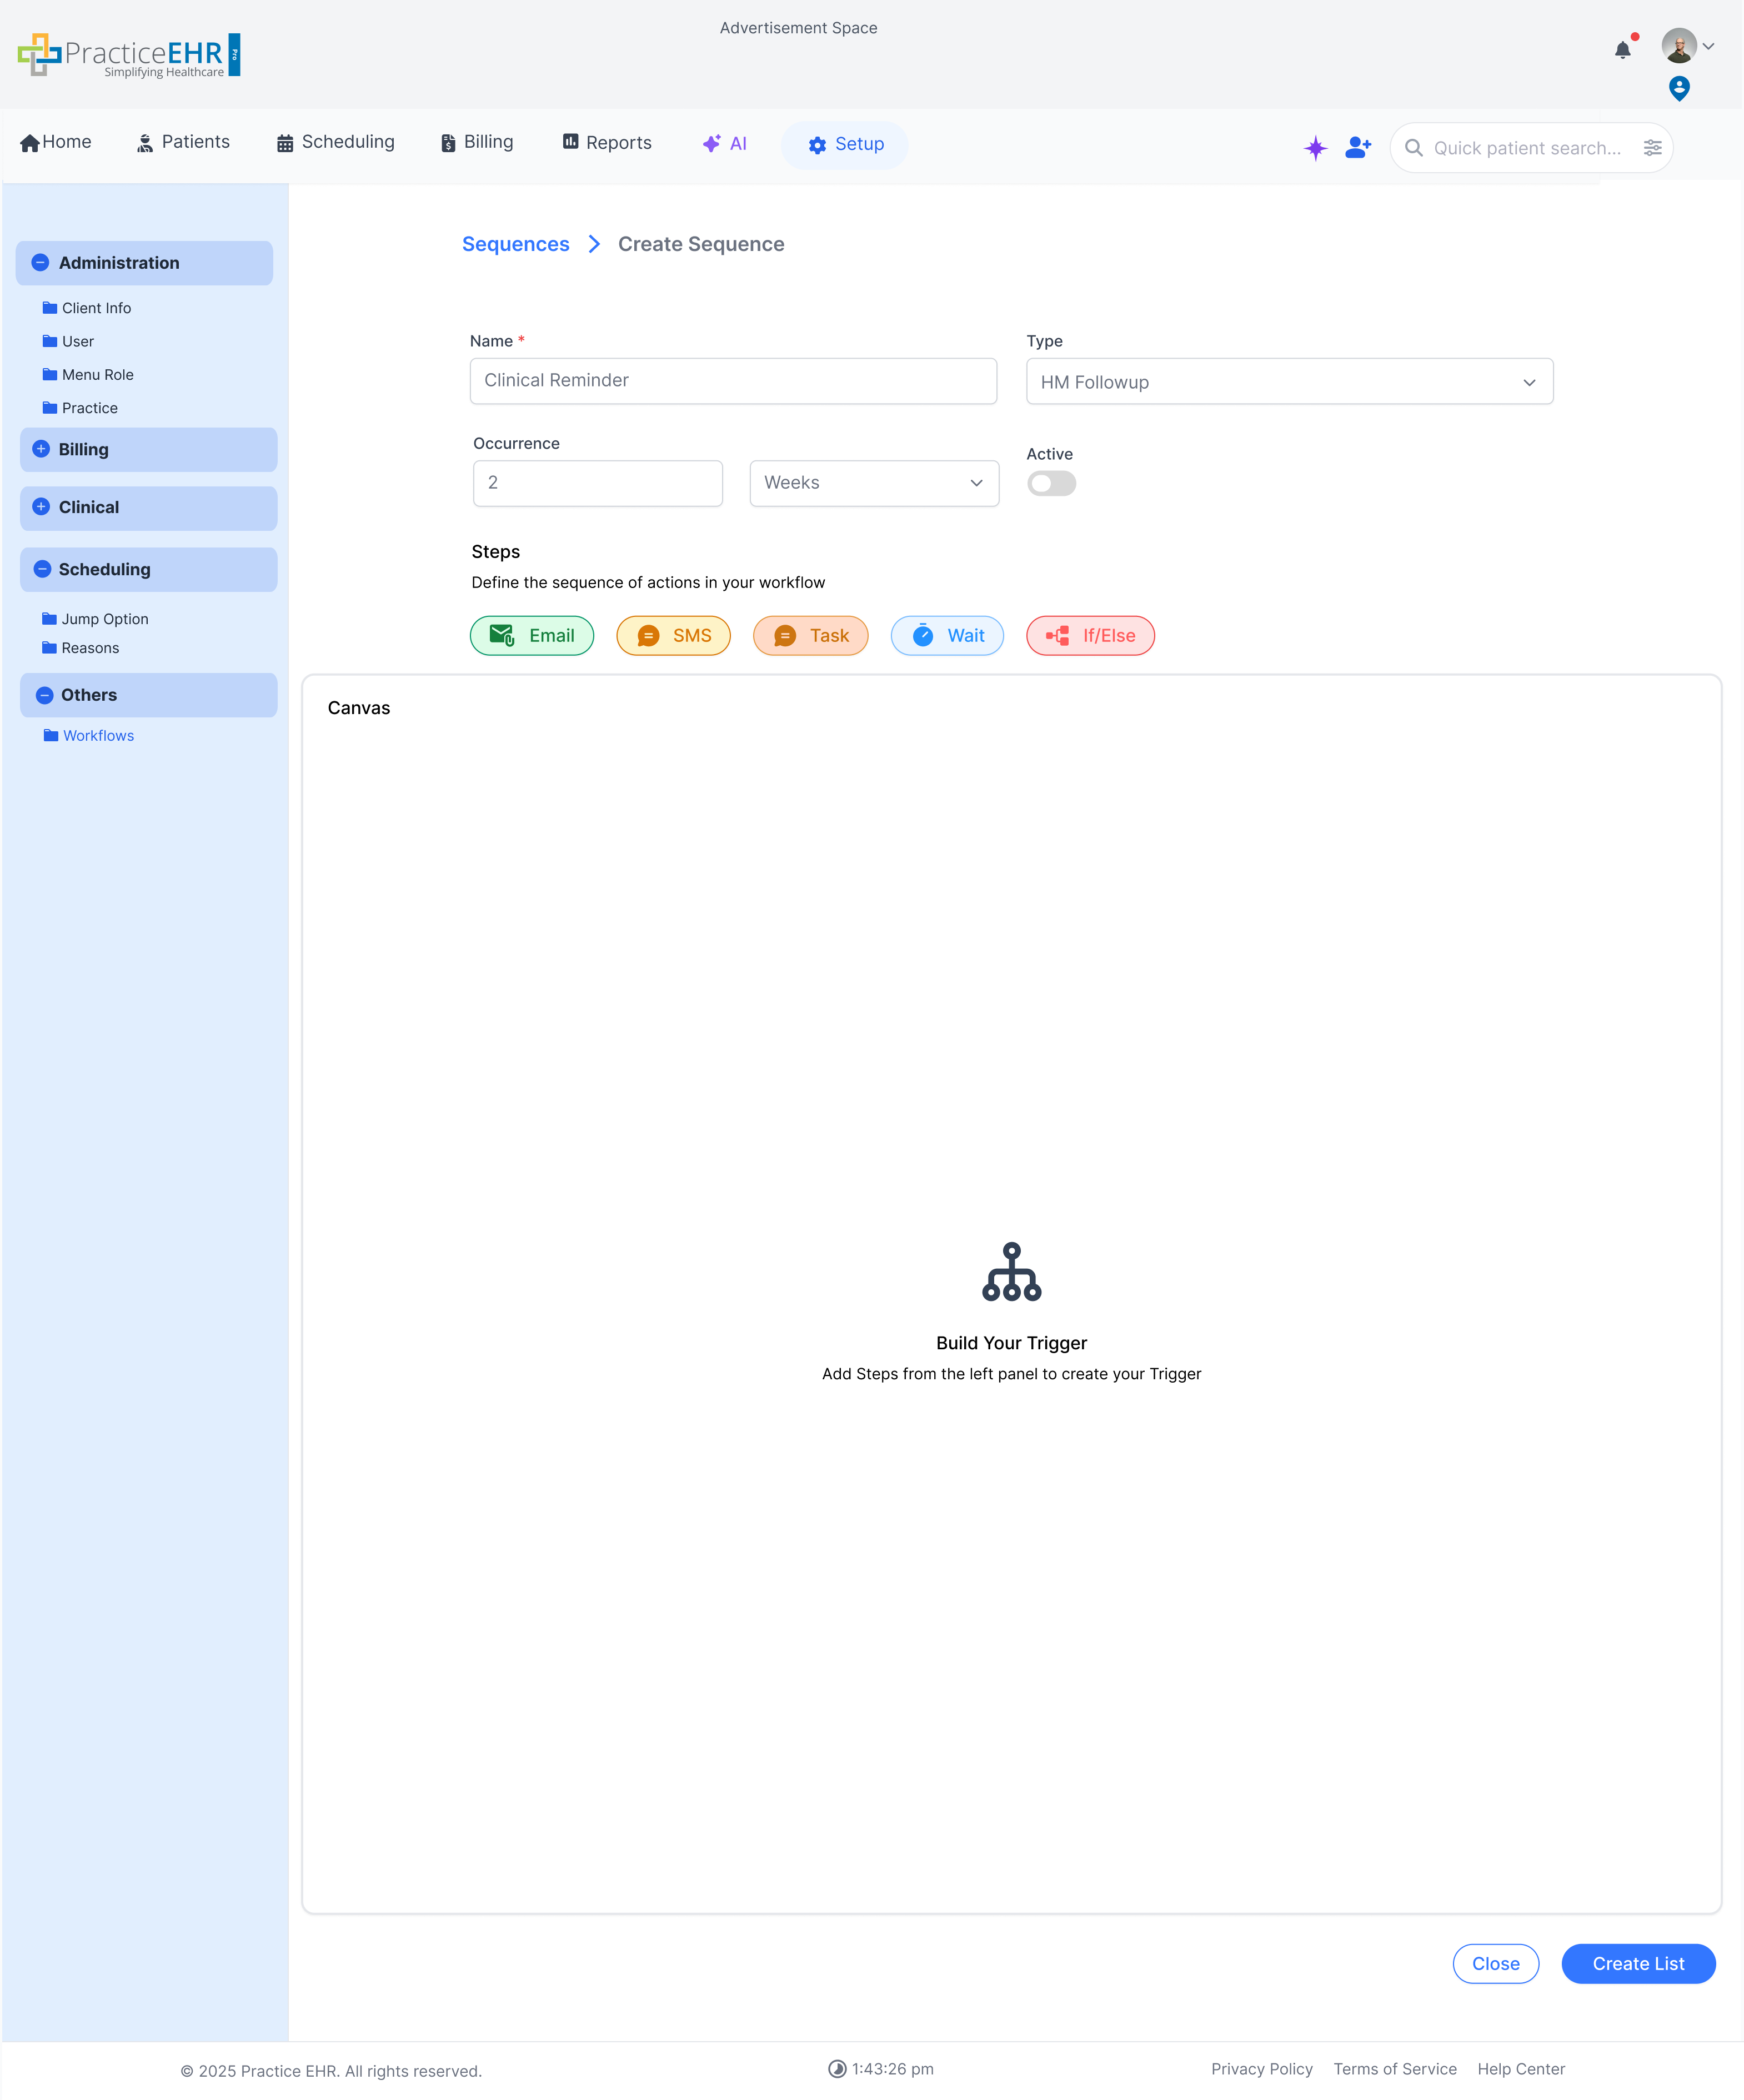
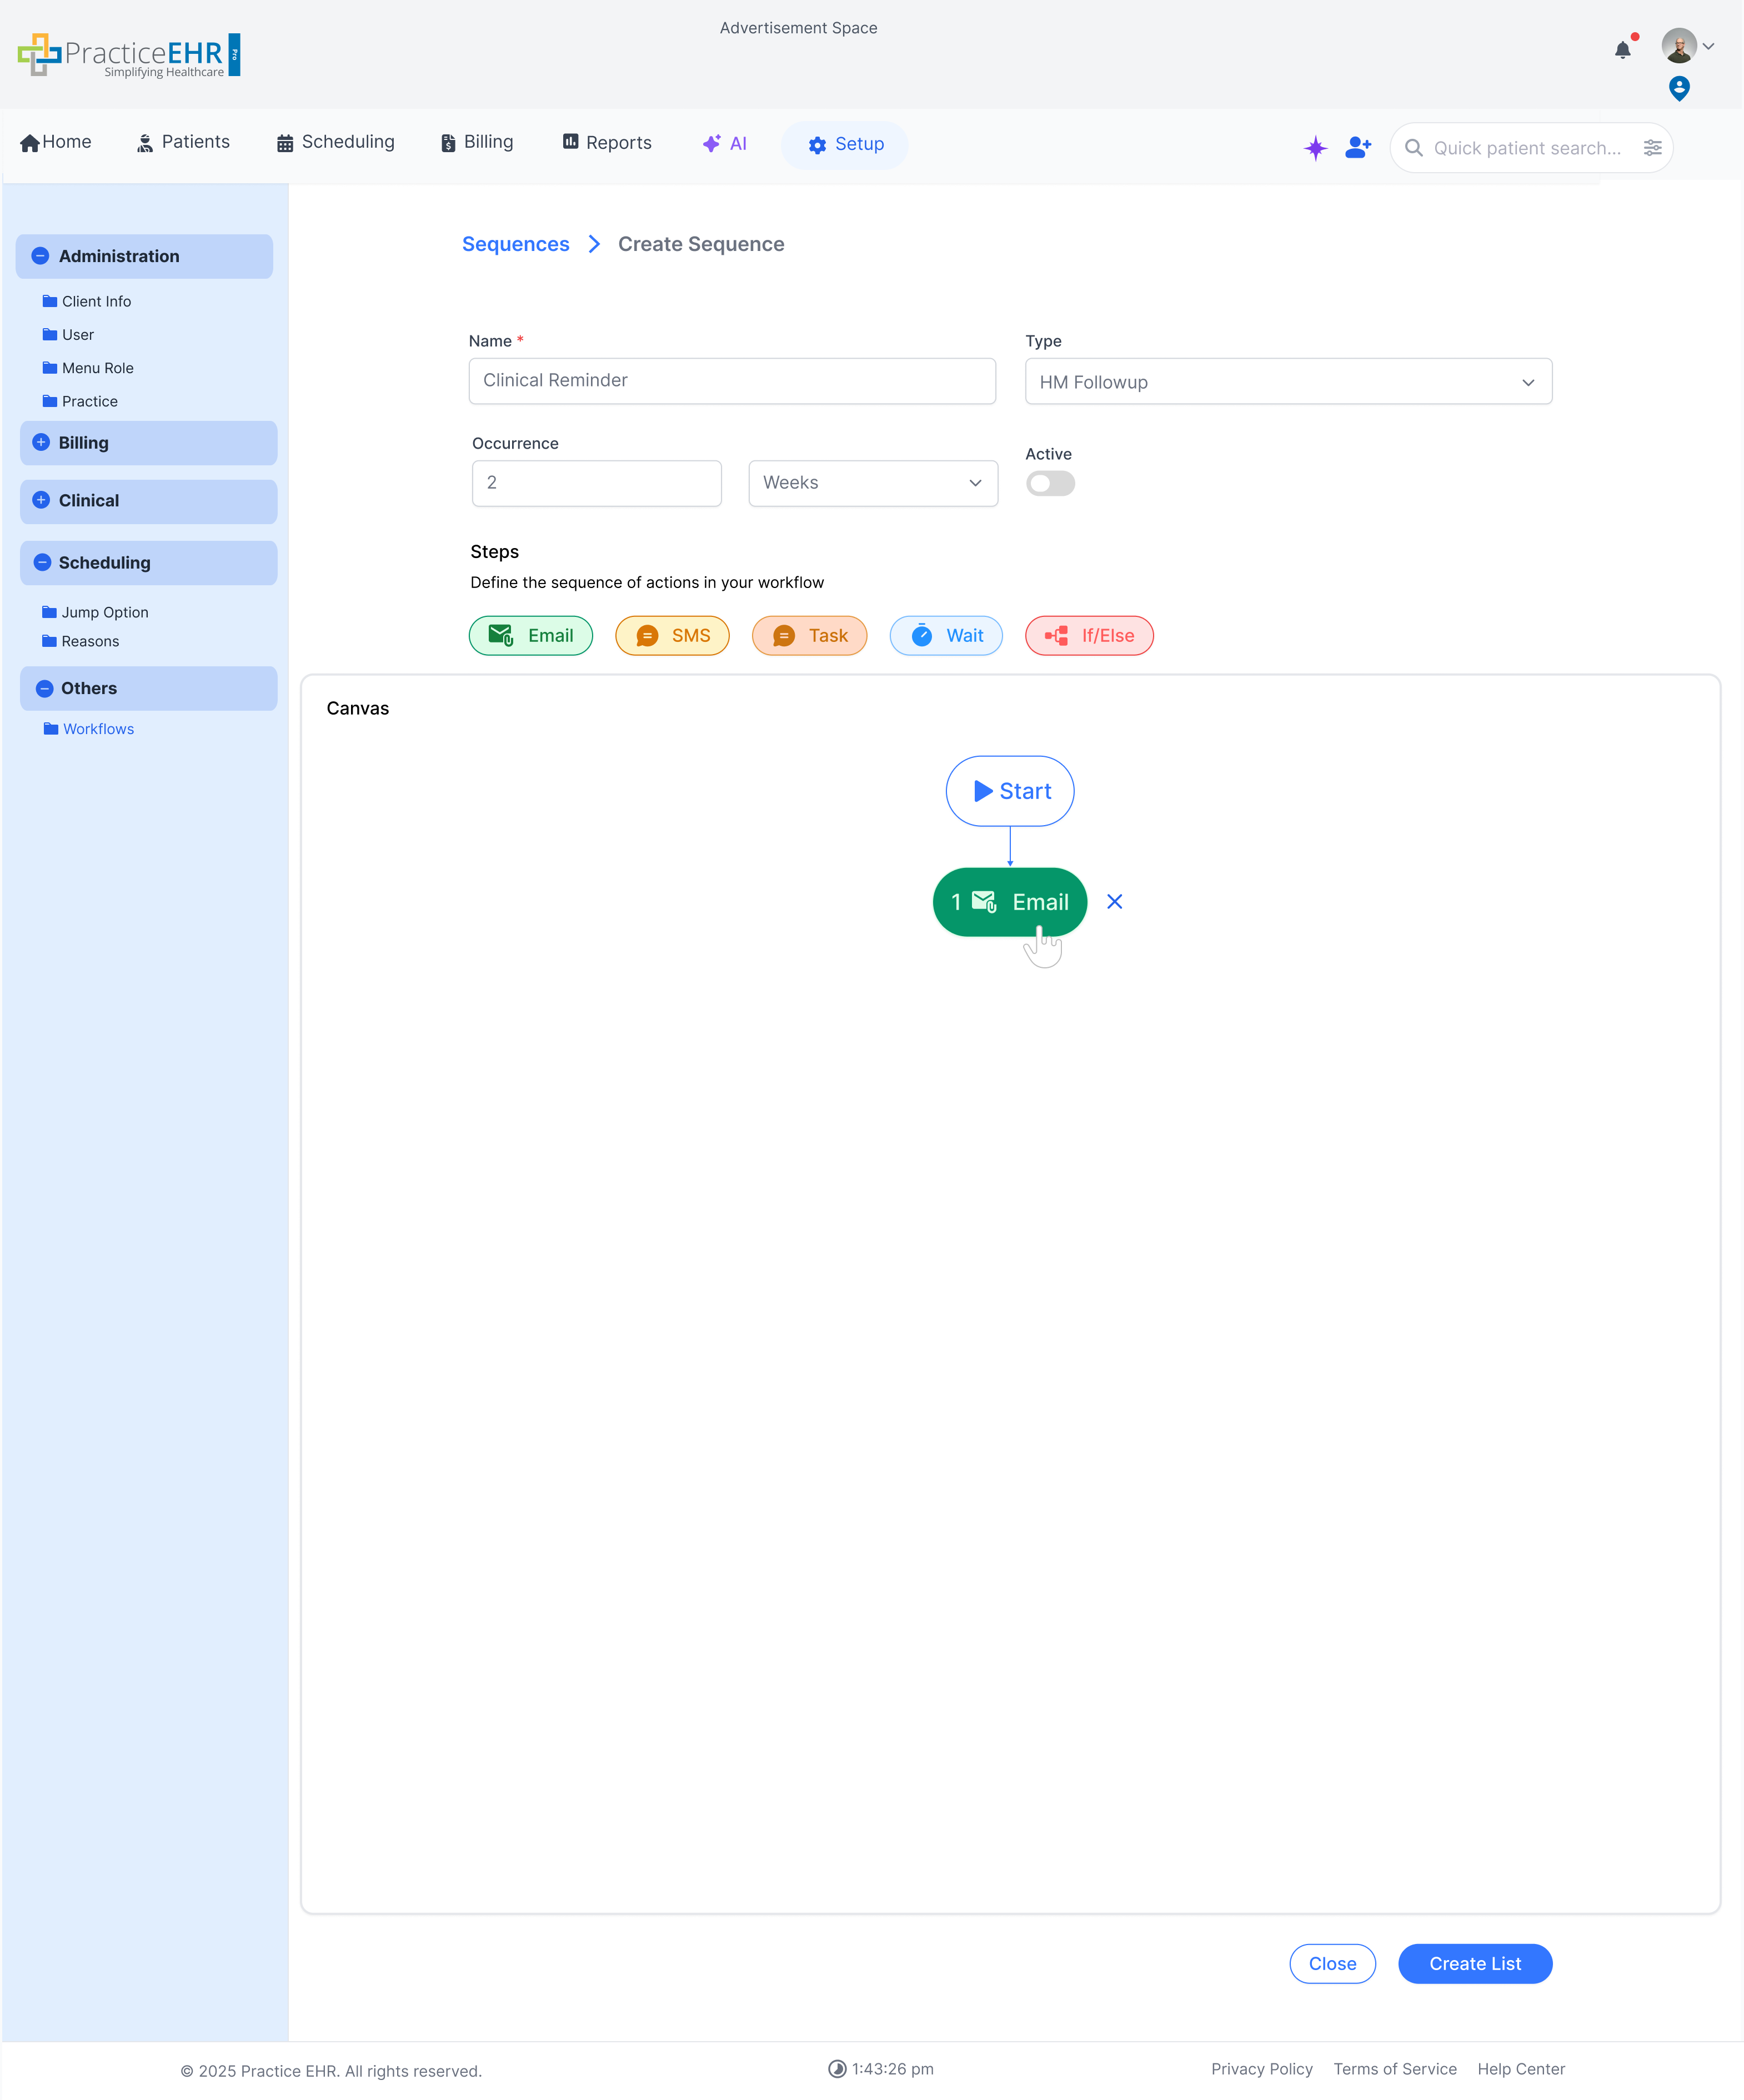
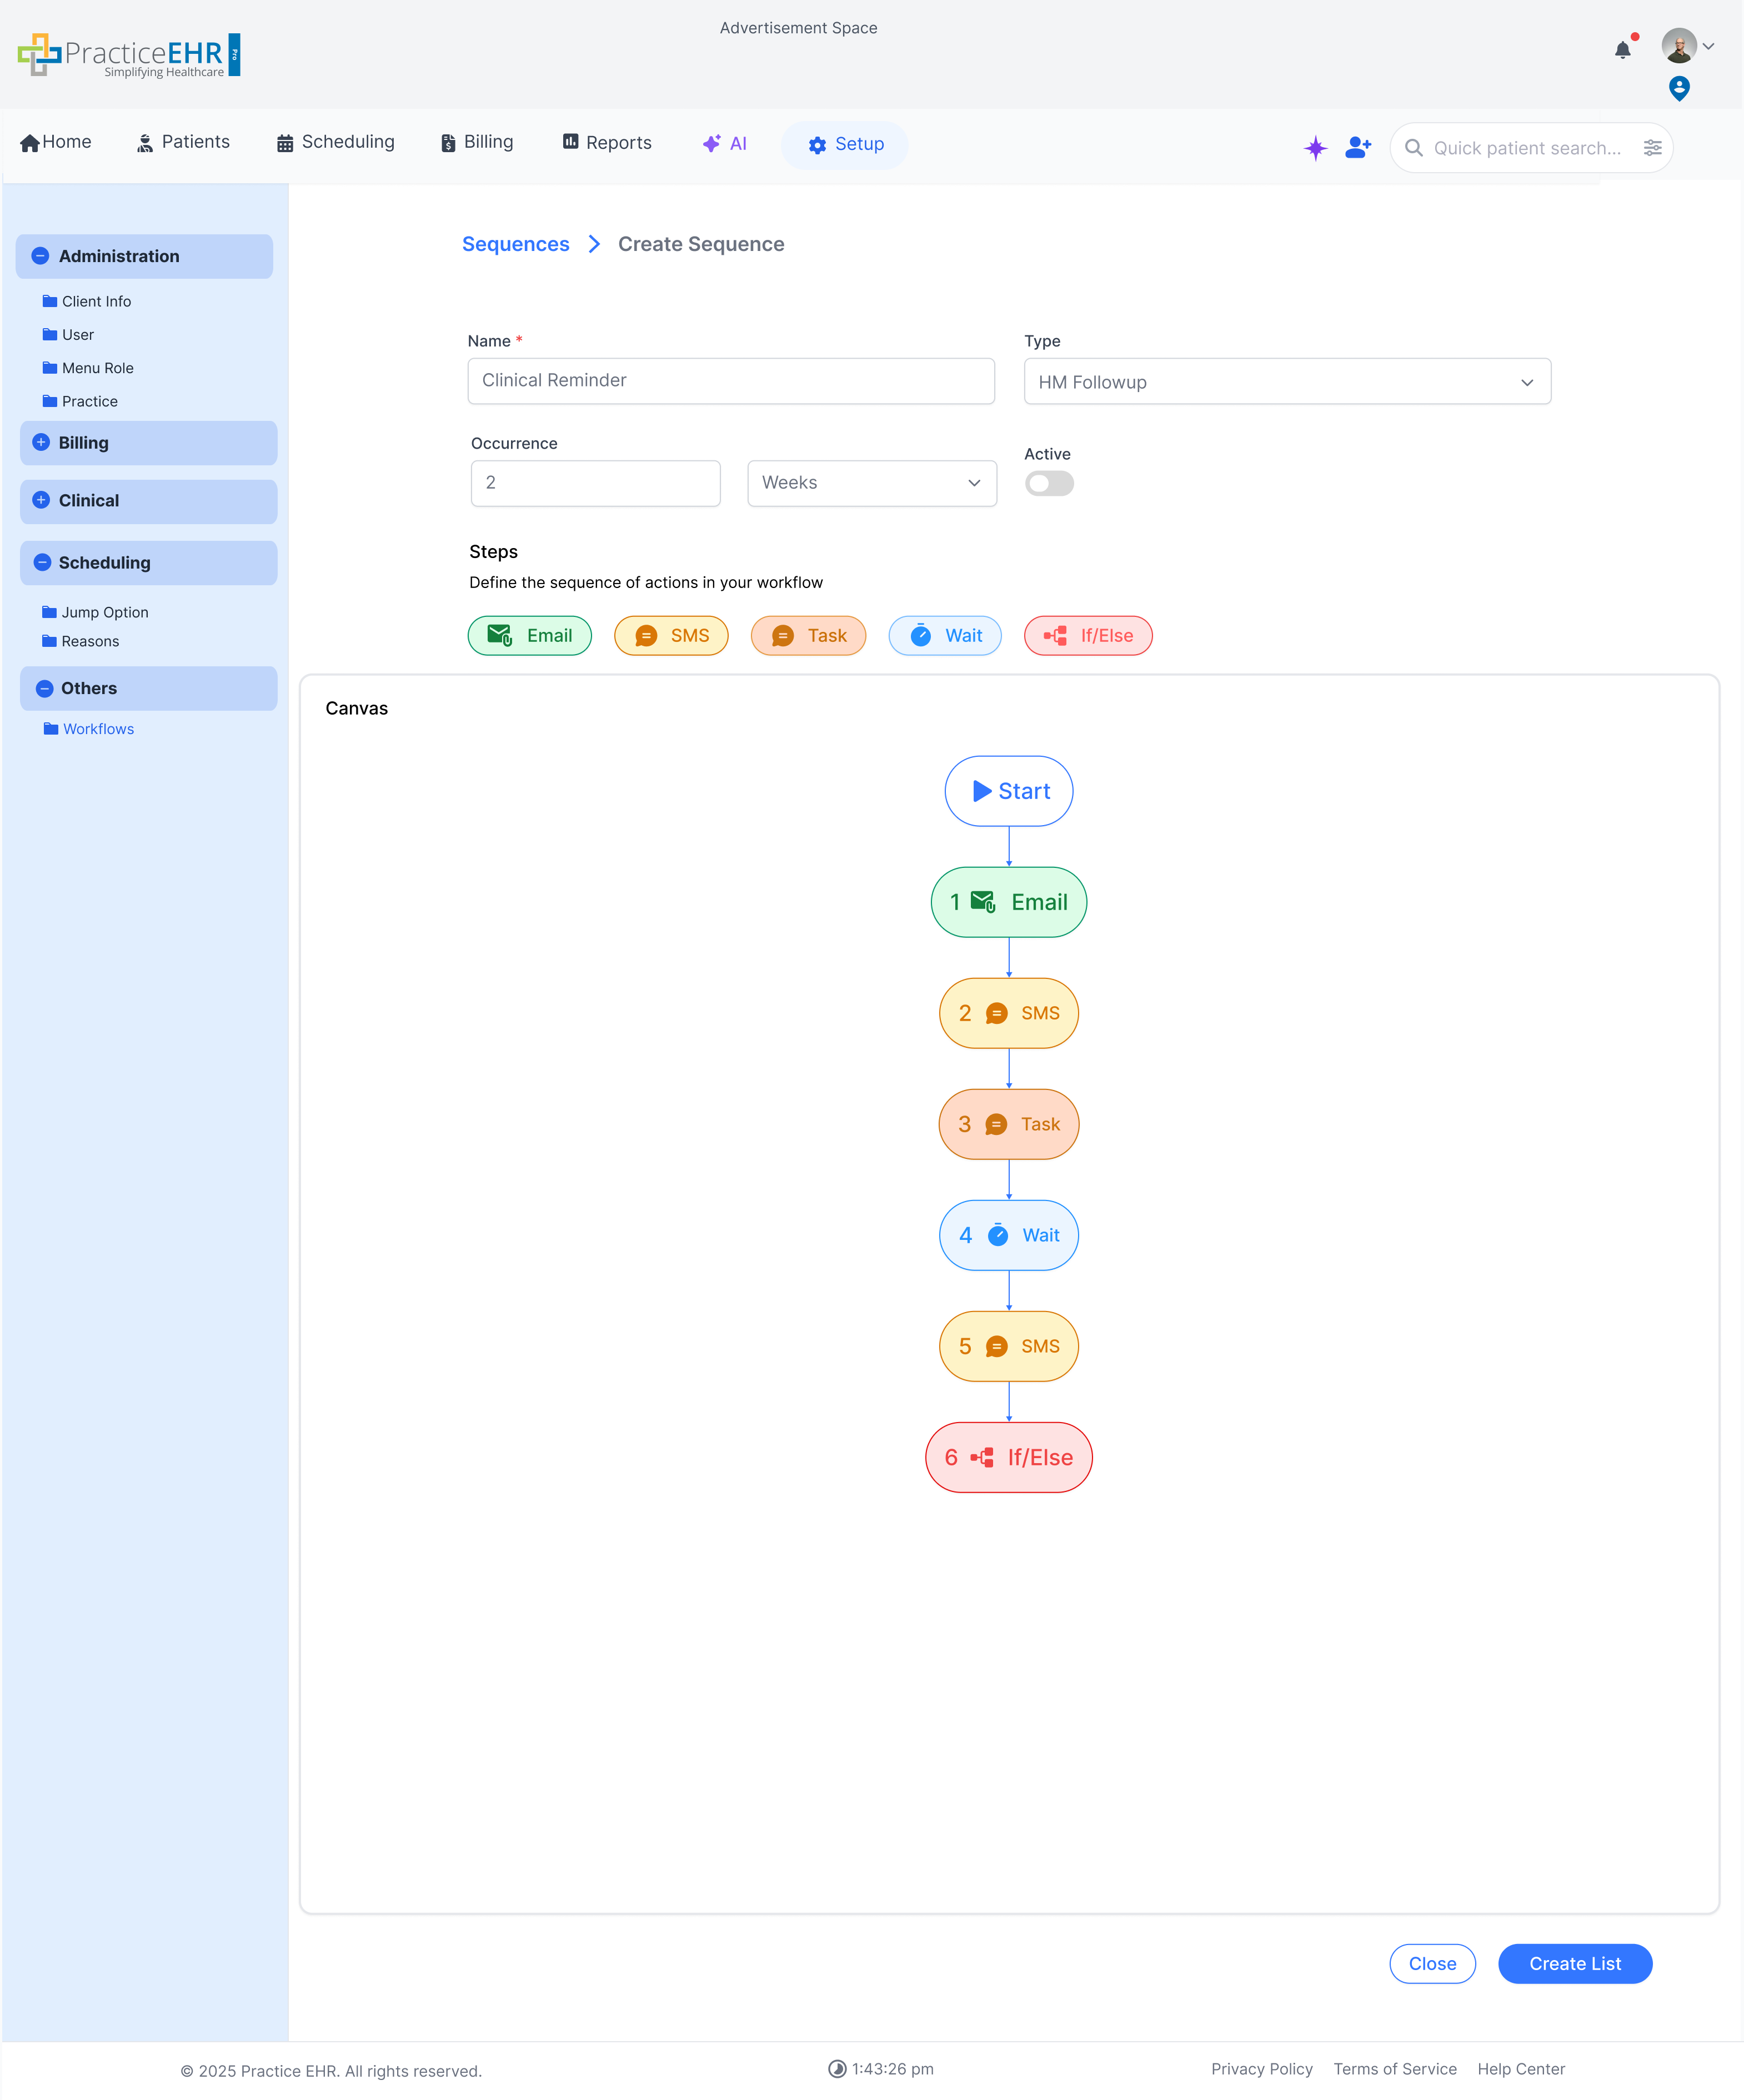
Create Trigger Window
- Name — mandatory field
- Smart Lists — user can add or remove lists from a dropdown
- Occurrence — specifies recurrence time for the created steps
- Active Toggle — set trigger as active or inactive
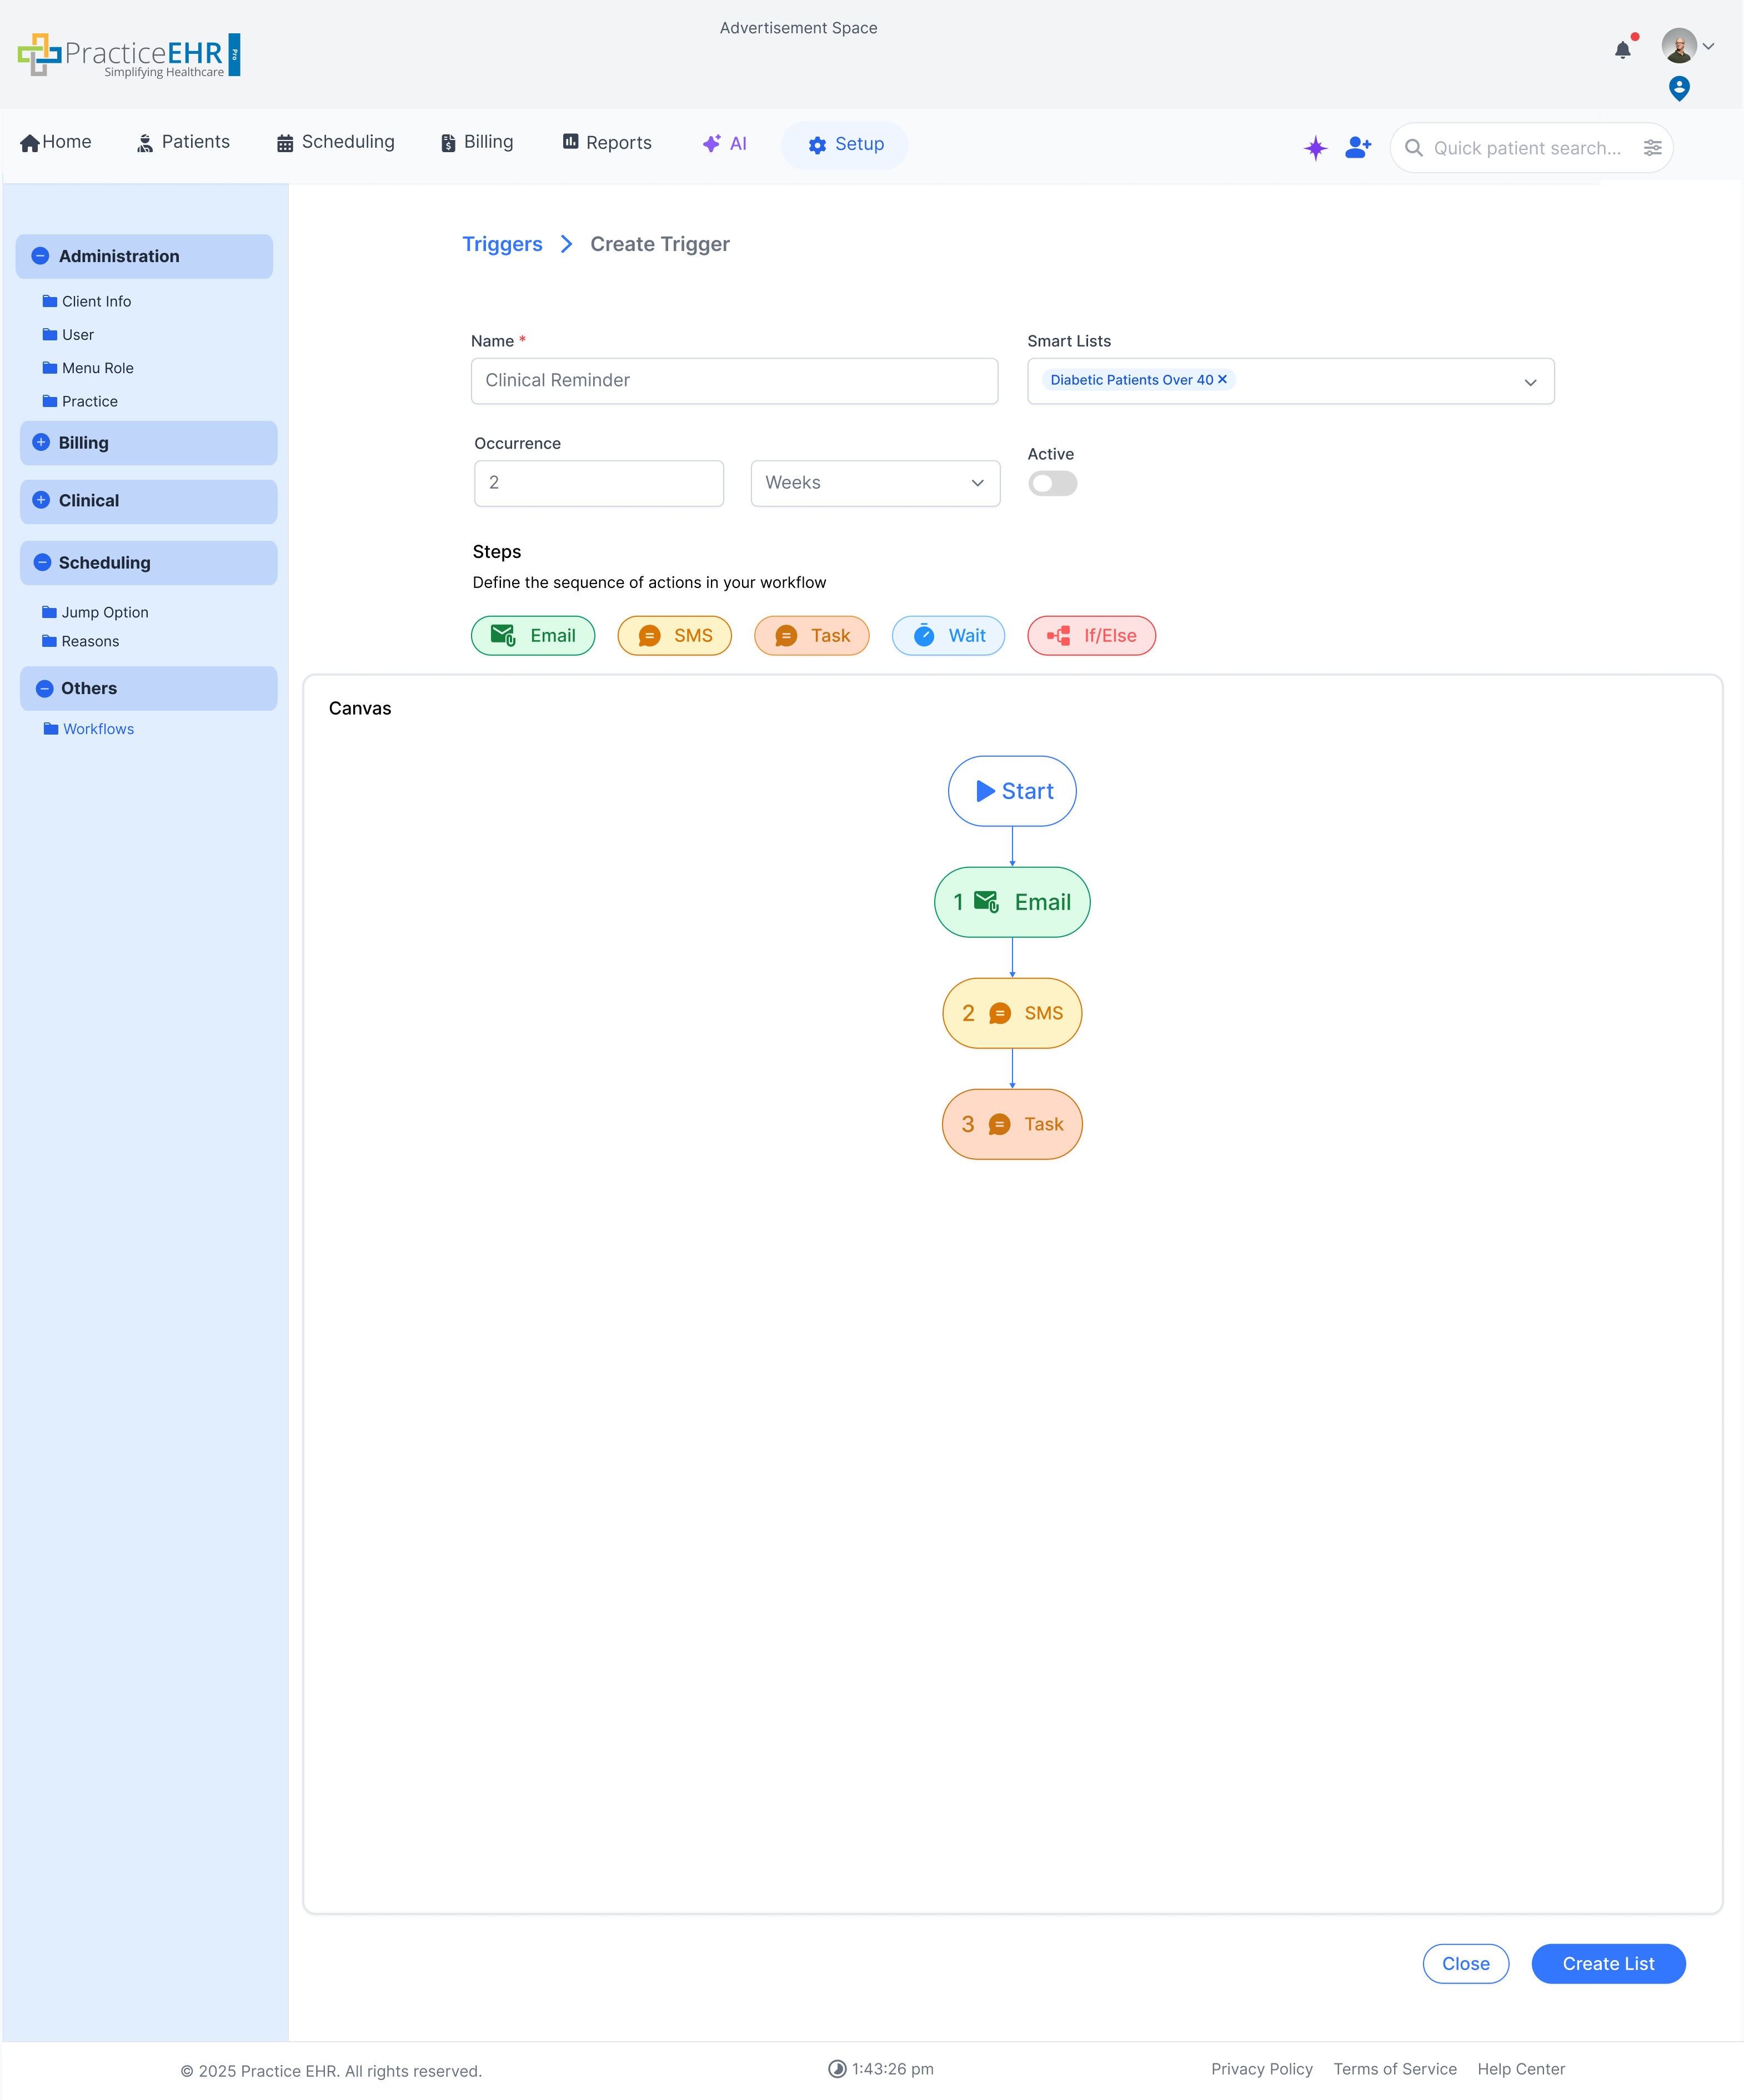
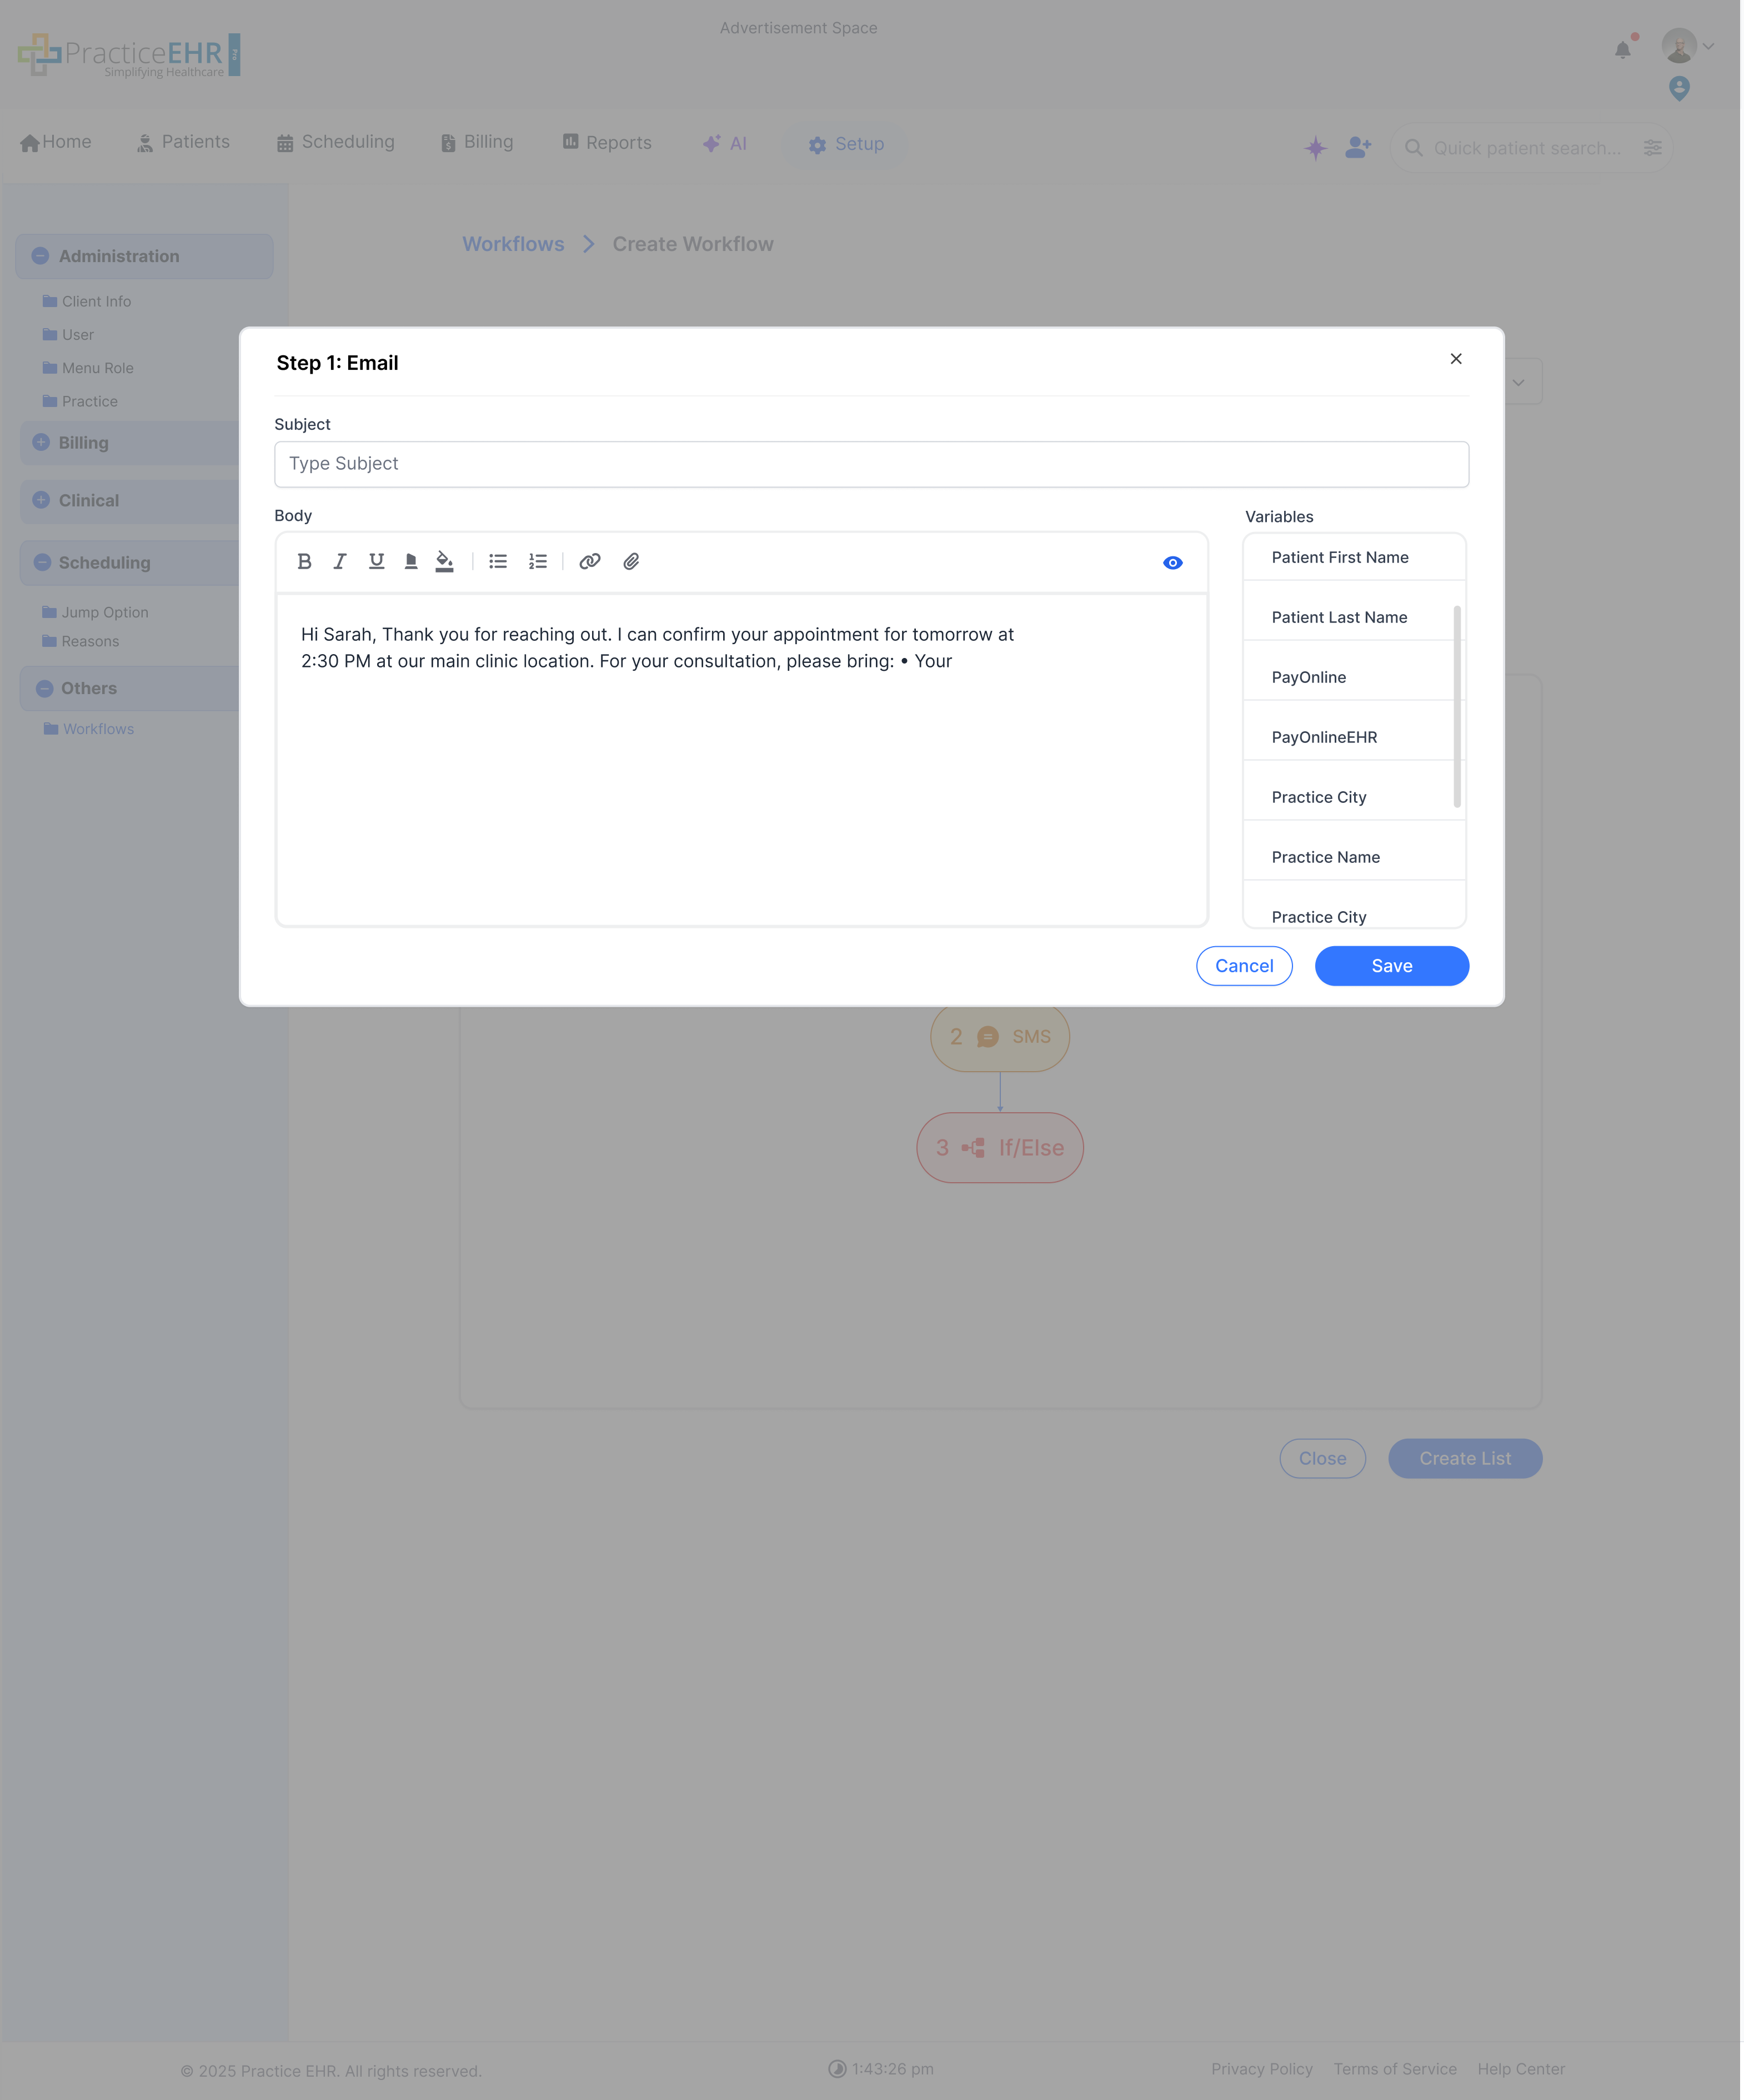
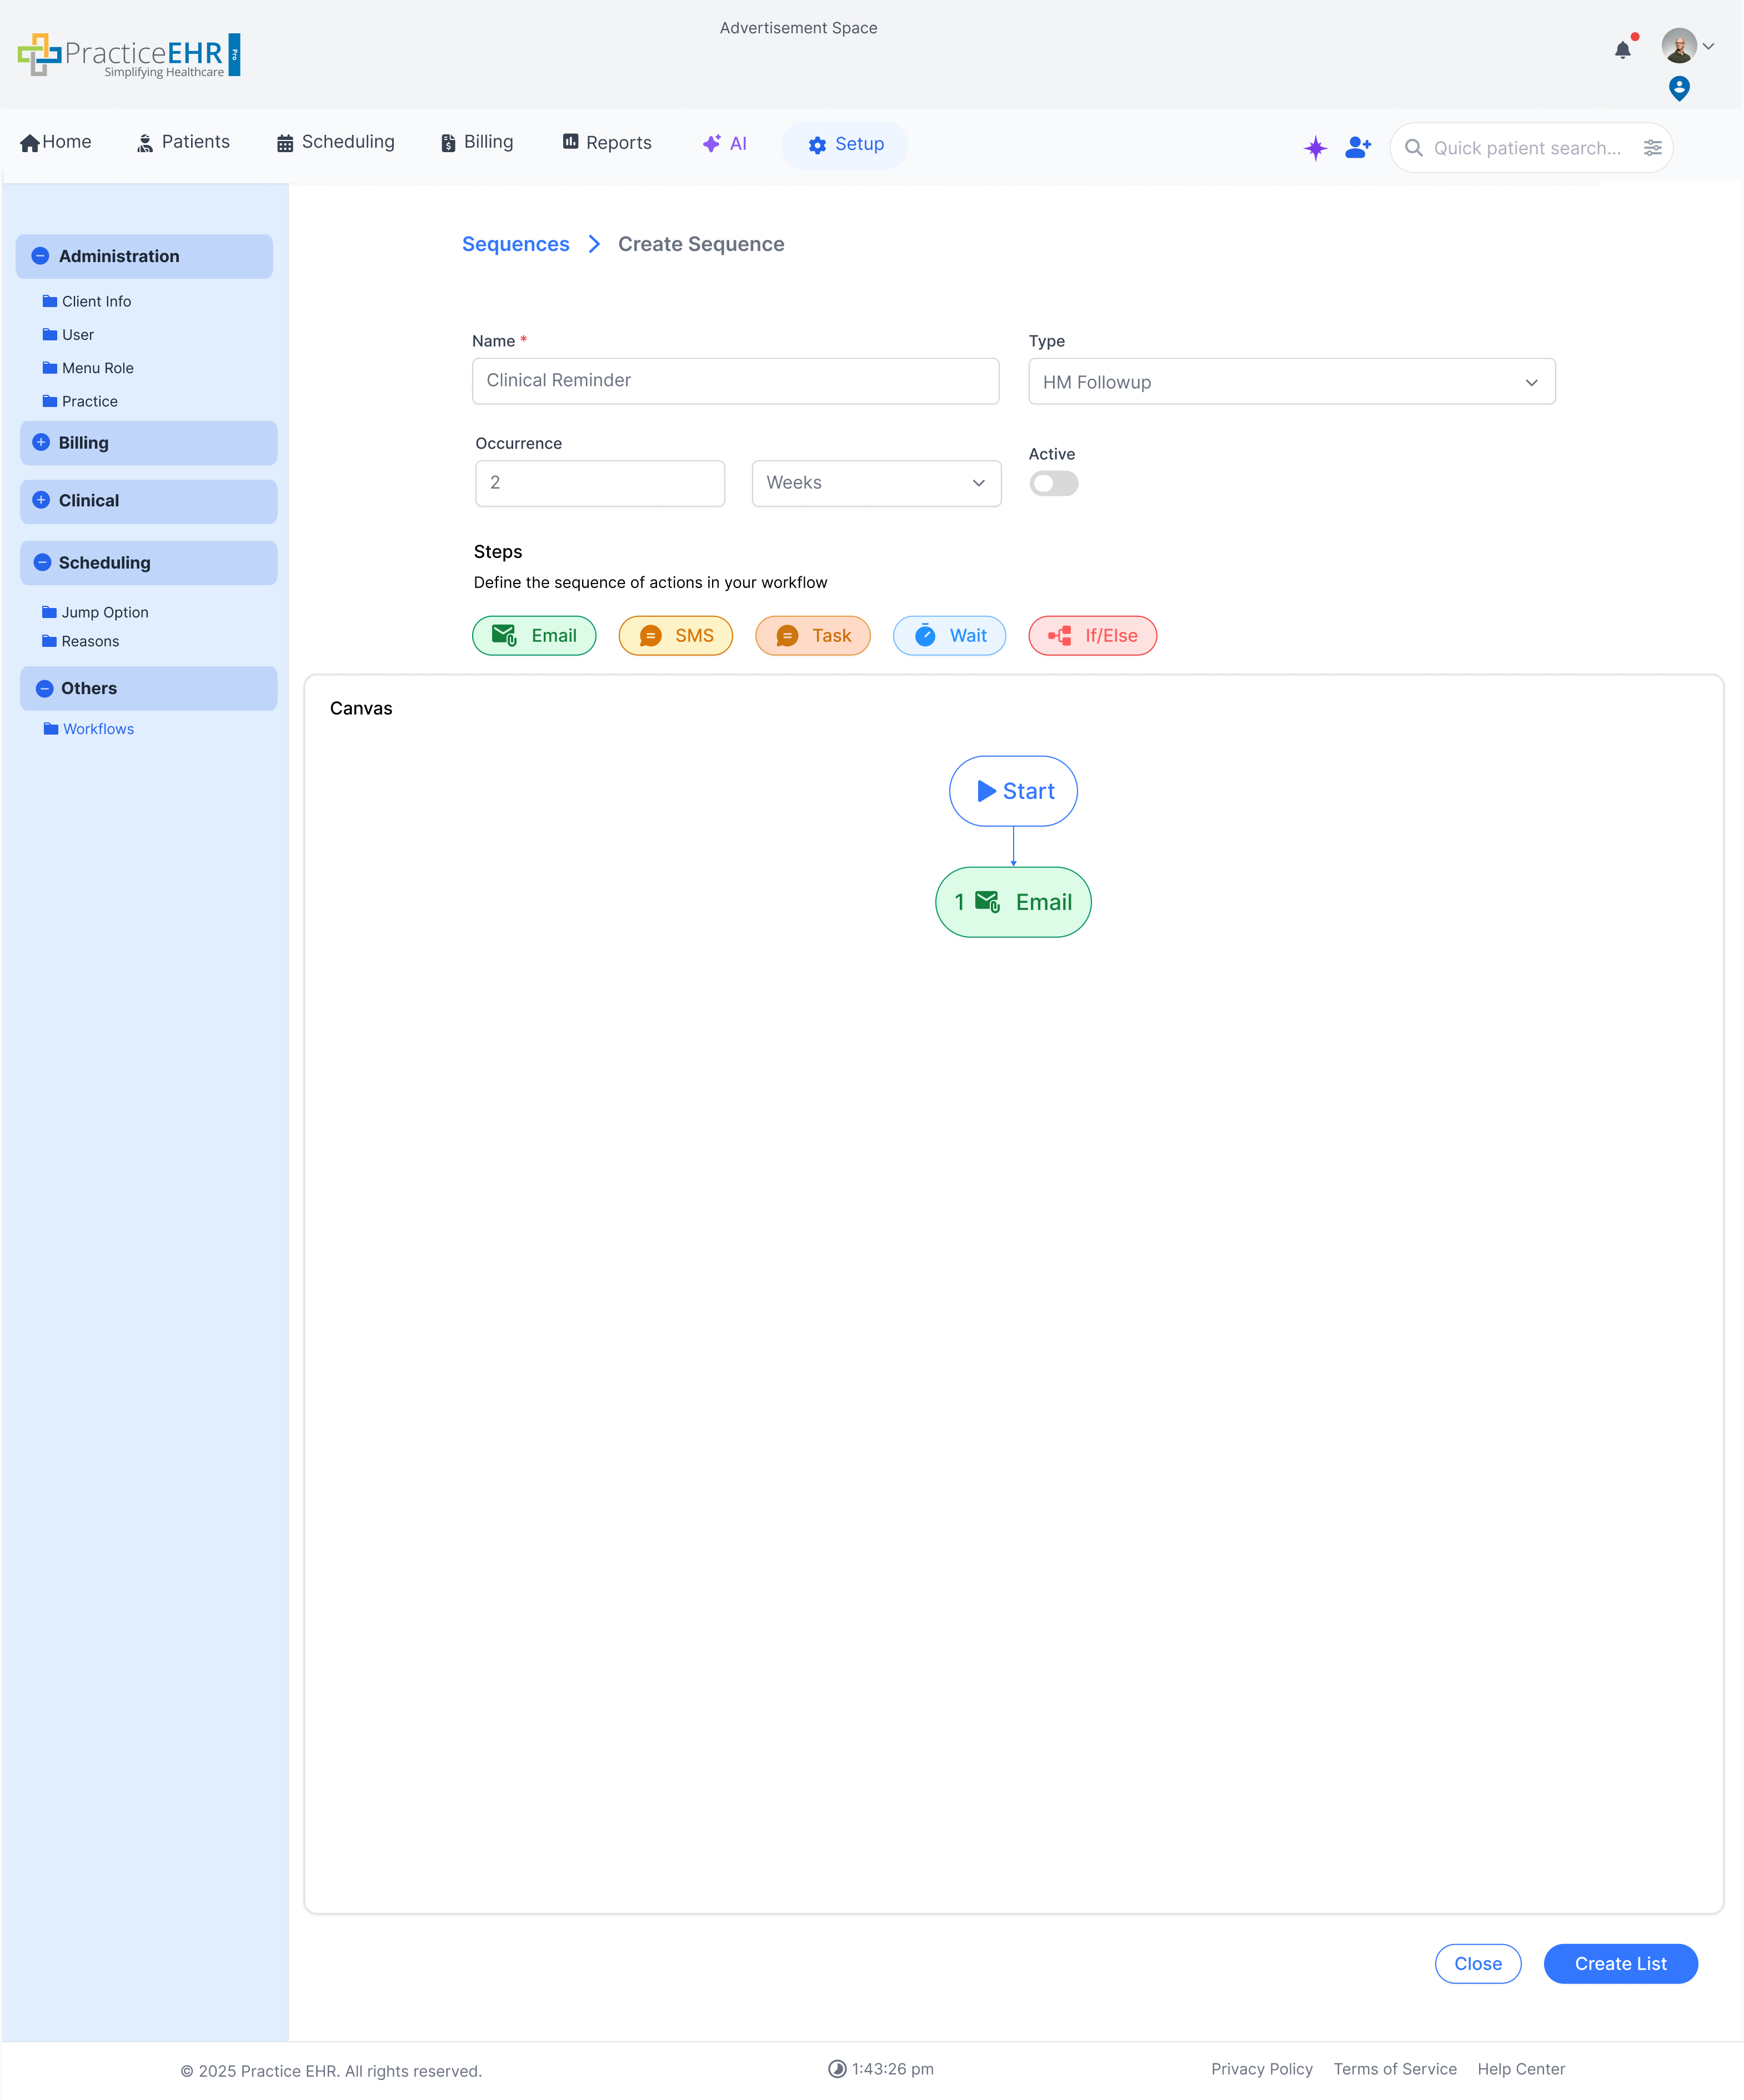
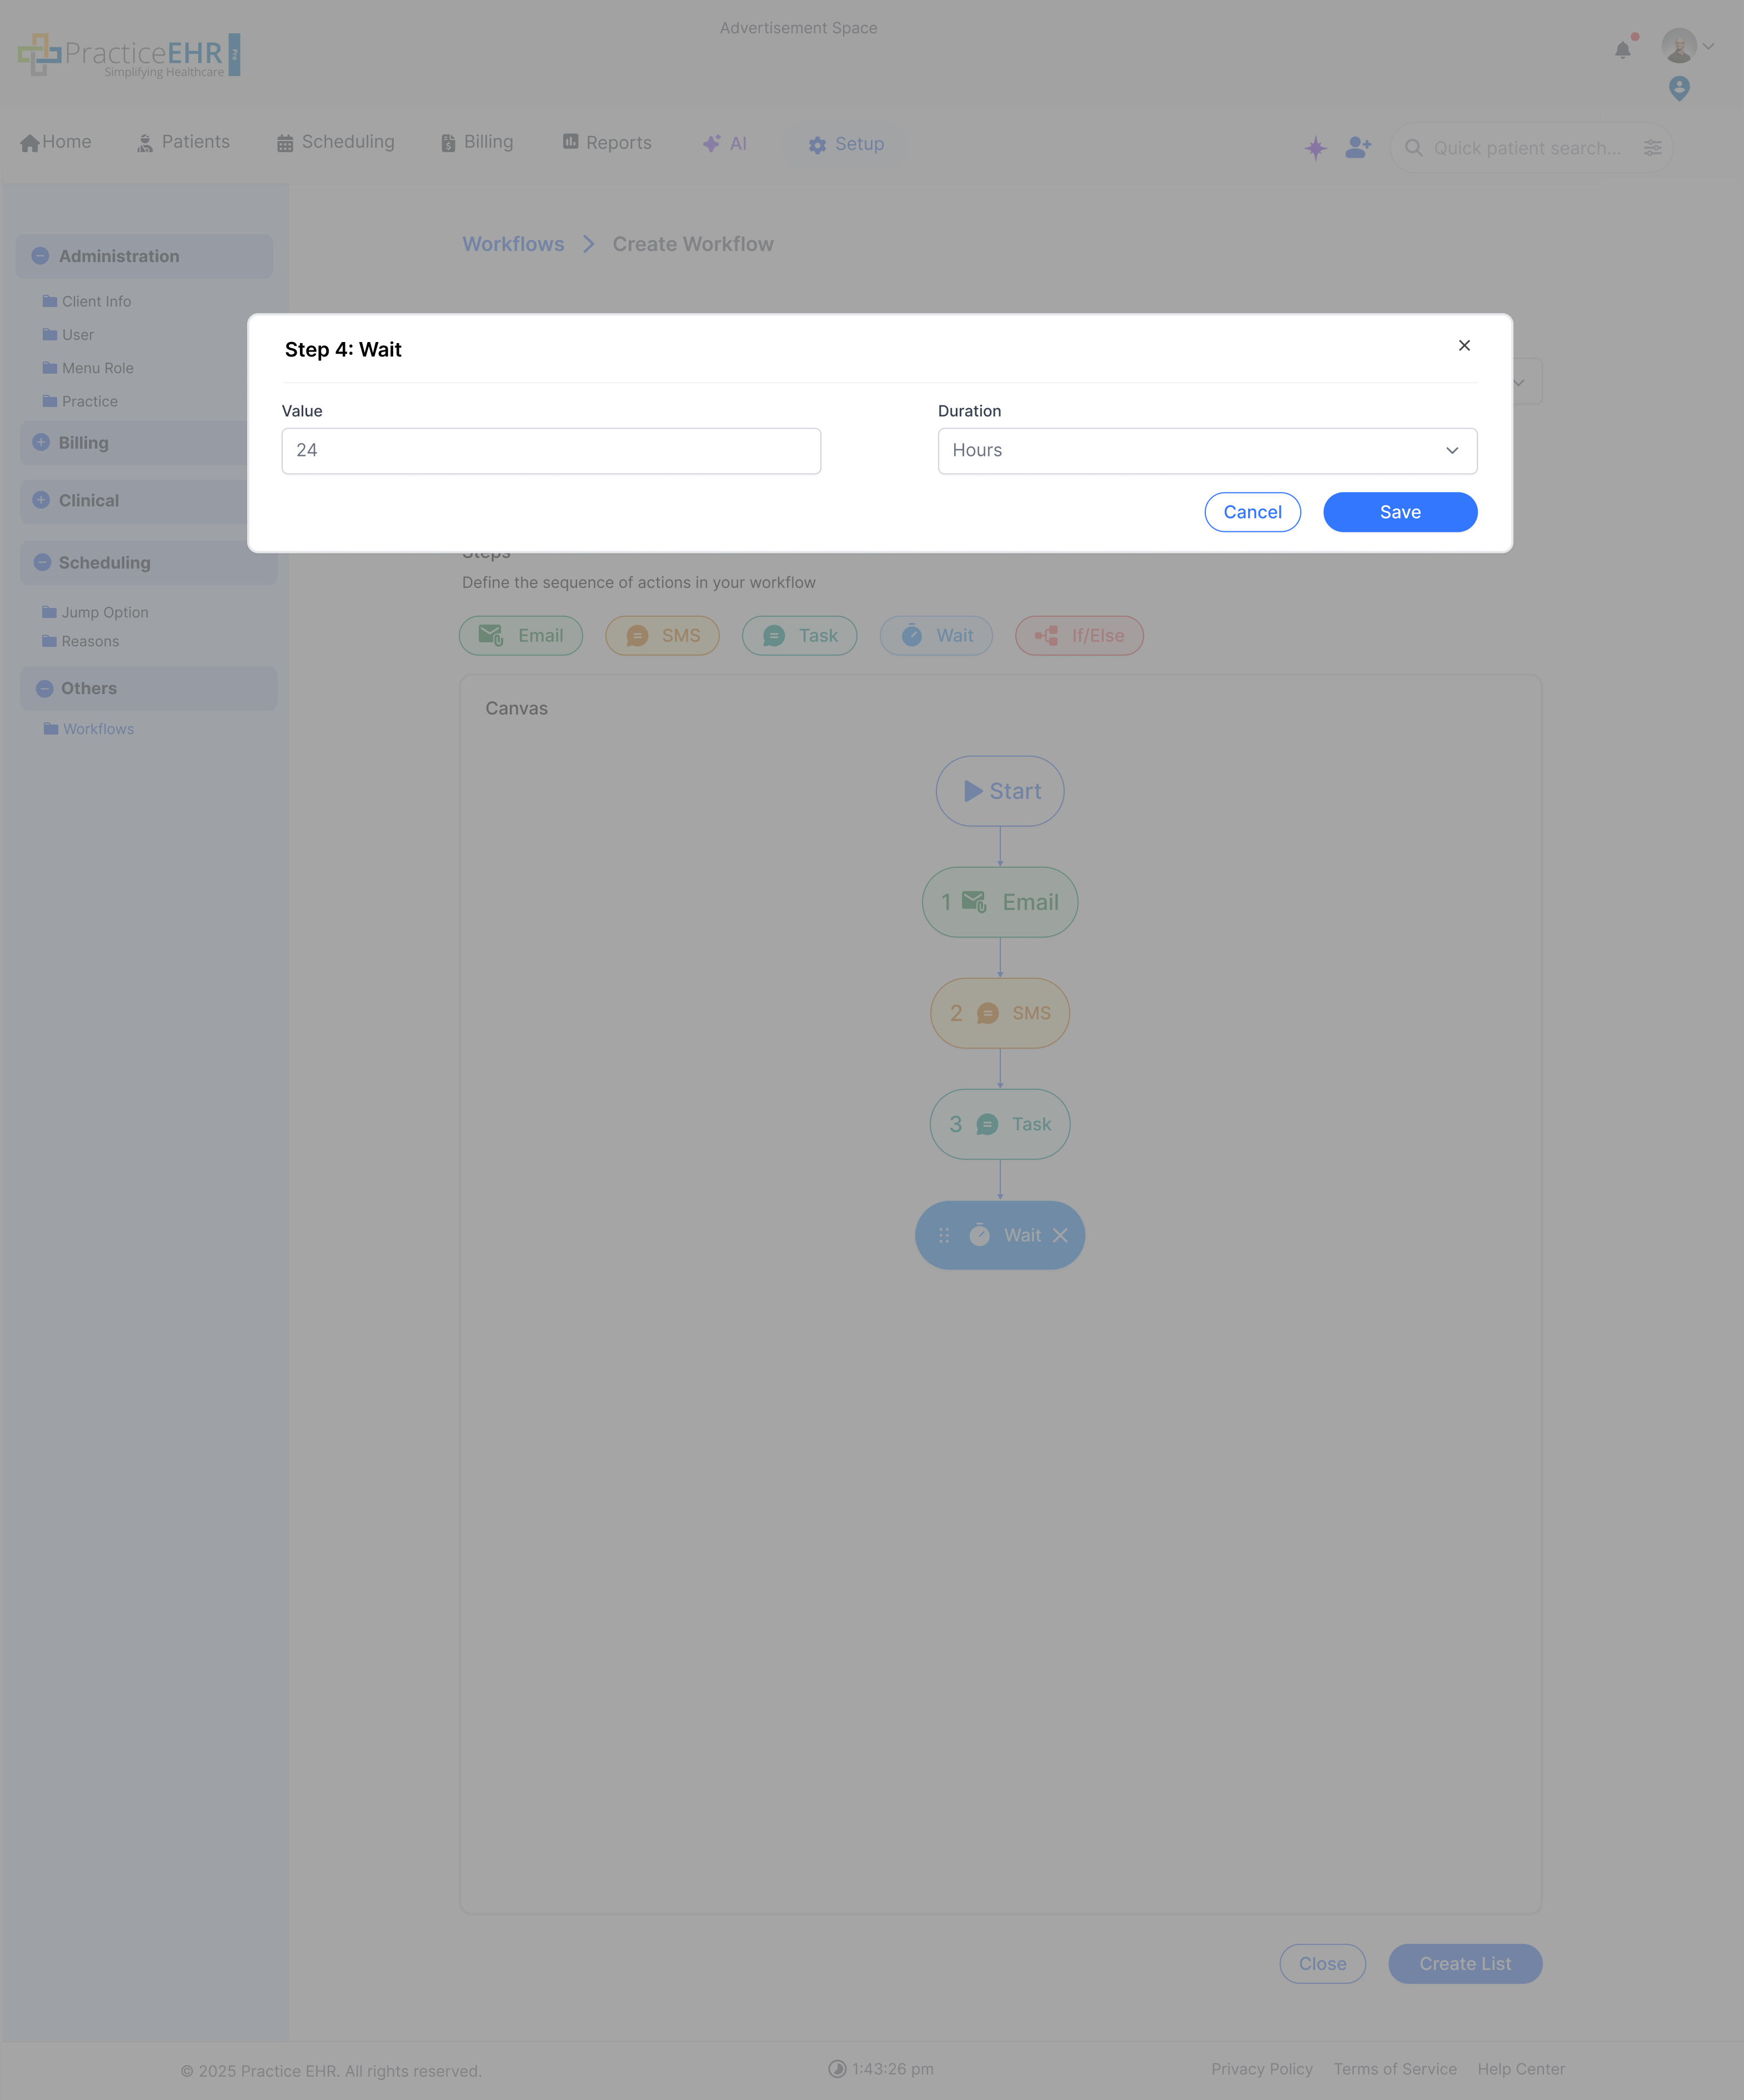
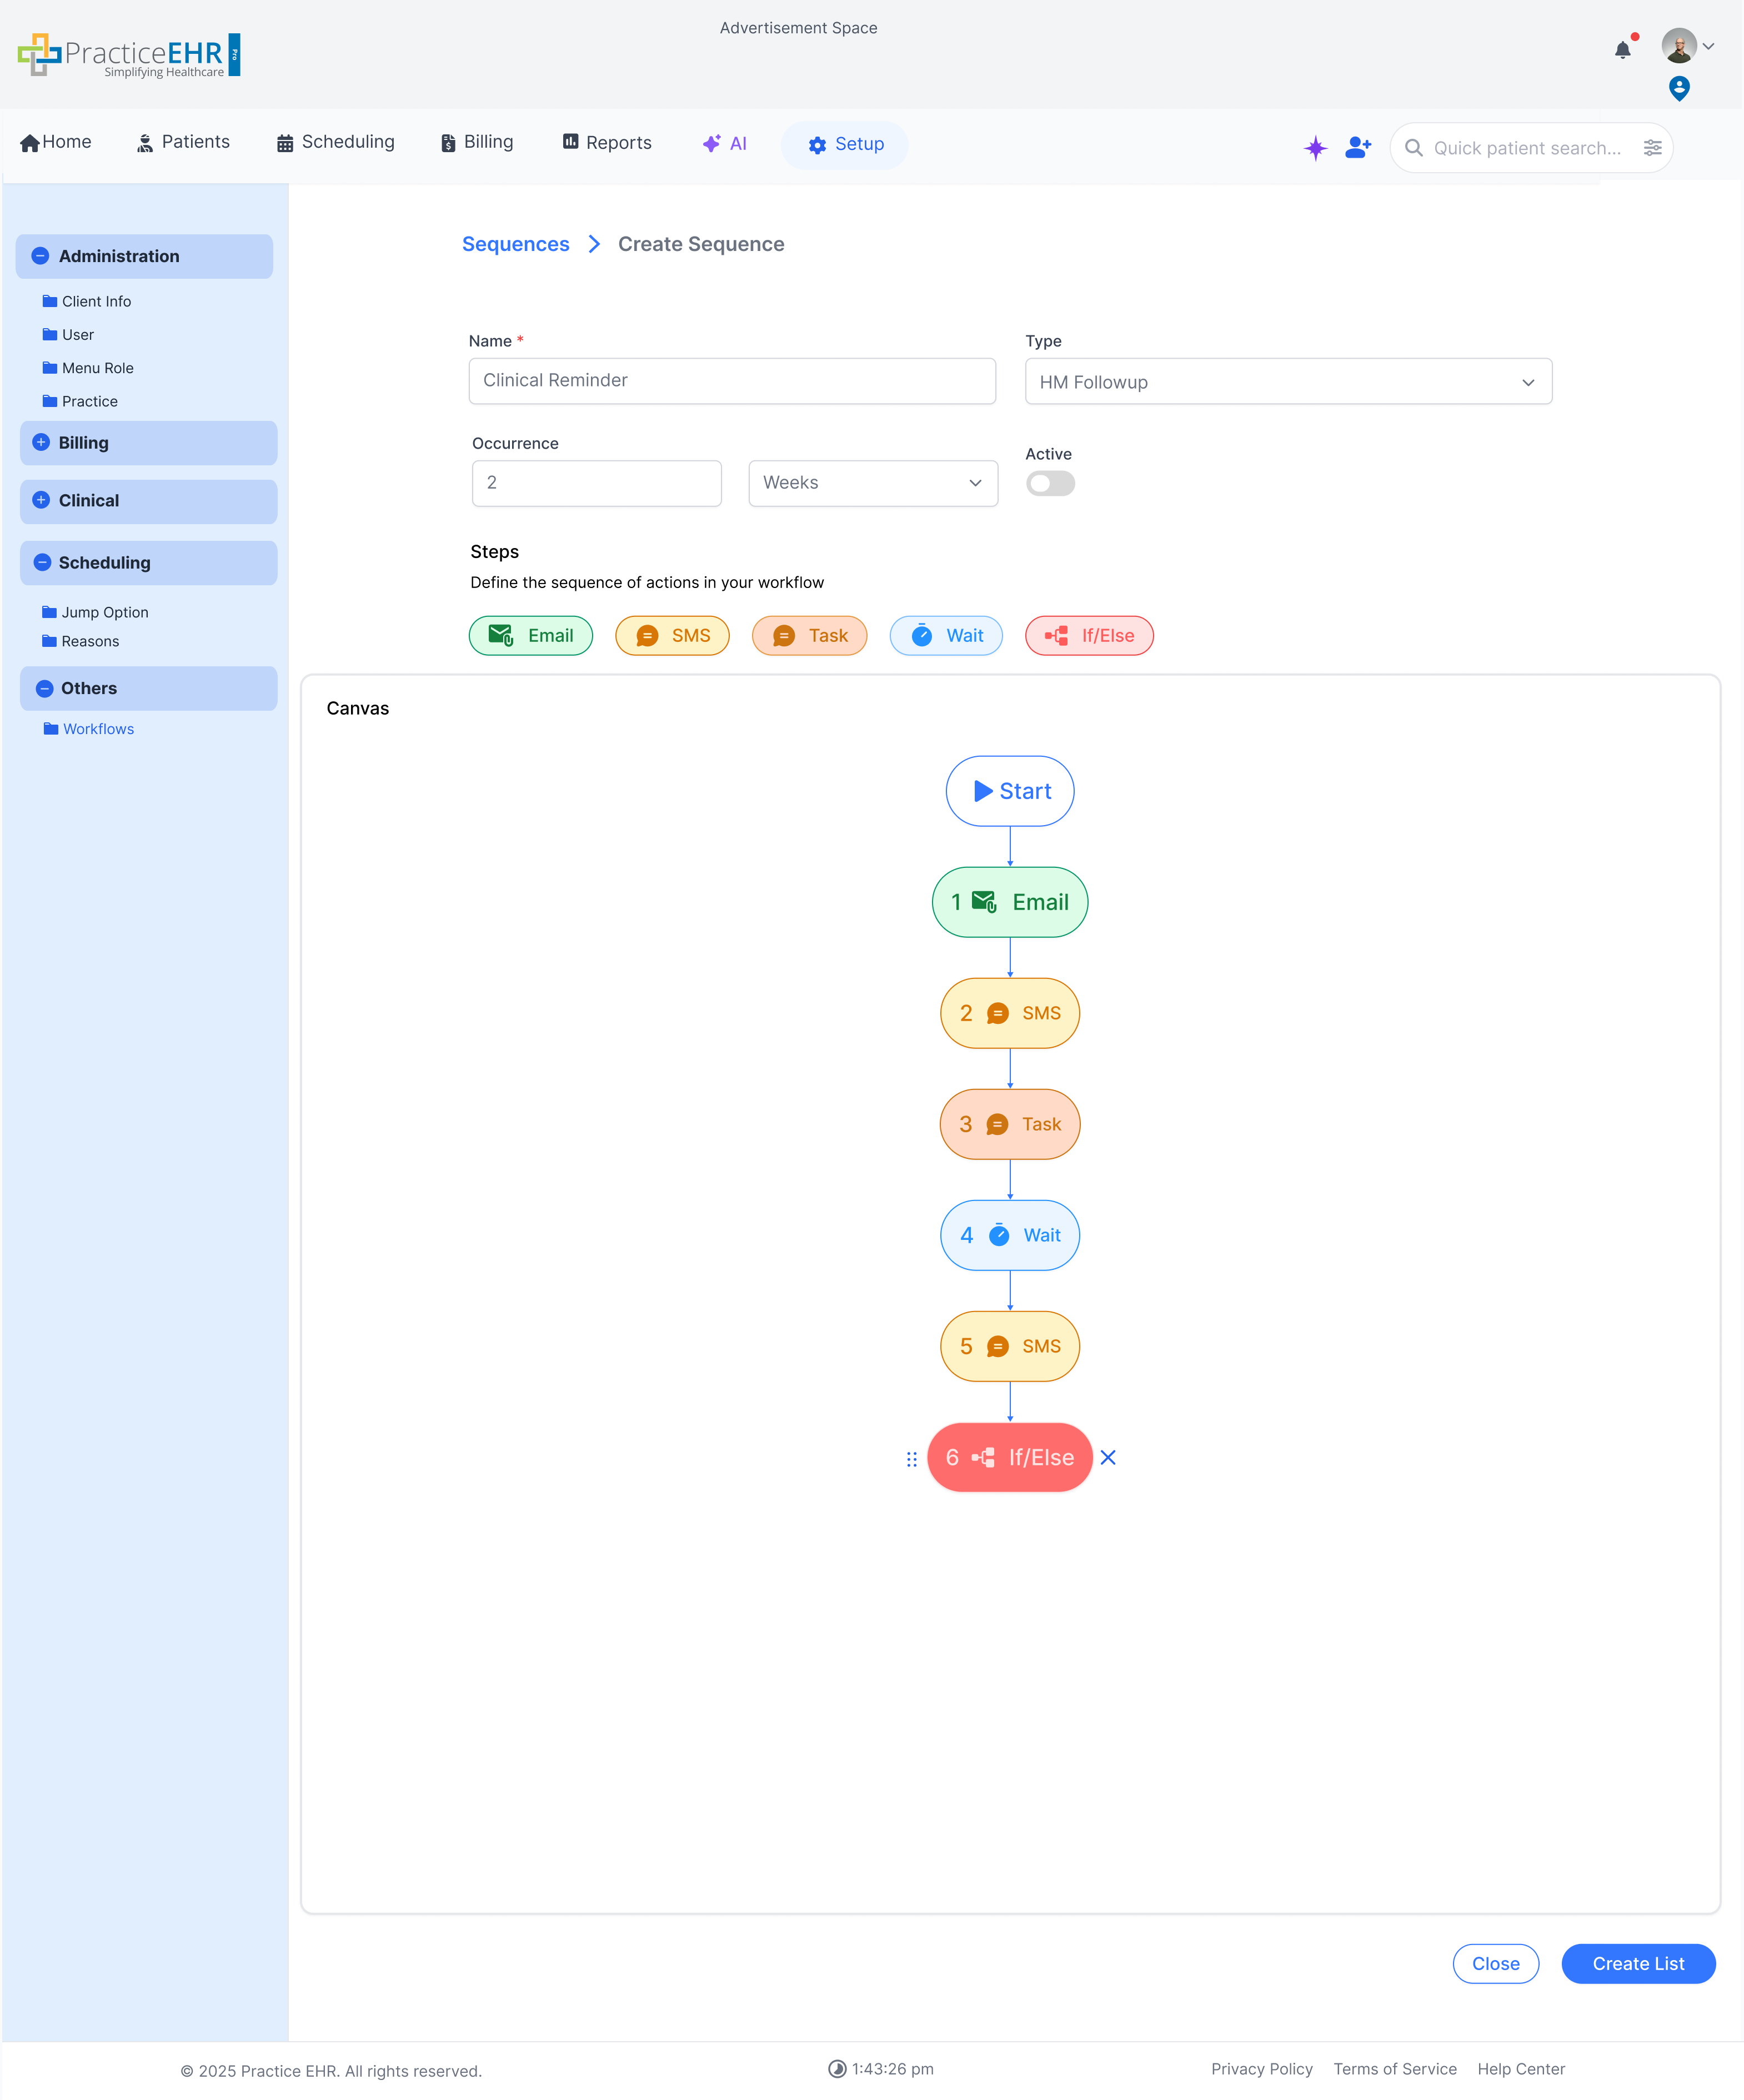
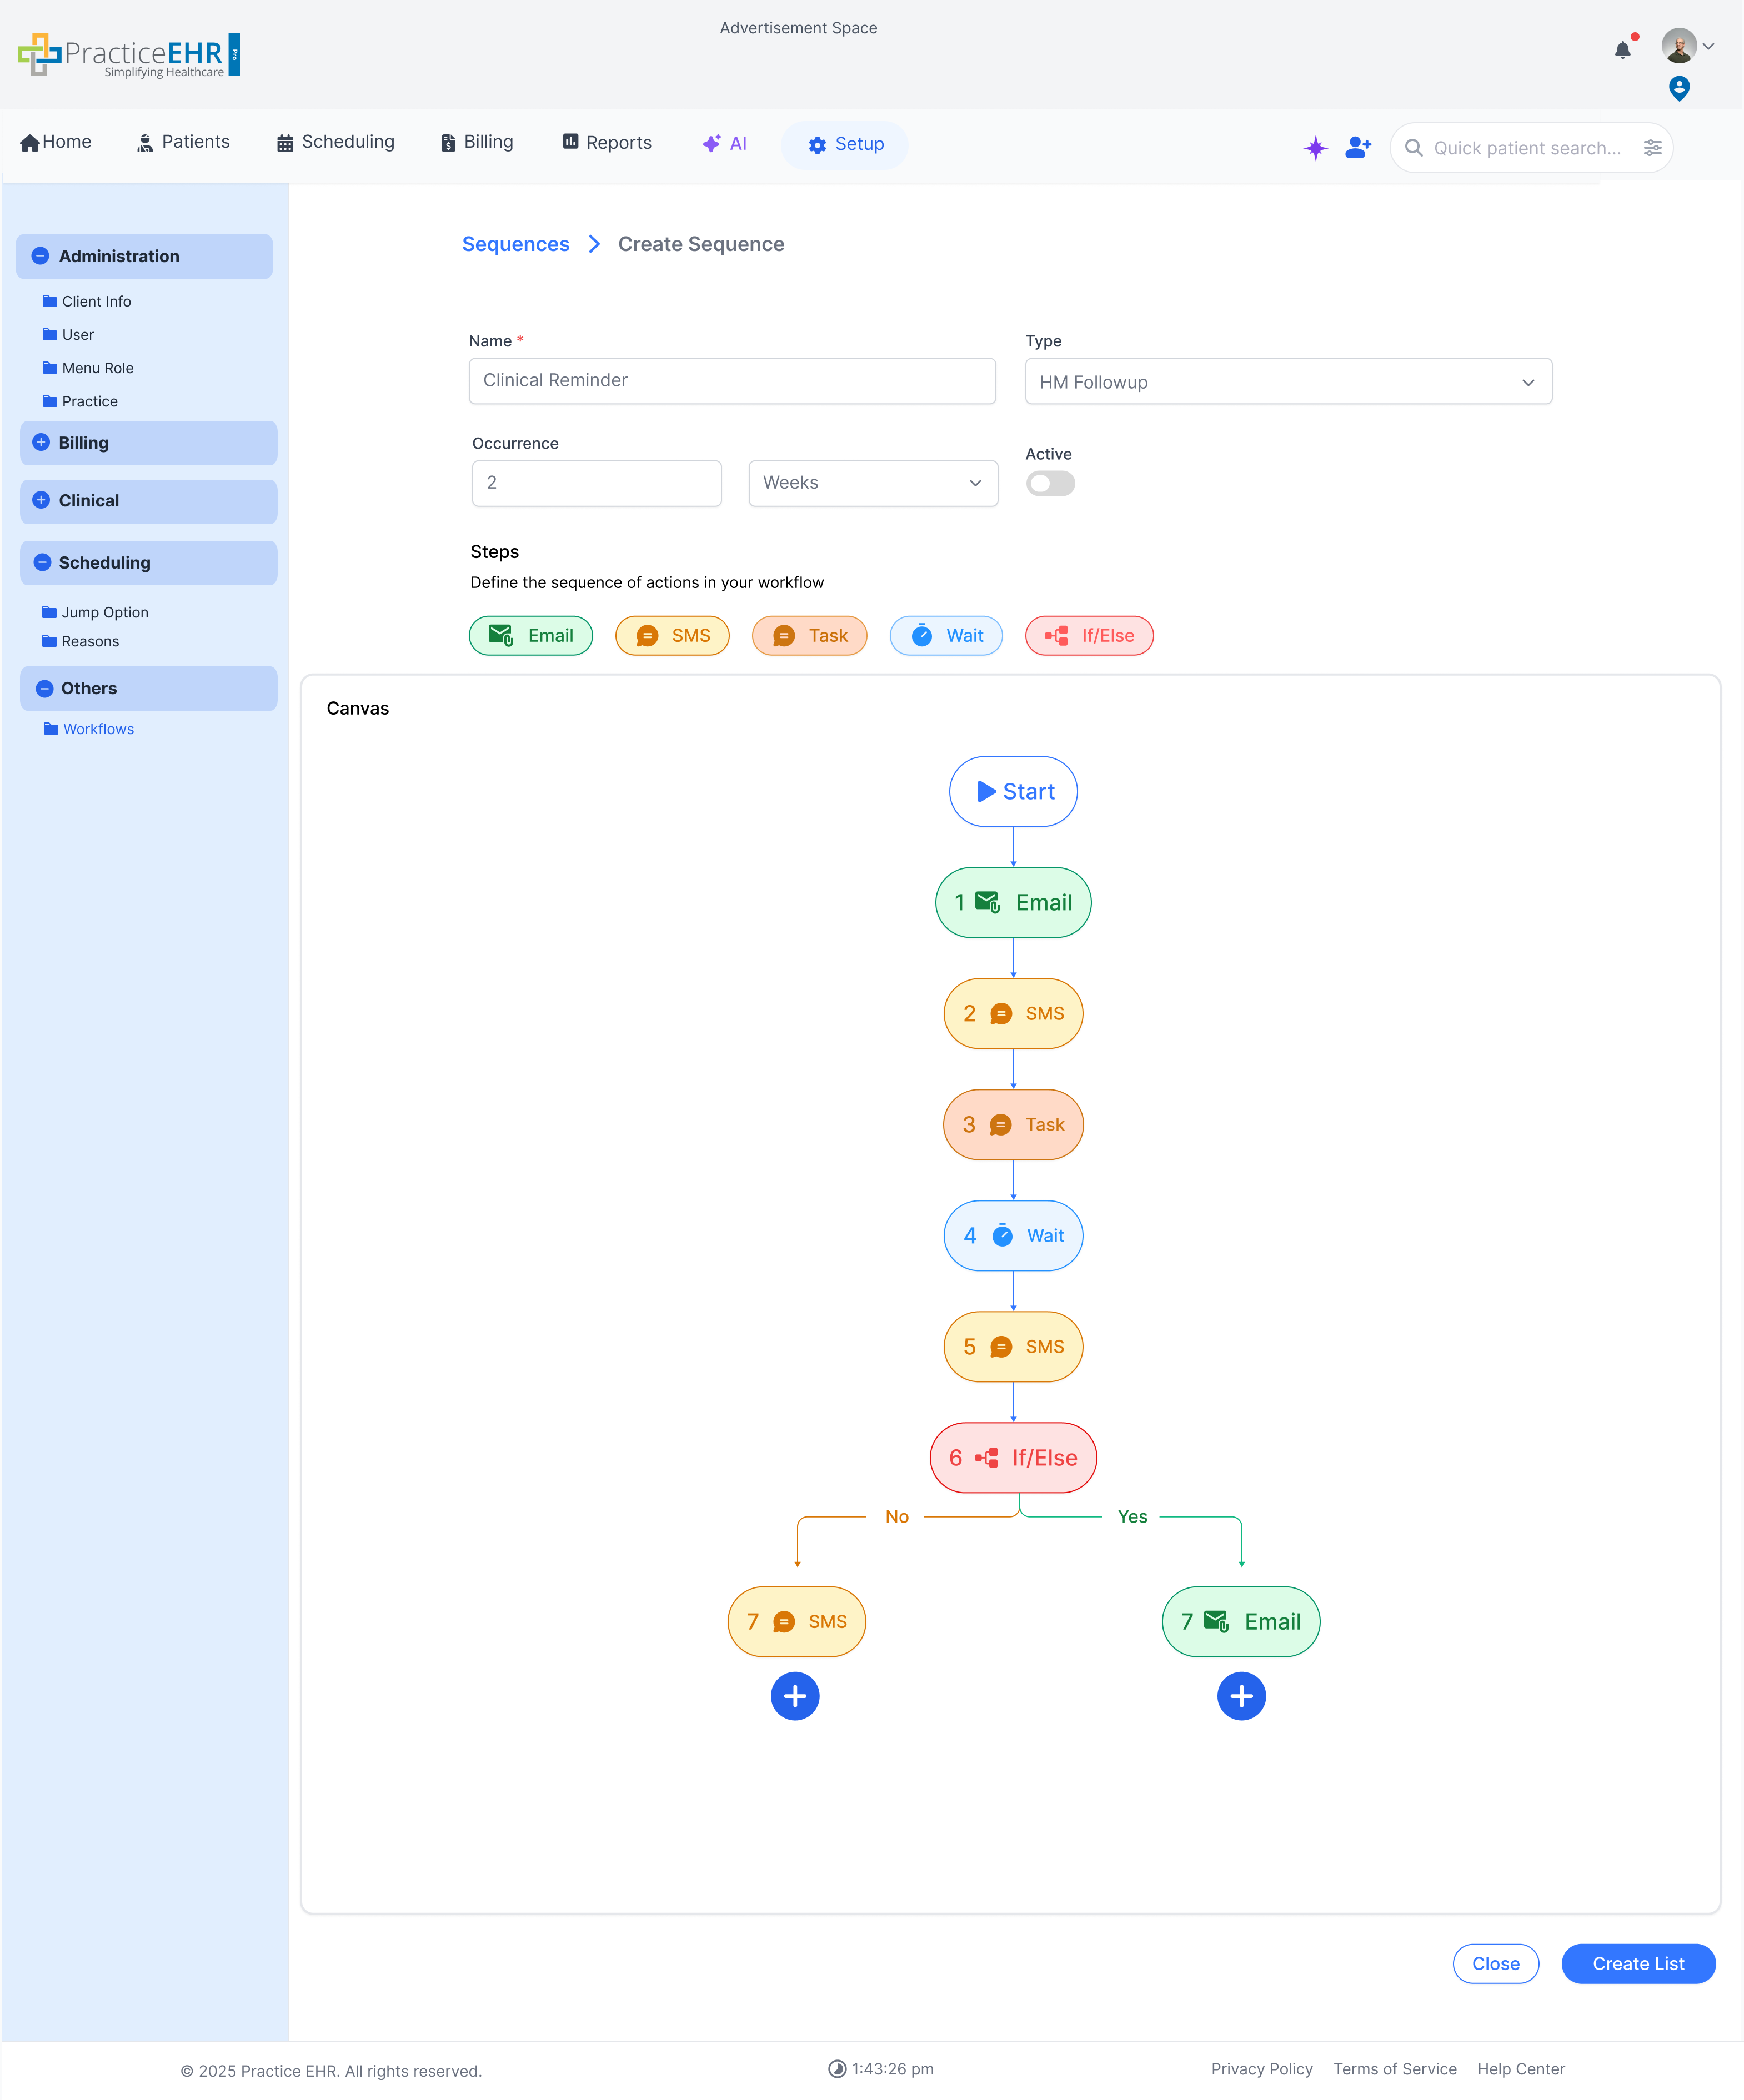
- Steps — add Email, SMS, Task, Wait, If/Else
- Canvas — steps appear here in a visual flow
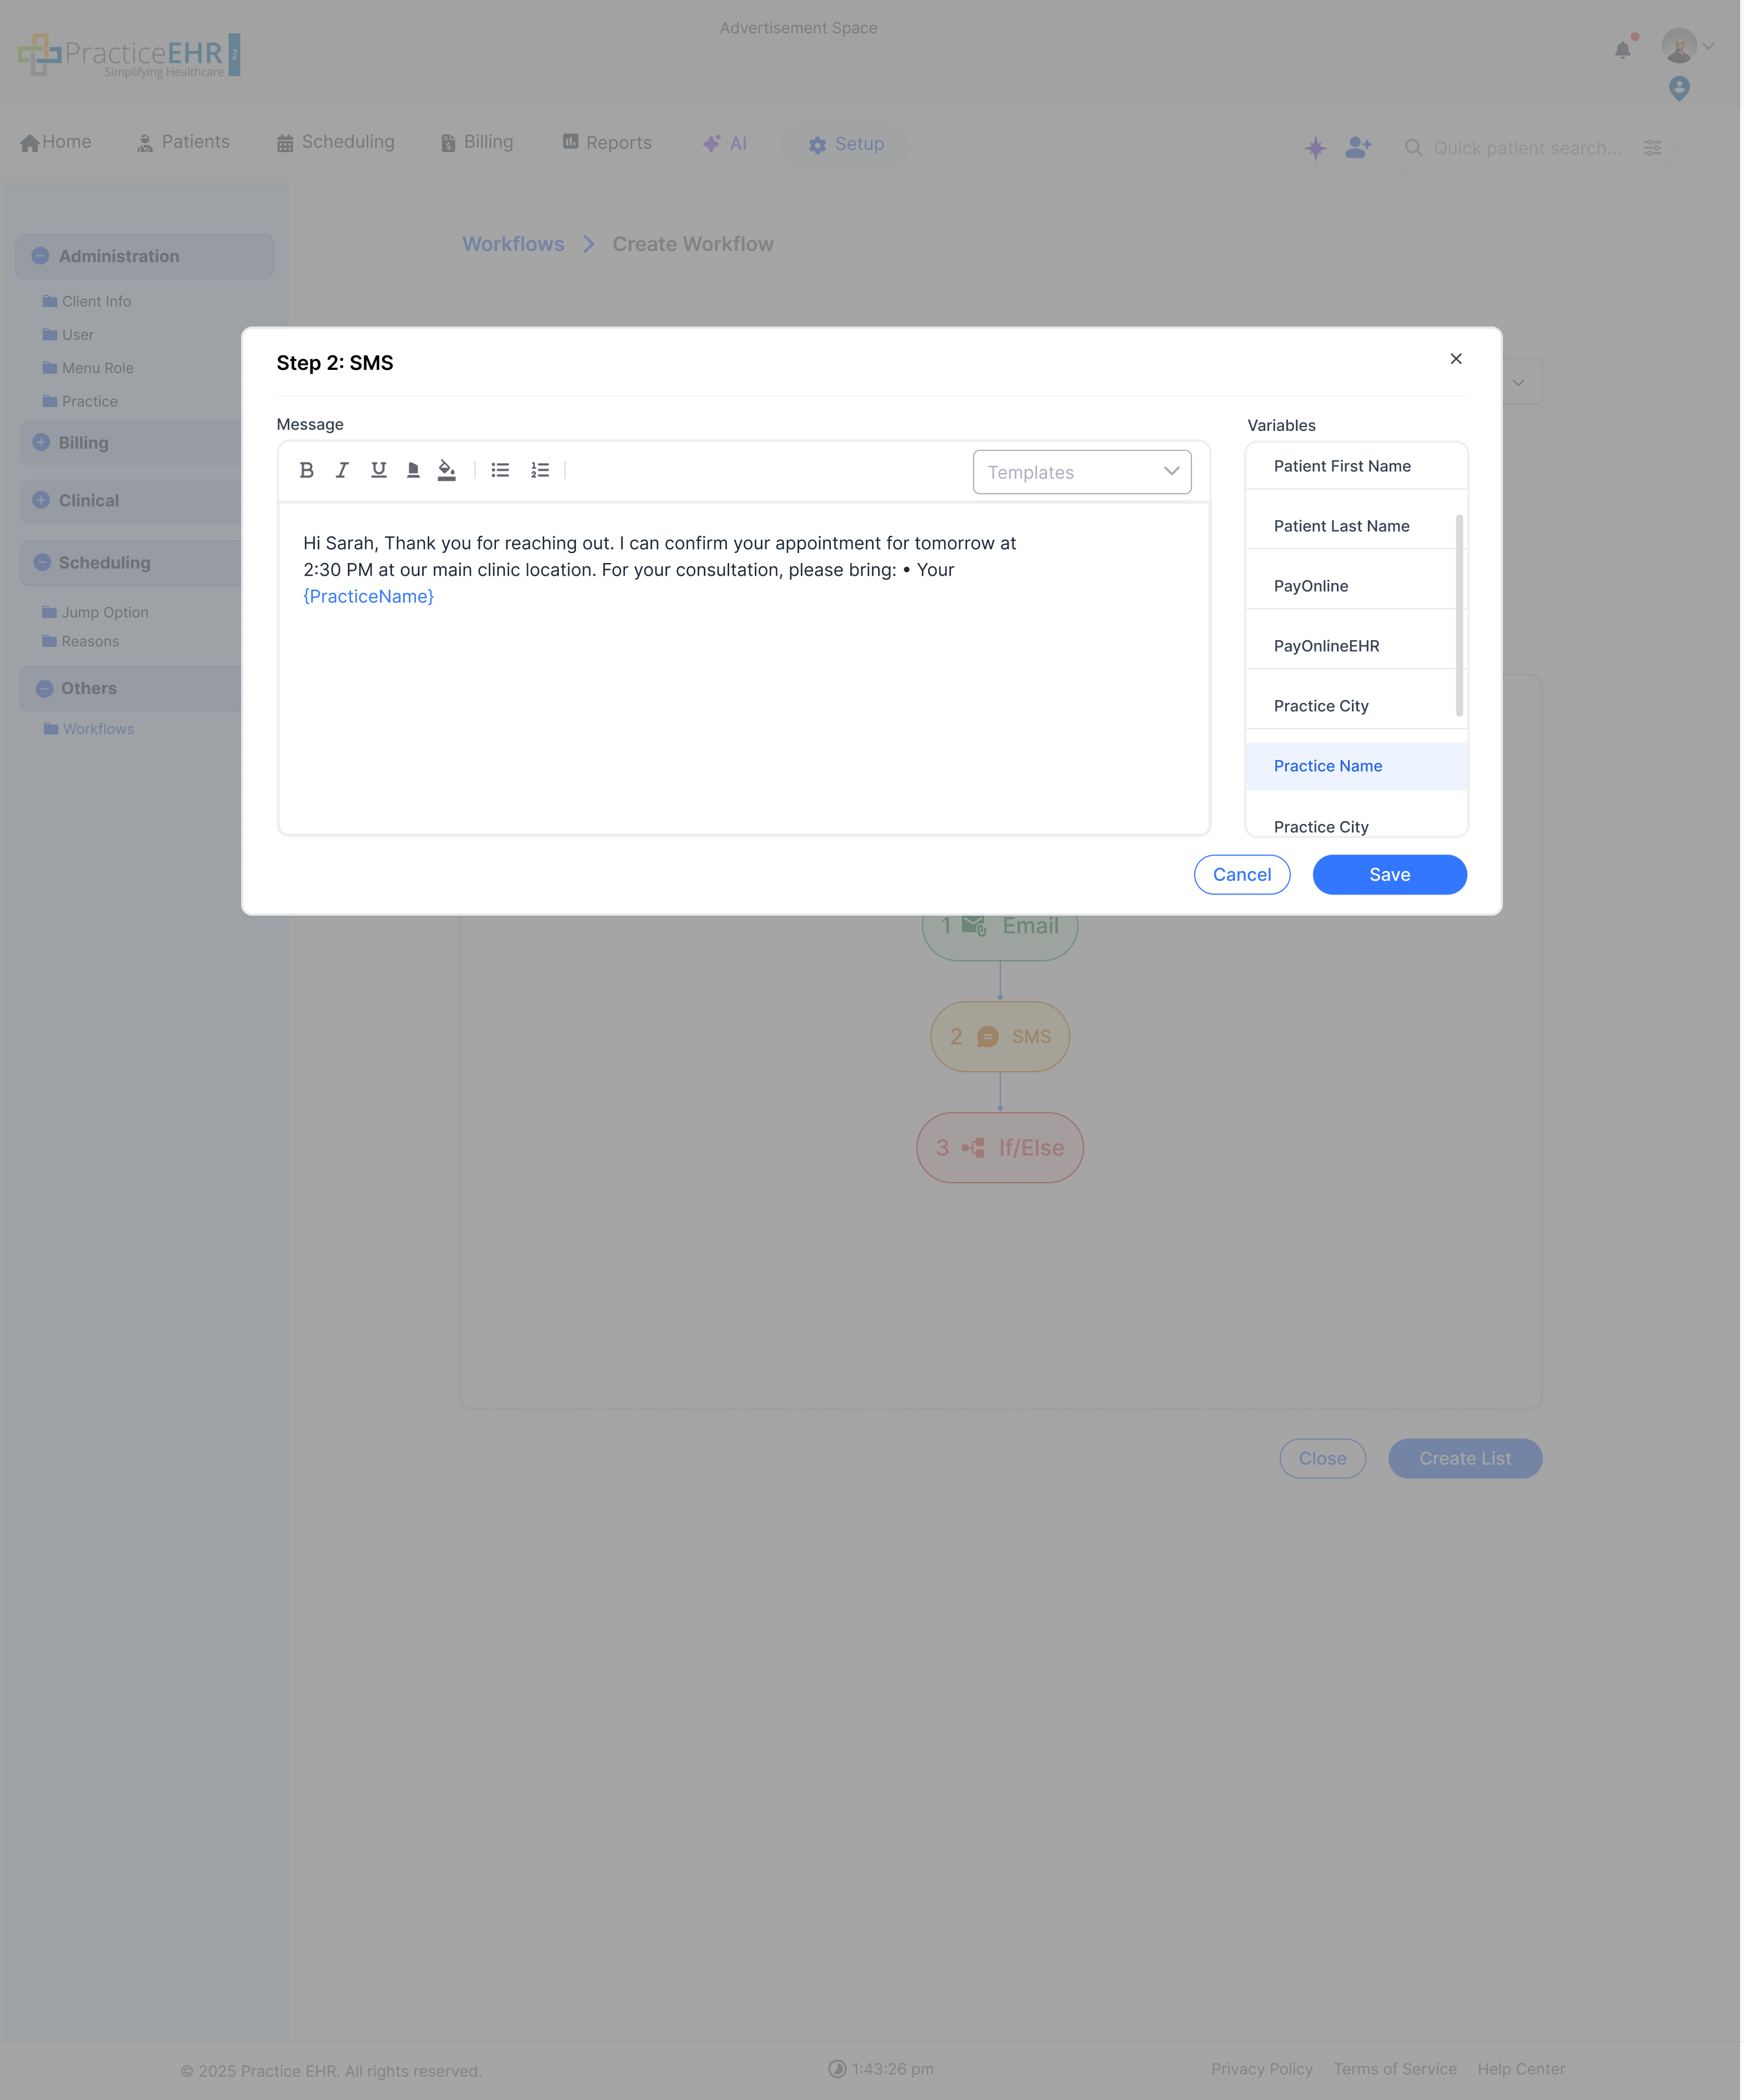
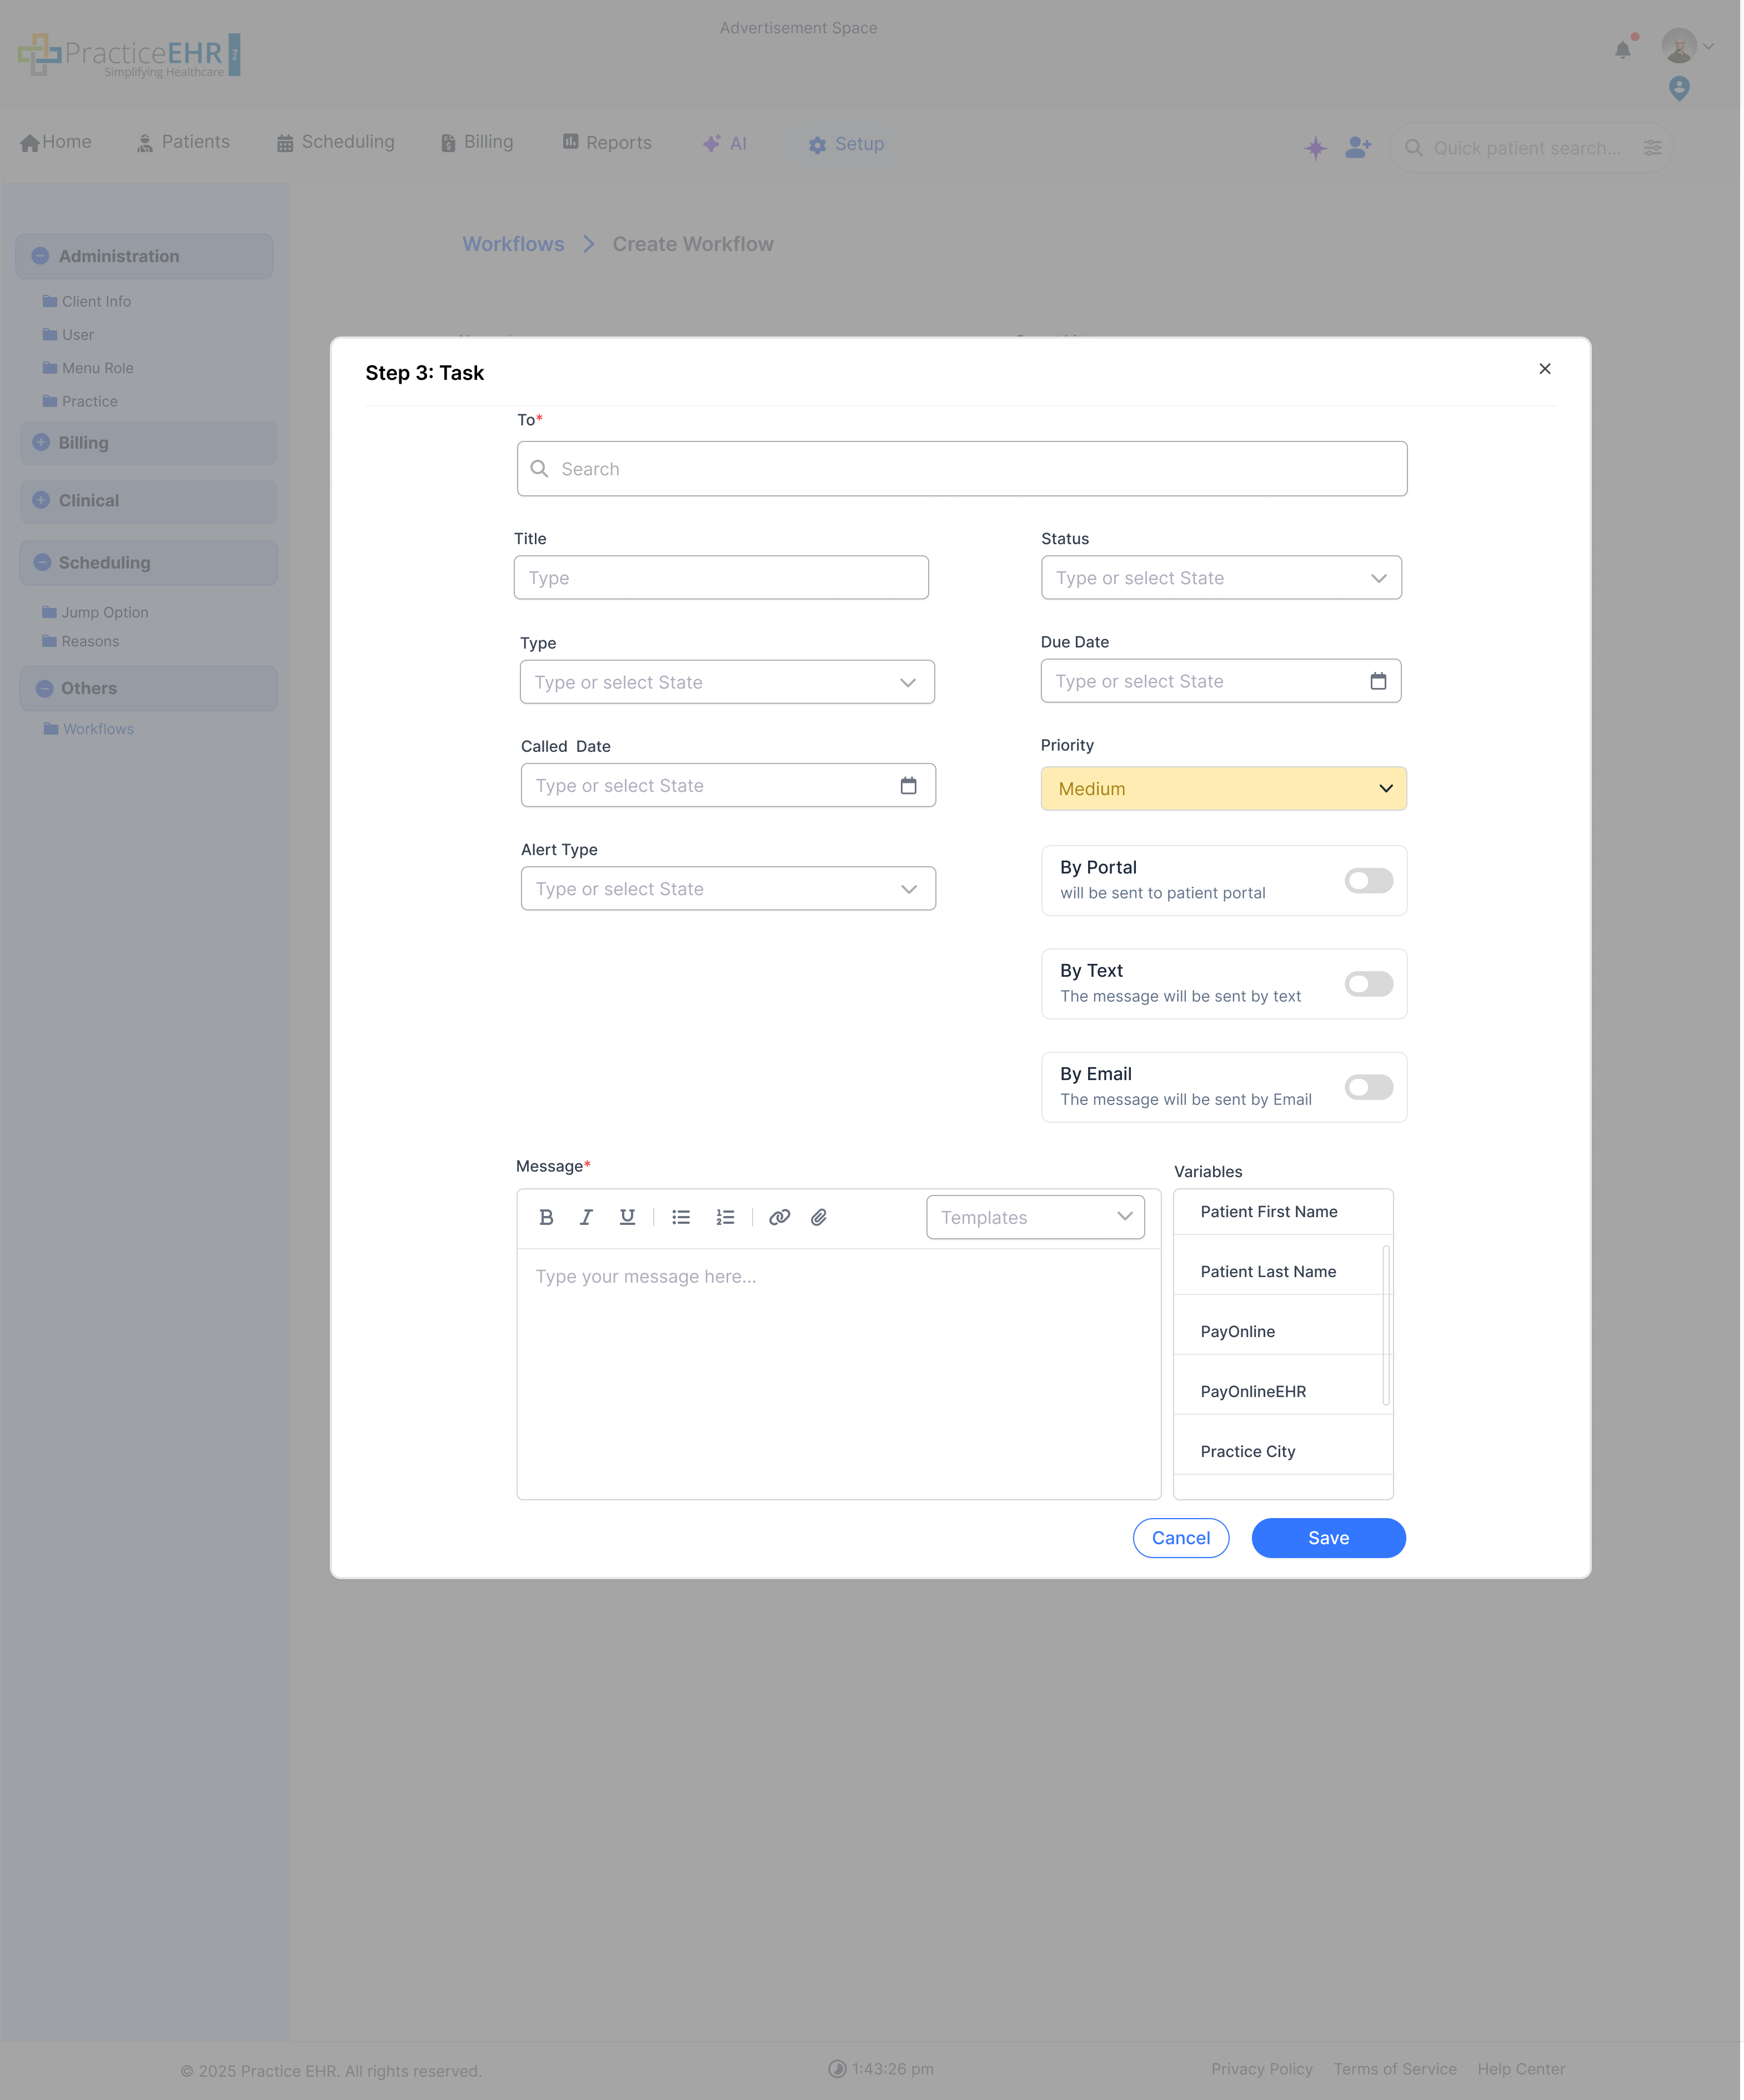
When the user clicks to add a step, a modal first prompts for details. For example, clicking SMS opens a modal requiring a message body. For an Email step, subject and body inputs are shown.
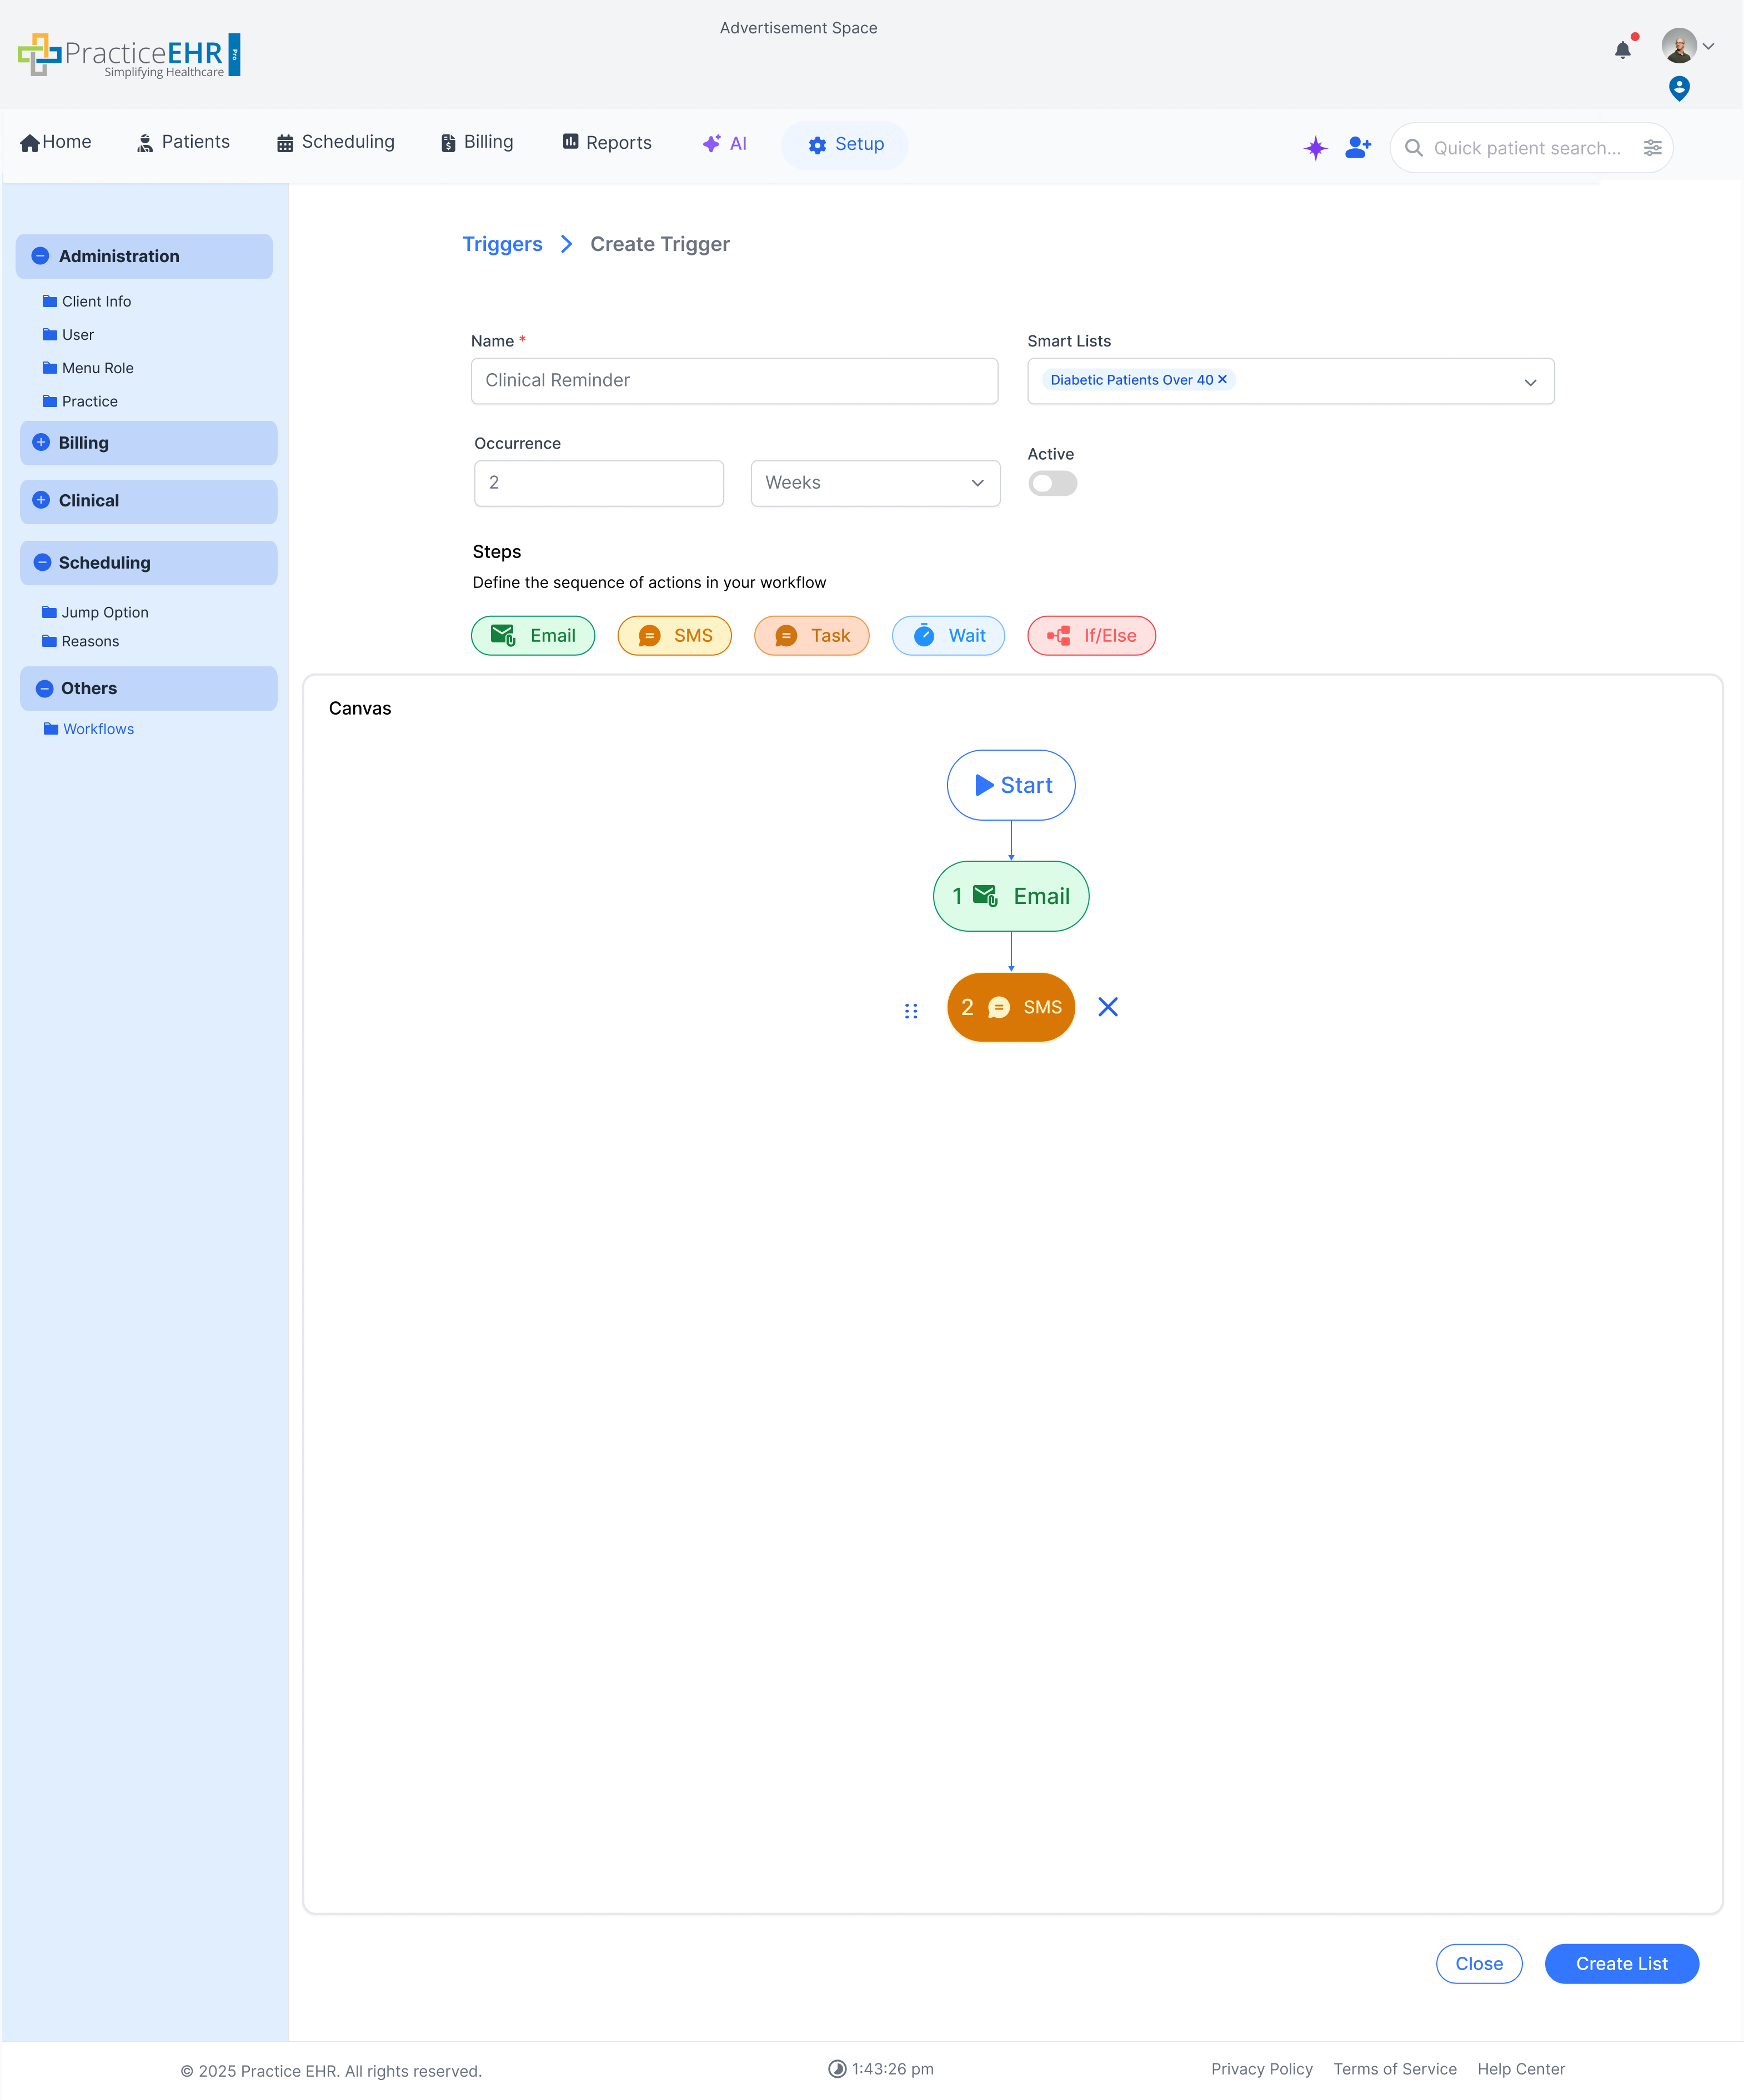
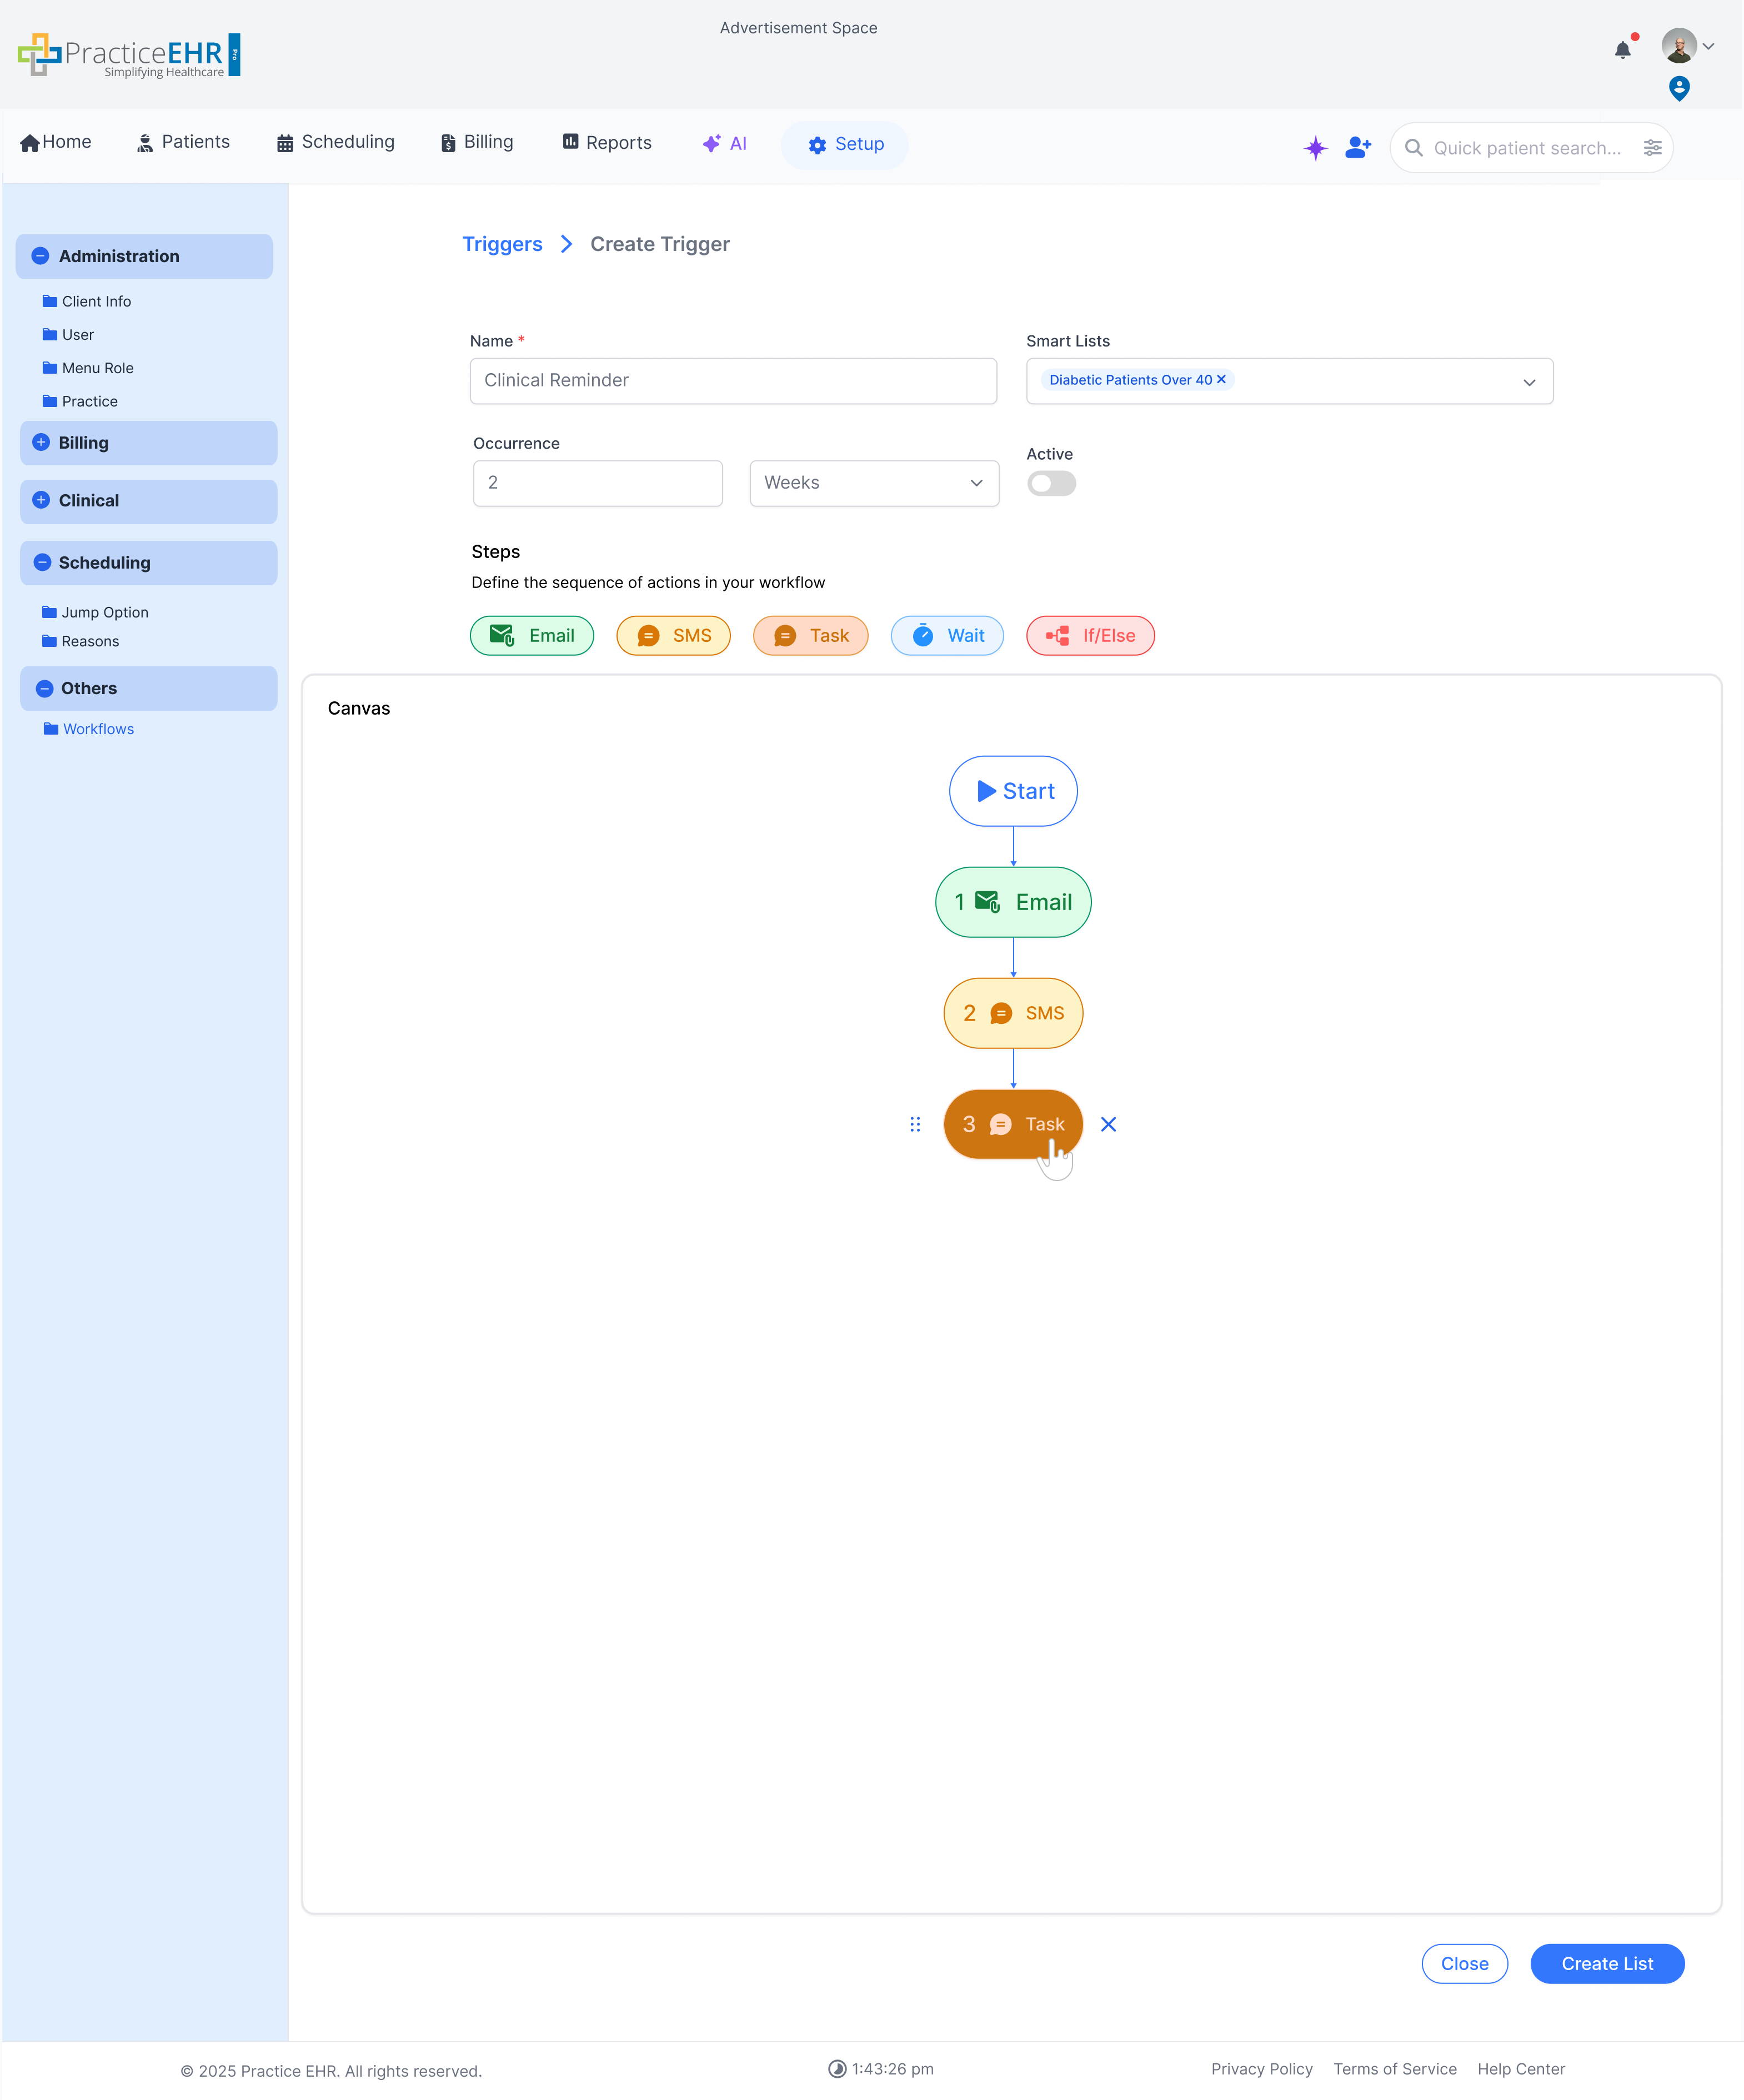
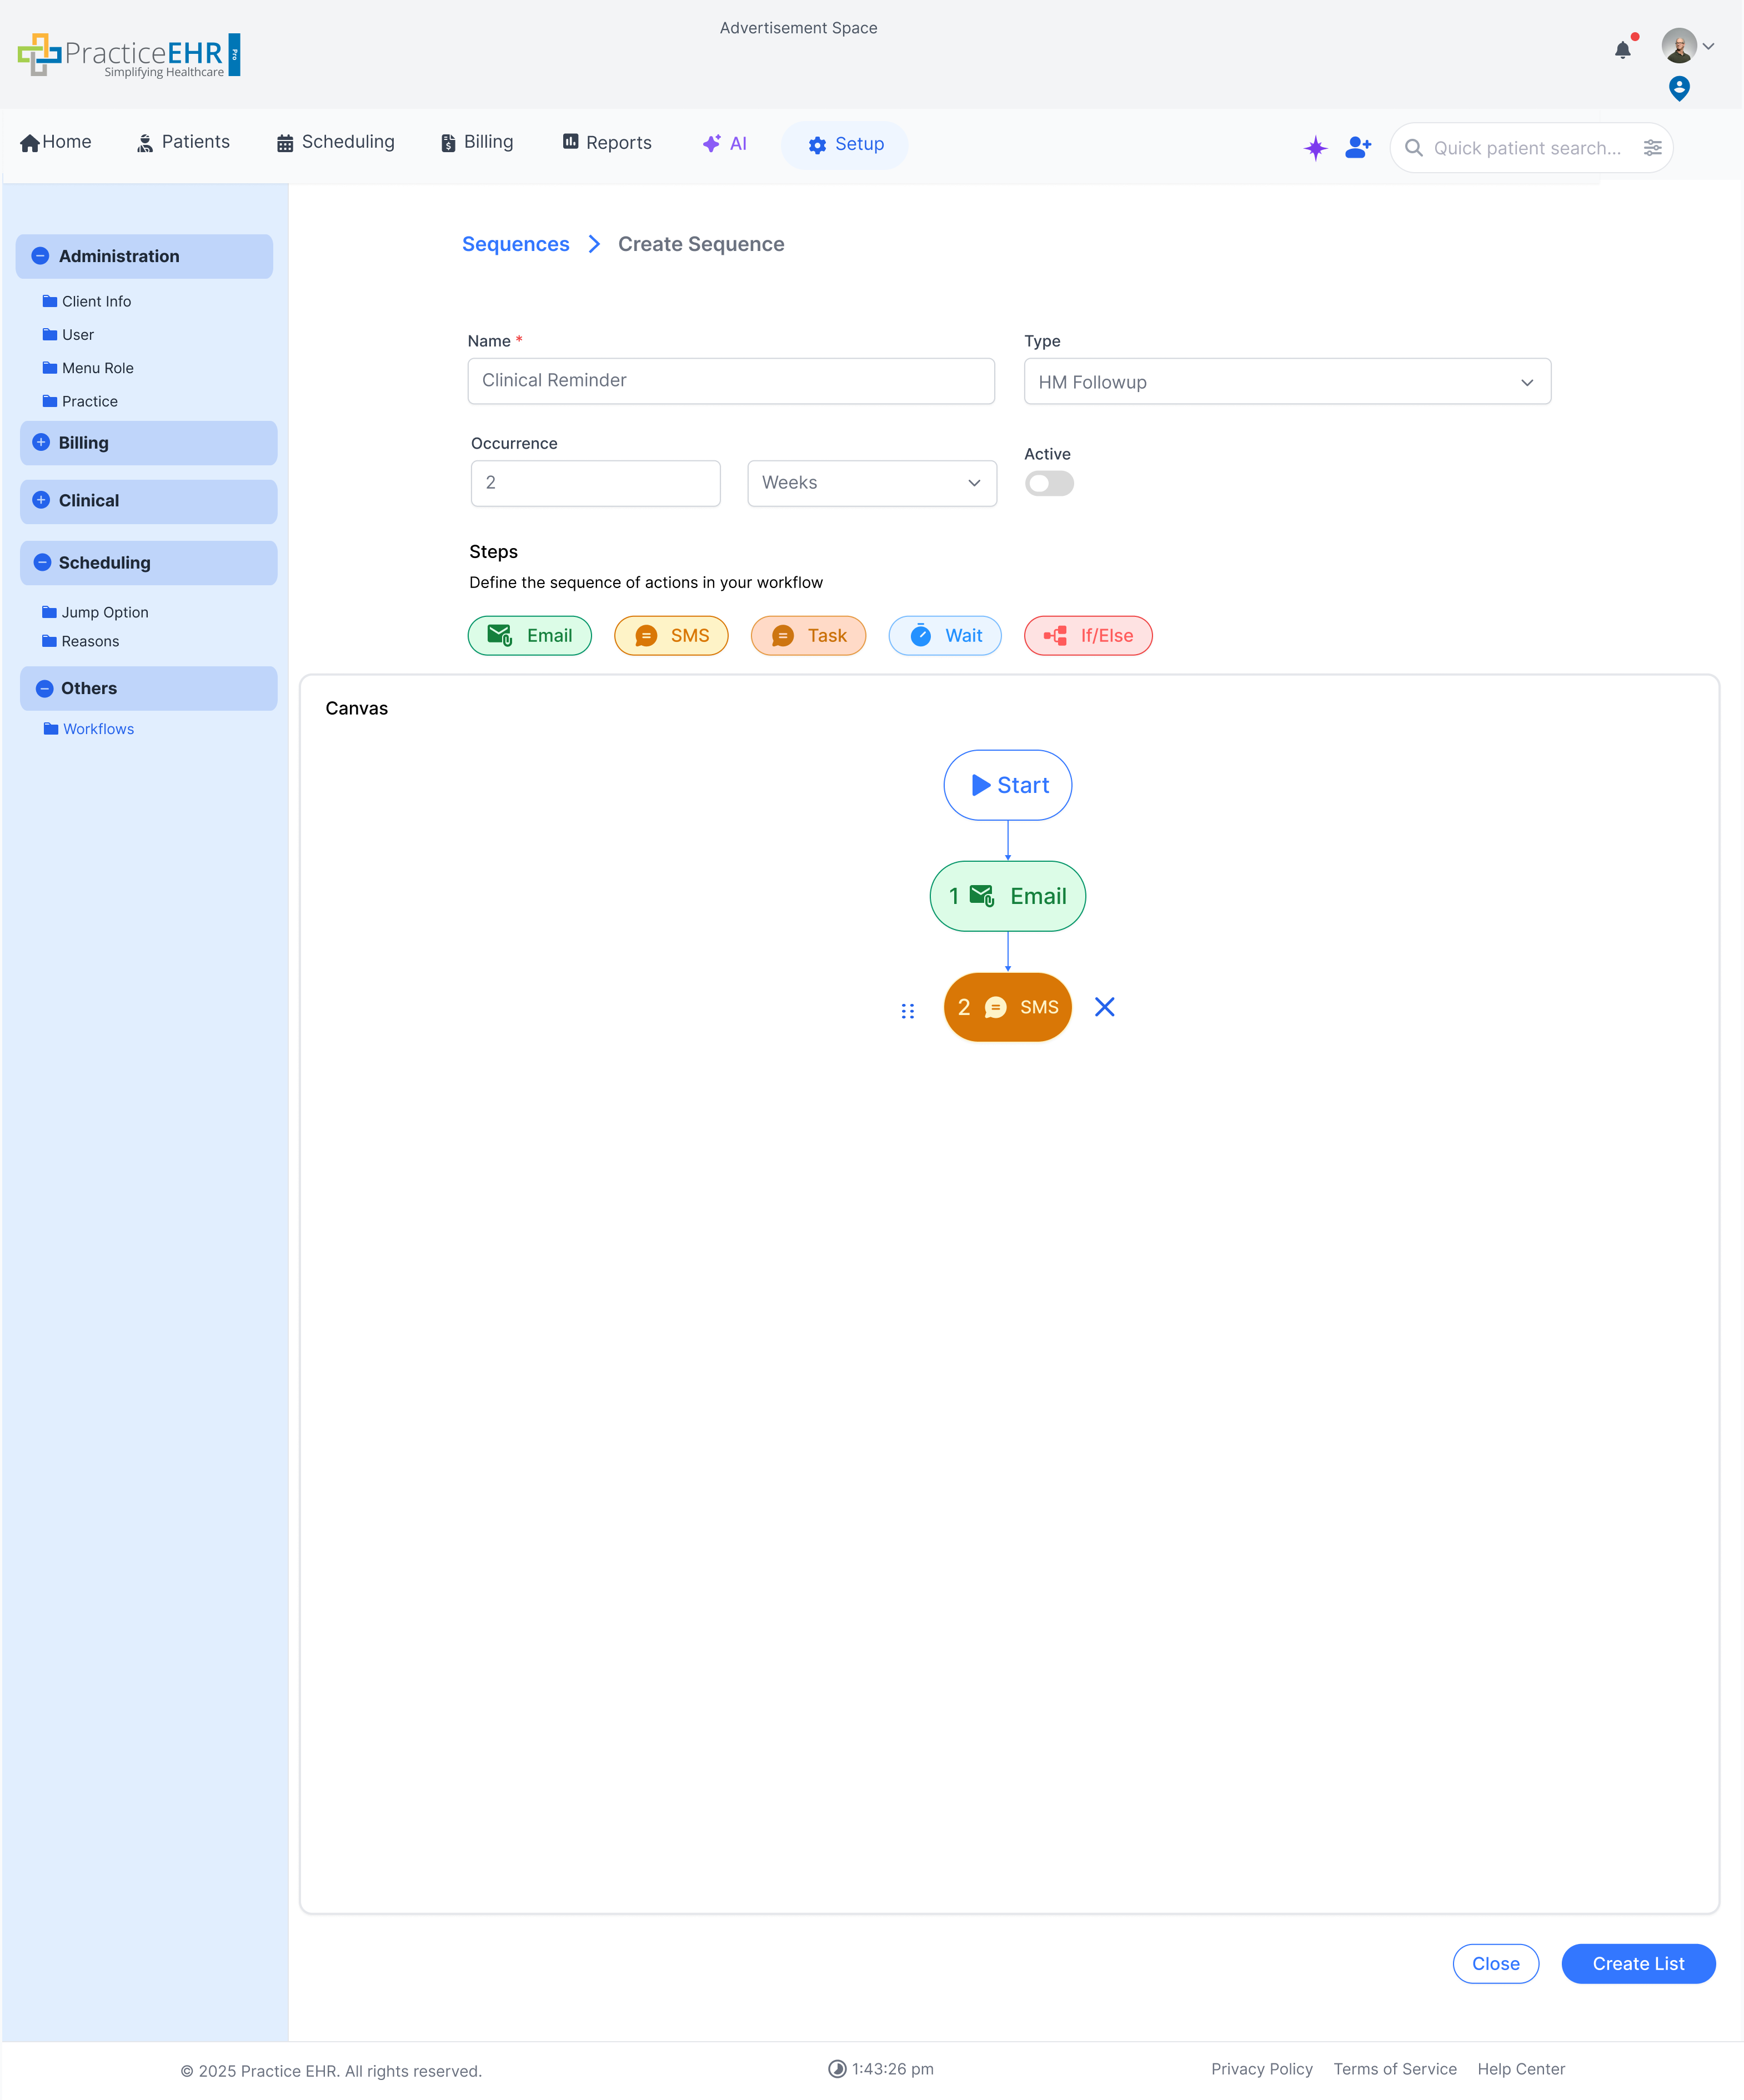
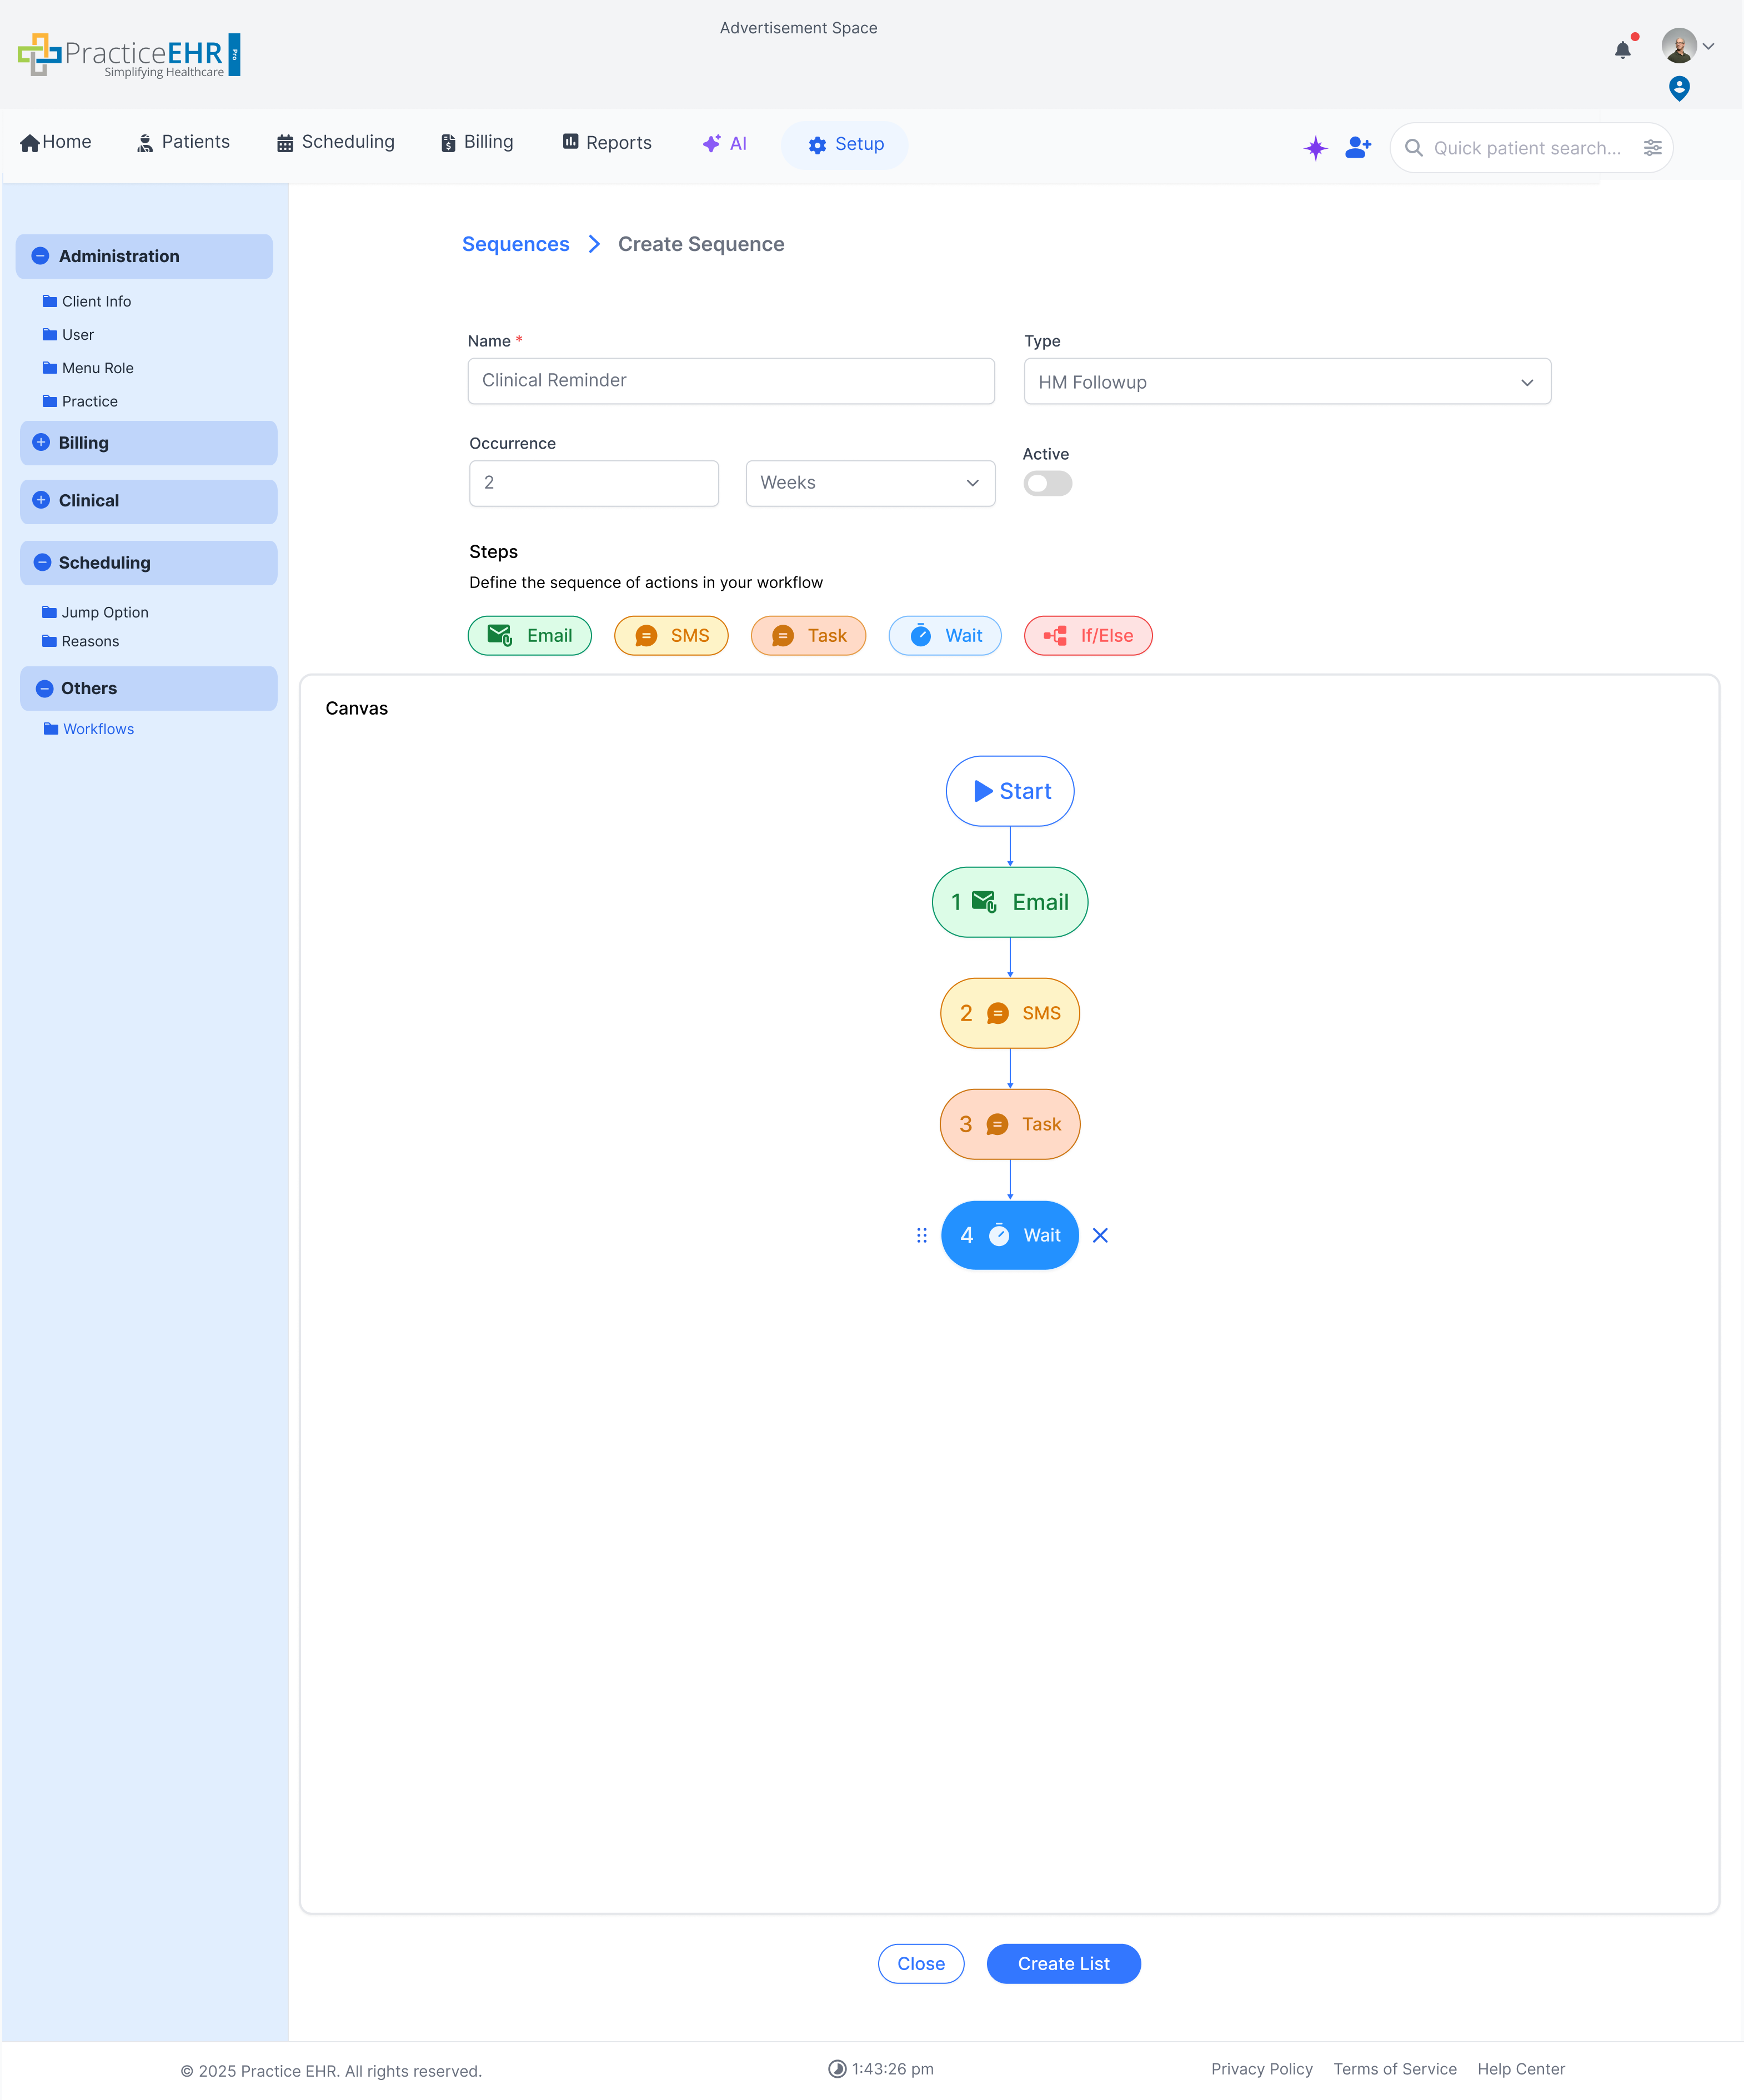
When hovering on a step in the canvas, it becomes darker and options to rearrange or delete appear beside the step.
Patient Workflow
This screen appears inside the patient chart (Patients → Messages → Workflows). It uses the Auto Search Grid pattern to show which workflows the patient is enrolled in and lets you add them to new workflows.
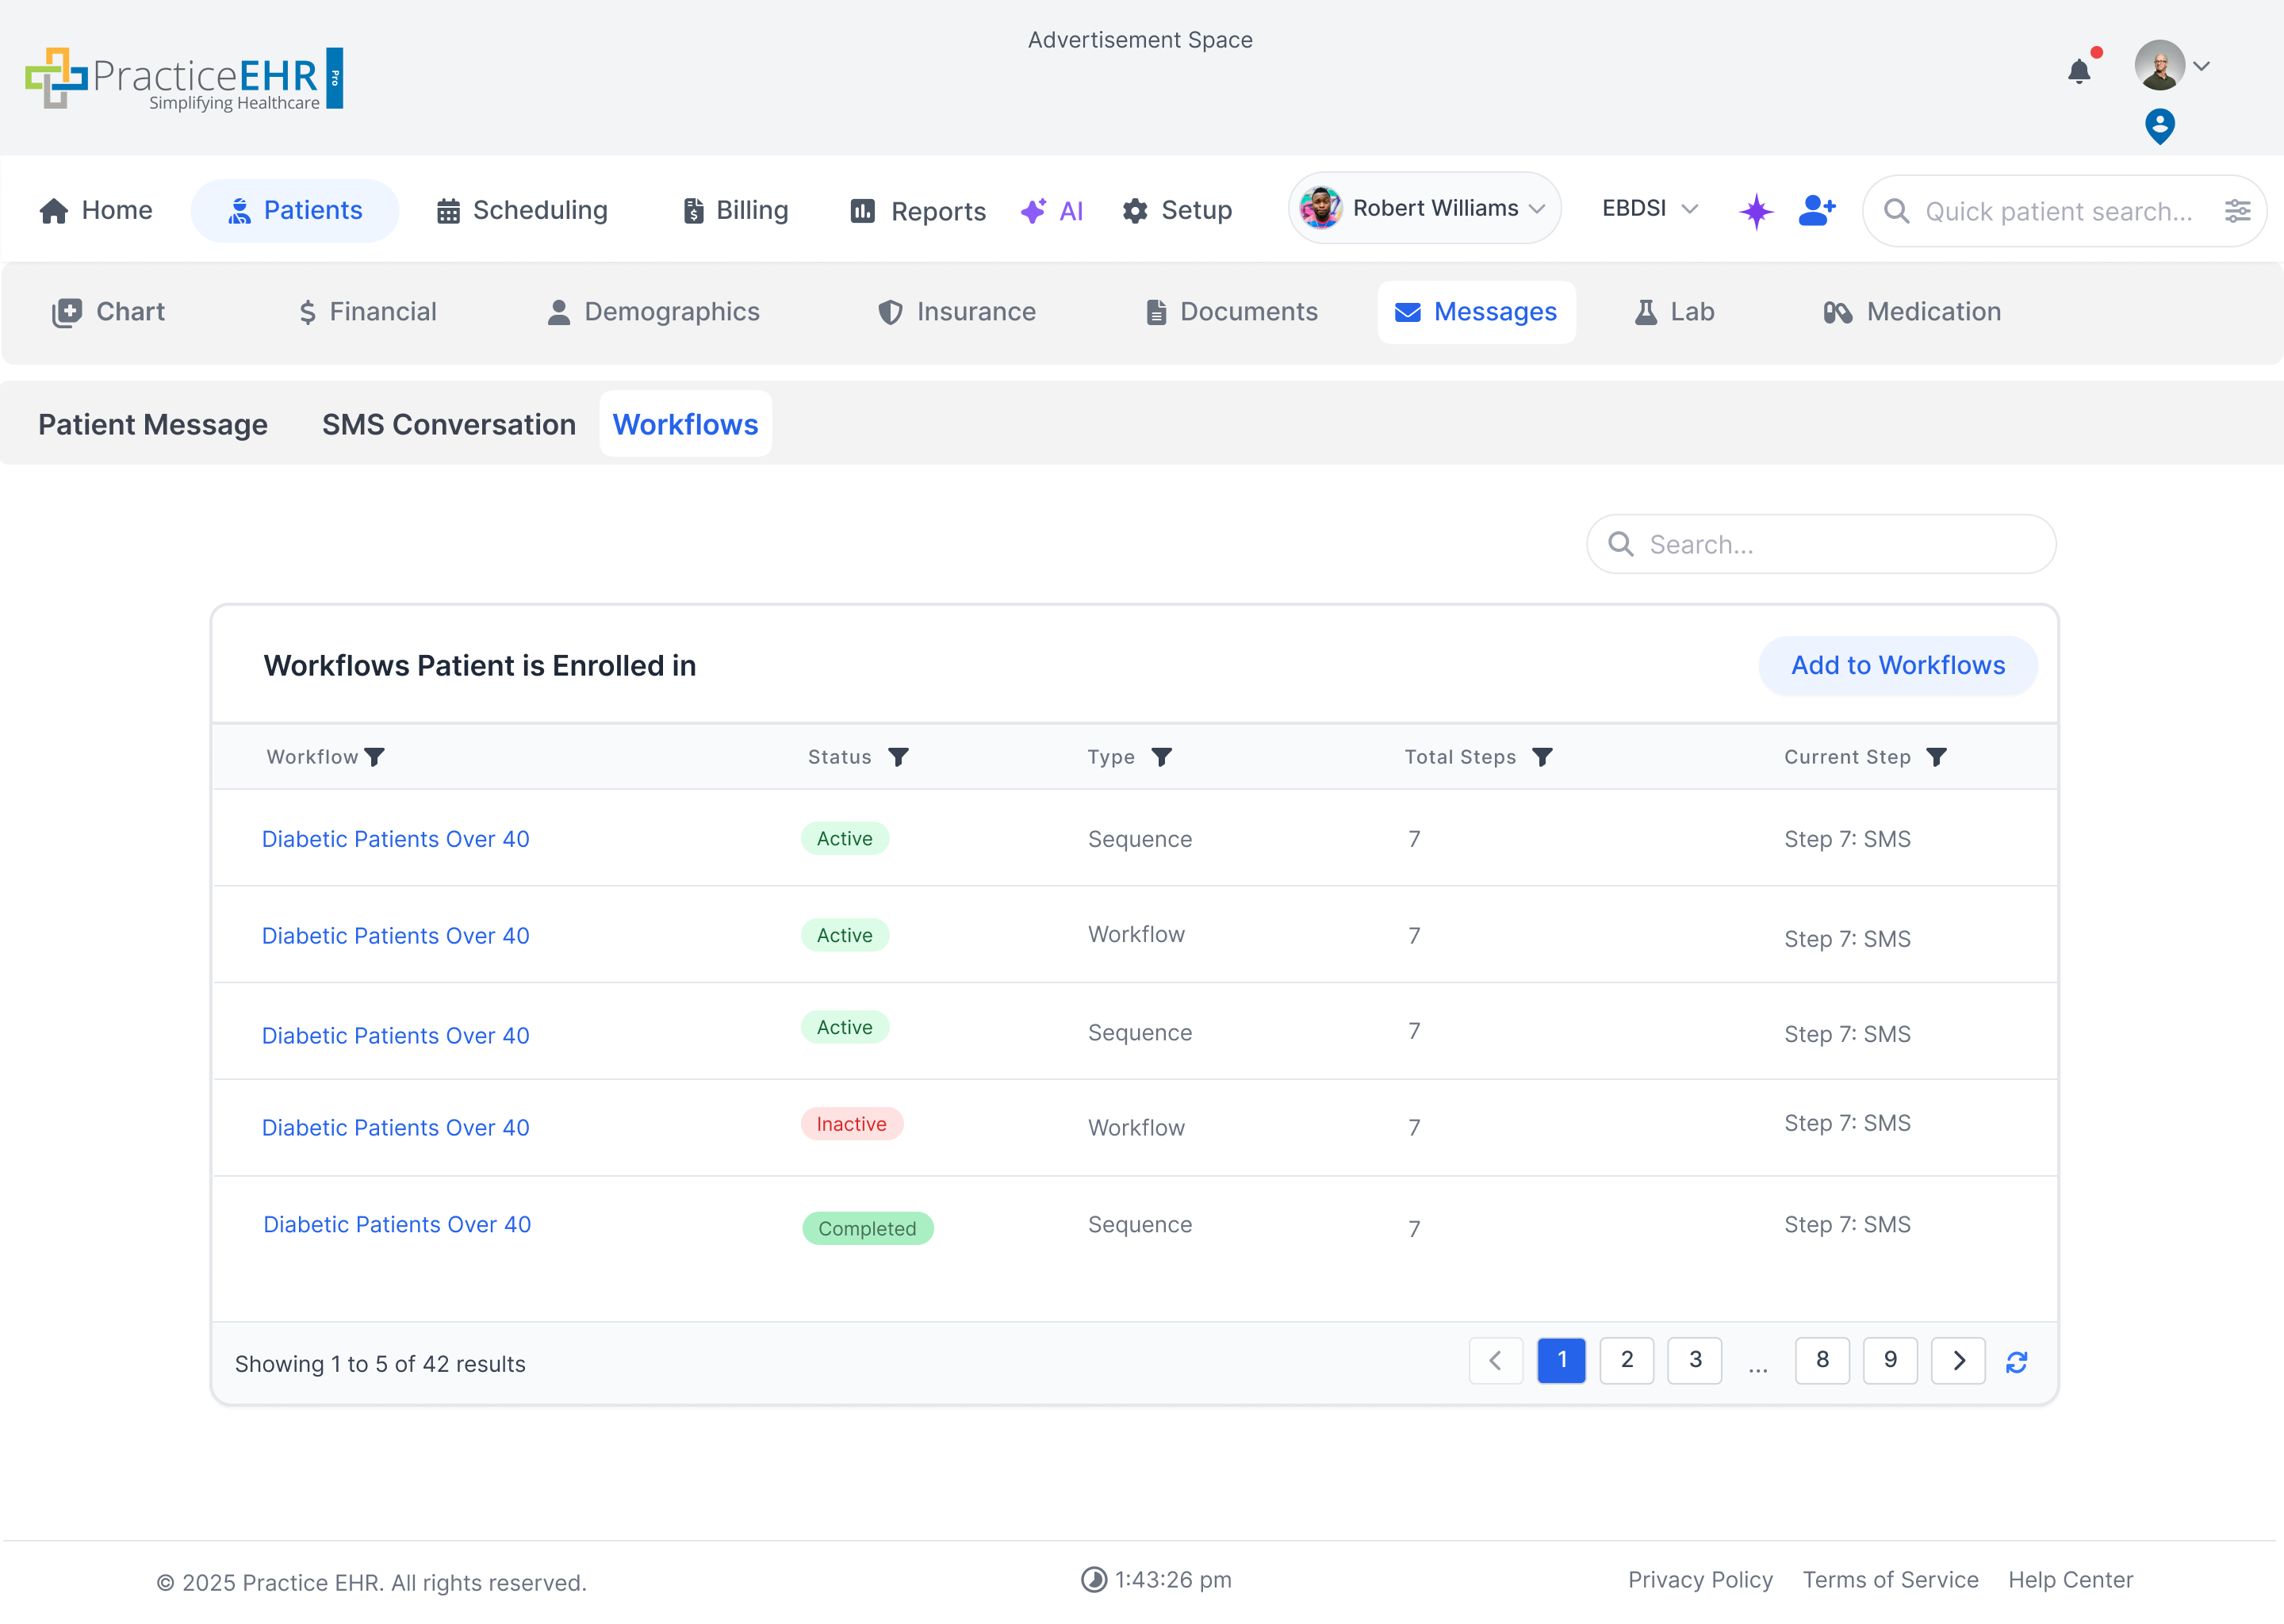
Description
The grid lists all workflows this patient is enrolled in. Users can search, sort, and enroll the patient into additional workflows via the Add to Workflows button (opens a selection modal).
Spec
- Columns: Workflow (link), Status pill, Type (Workflow/Sequence), Total Steps, Current Step.
- Search: top-right search filters the enrolled workflows list.
- Status Pills: Active / Inactive / Completed.
- Pagination: standard footer paginator with page shortcuts and refresh.
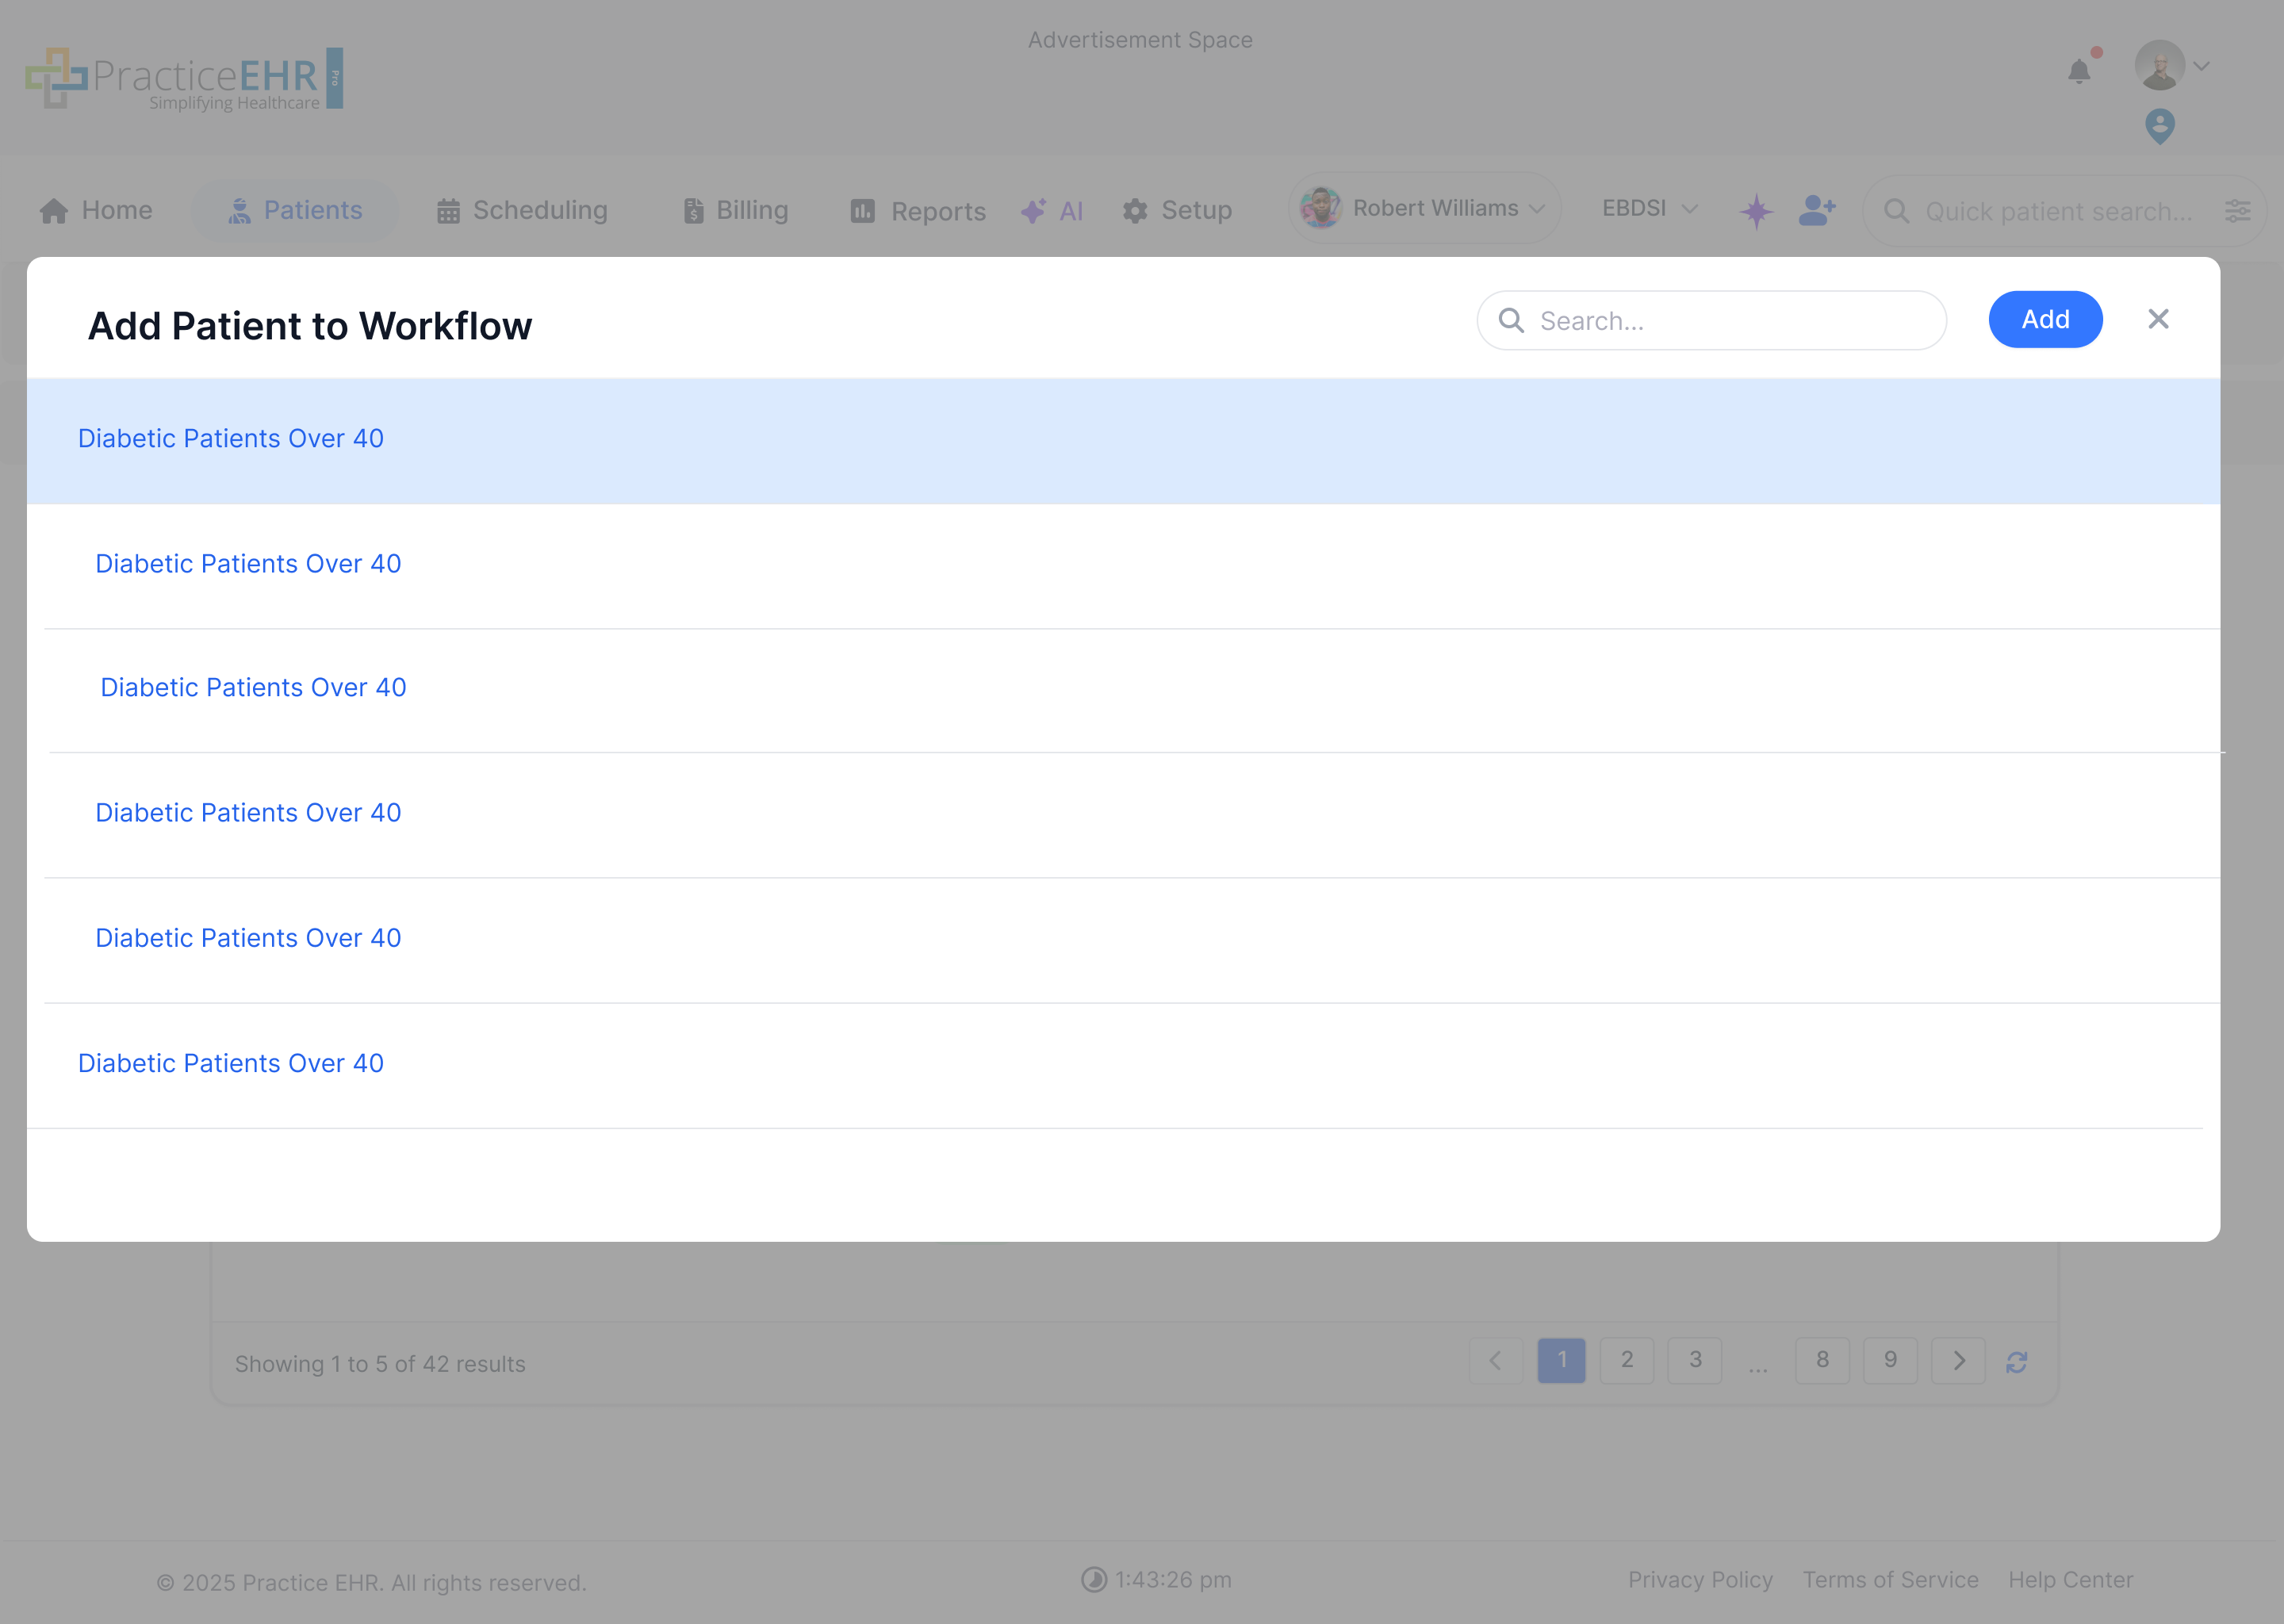
Add to Workflows (Modal)
- Open: Click on buttonAdd to Workflows.
- Search: live-filters the available workflows in the list.
- Select + Add: pick a workflow in the list, then press Add to enroll the patient.
- Close: “X” (top-right) or outside click dismisses the modal without changes.
Trigger Detail
This screen shows a detailed trigger setup including performance statistics, trigger information, visual canvas of steps, and the result grid of linked patients.
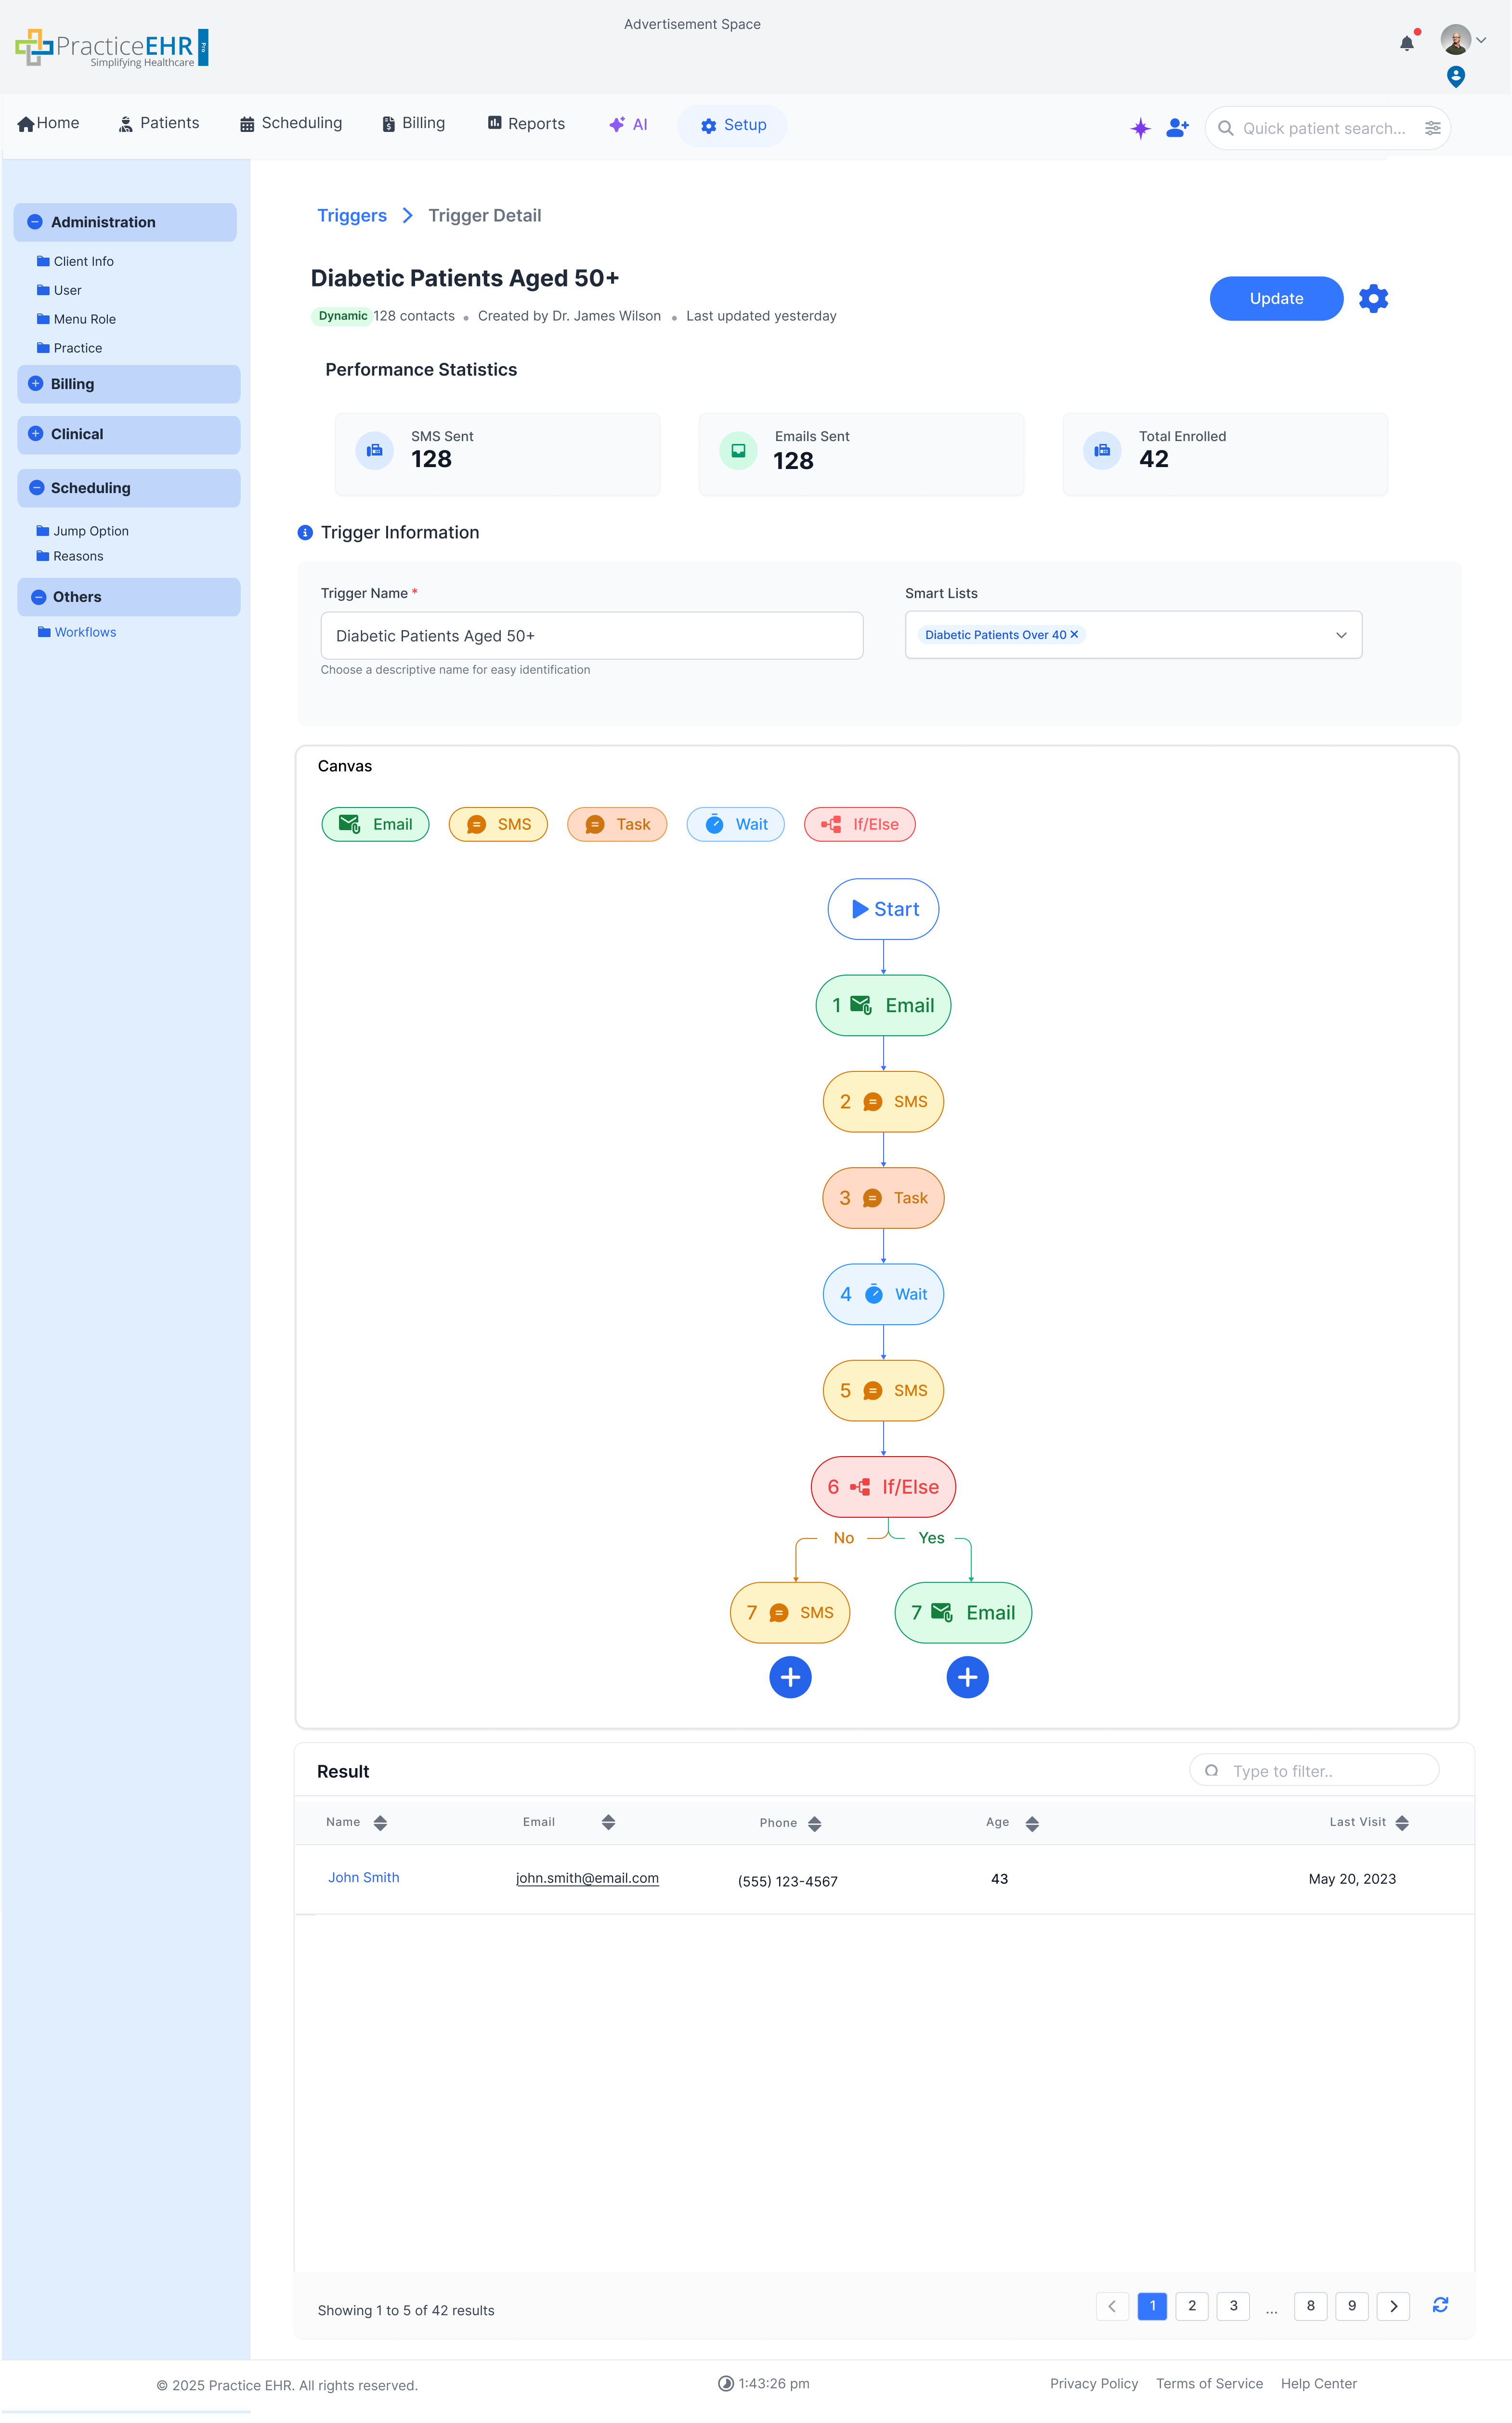
Description
The routine trigger detail view displays KPIs (e.g., SMS/Email sent, Total enrolled), editable trigger information, and the canvas flow where each step (Email, SMS, Task, Wait, If/Else) is visualized in order.
Key Features
- Performance Statistics — shows counts of SMS sent, Emails sent, and Total enrolled patients.
- Trigger Information — includes trigger name, attached smart lists, occurrence, and active toggle.
- Canvas — visual flow of steps with branching (Yes/No) for If/Else conditions.
- Result Grid — lists linked patients with details such as Name, Email, Phone, Age, and Last Visit.
Trigger Analytics
Detail shows performance metrics (KPI cards), a linked-patients result grid, and quick editing for the trigger’s name, smart lists, and steps (via the canvas).
clicking on the blue arrow buttons allow you to switch between different screens

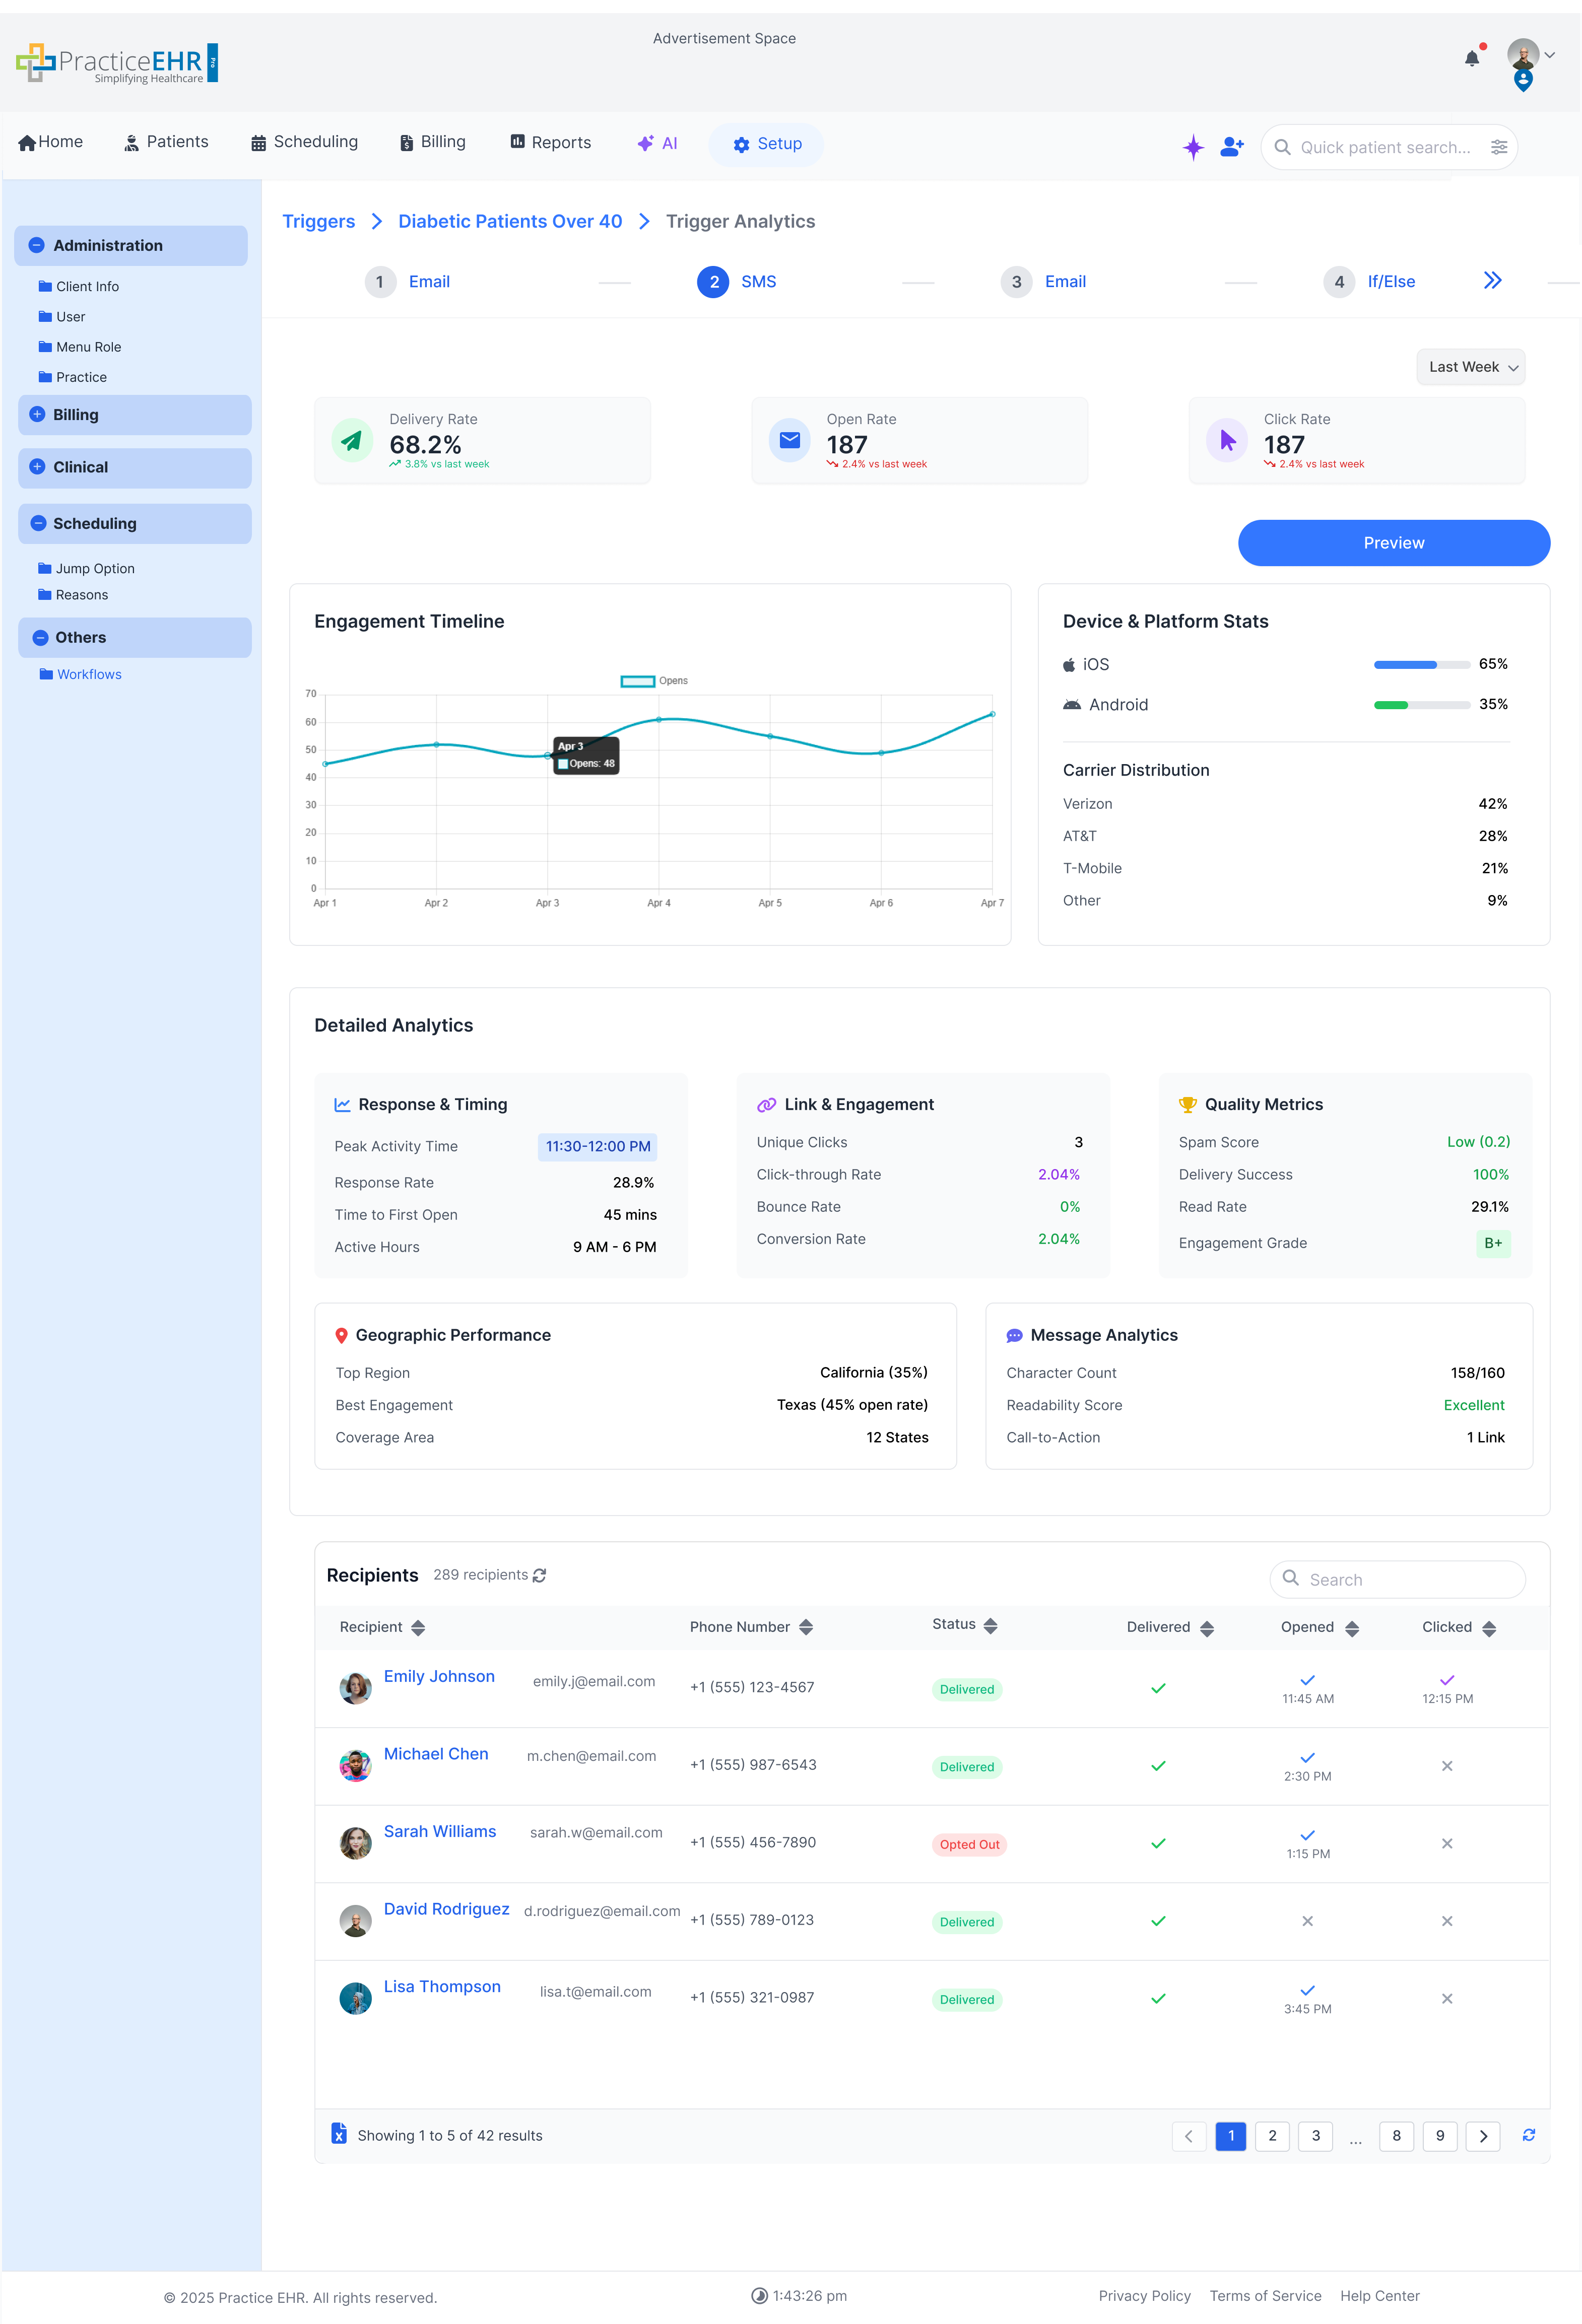
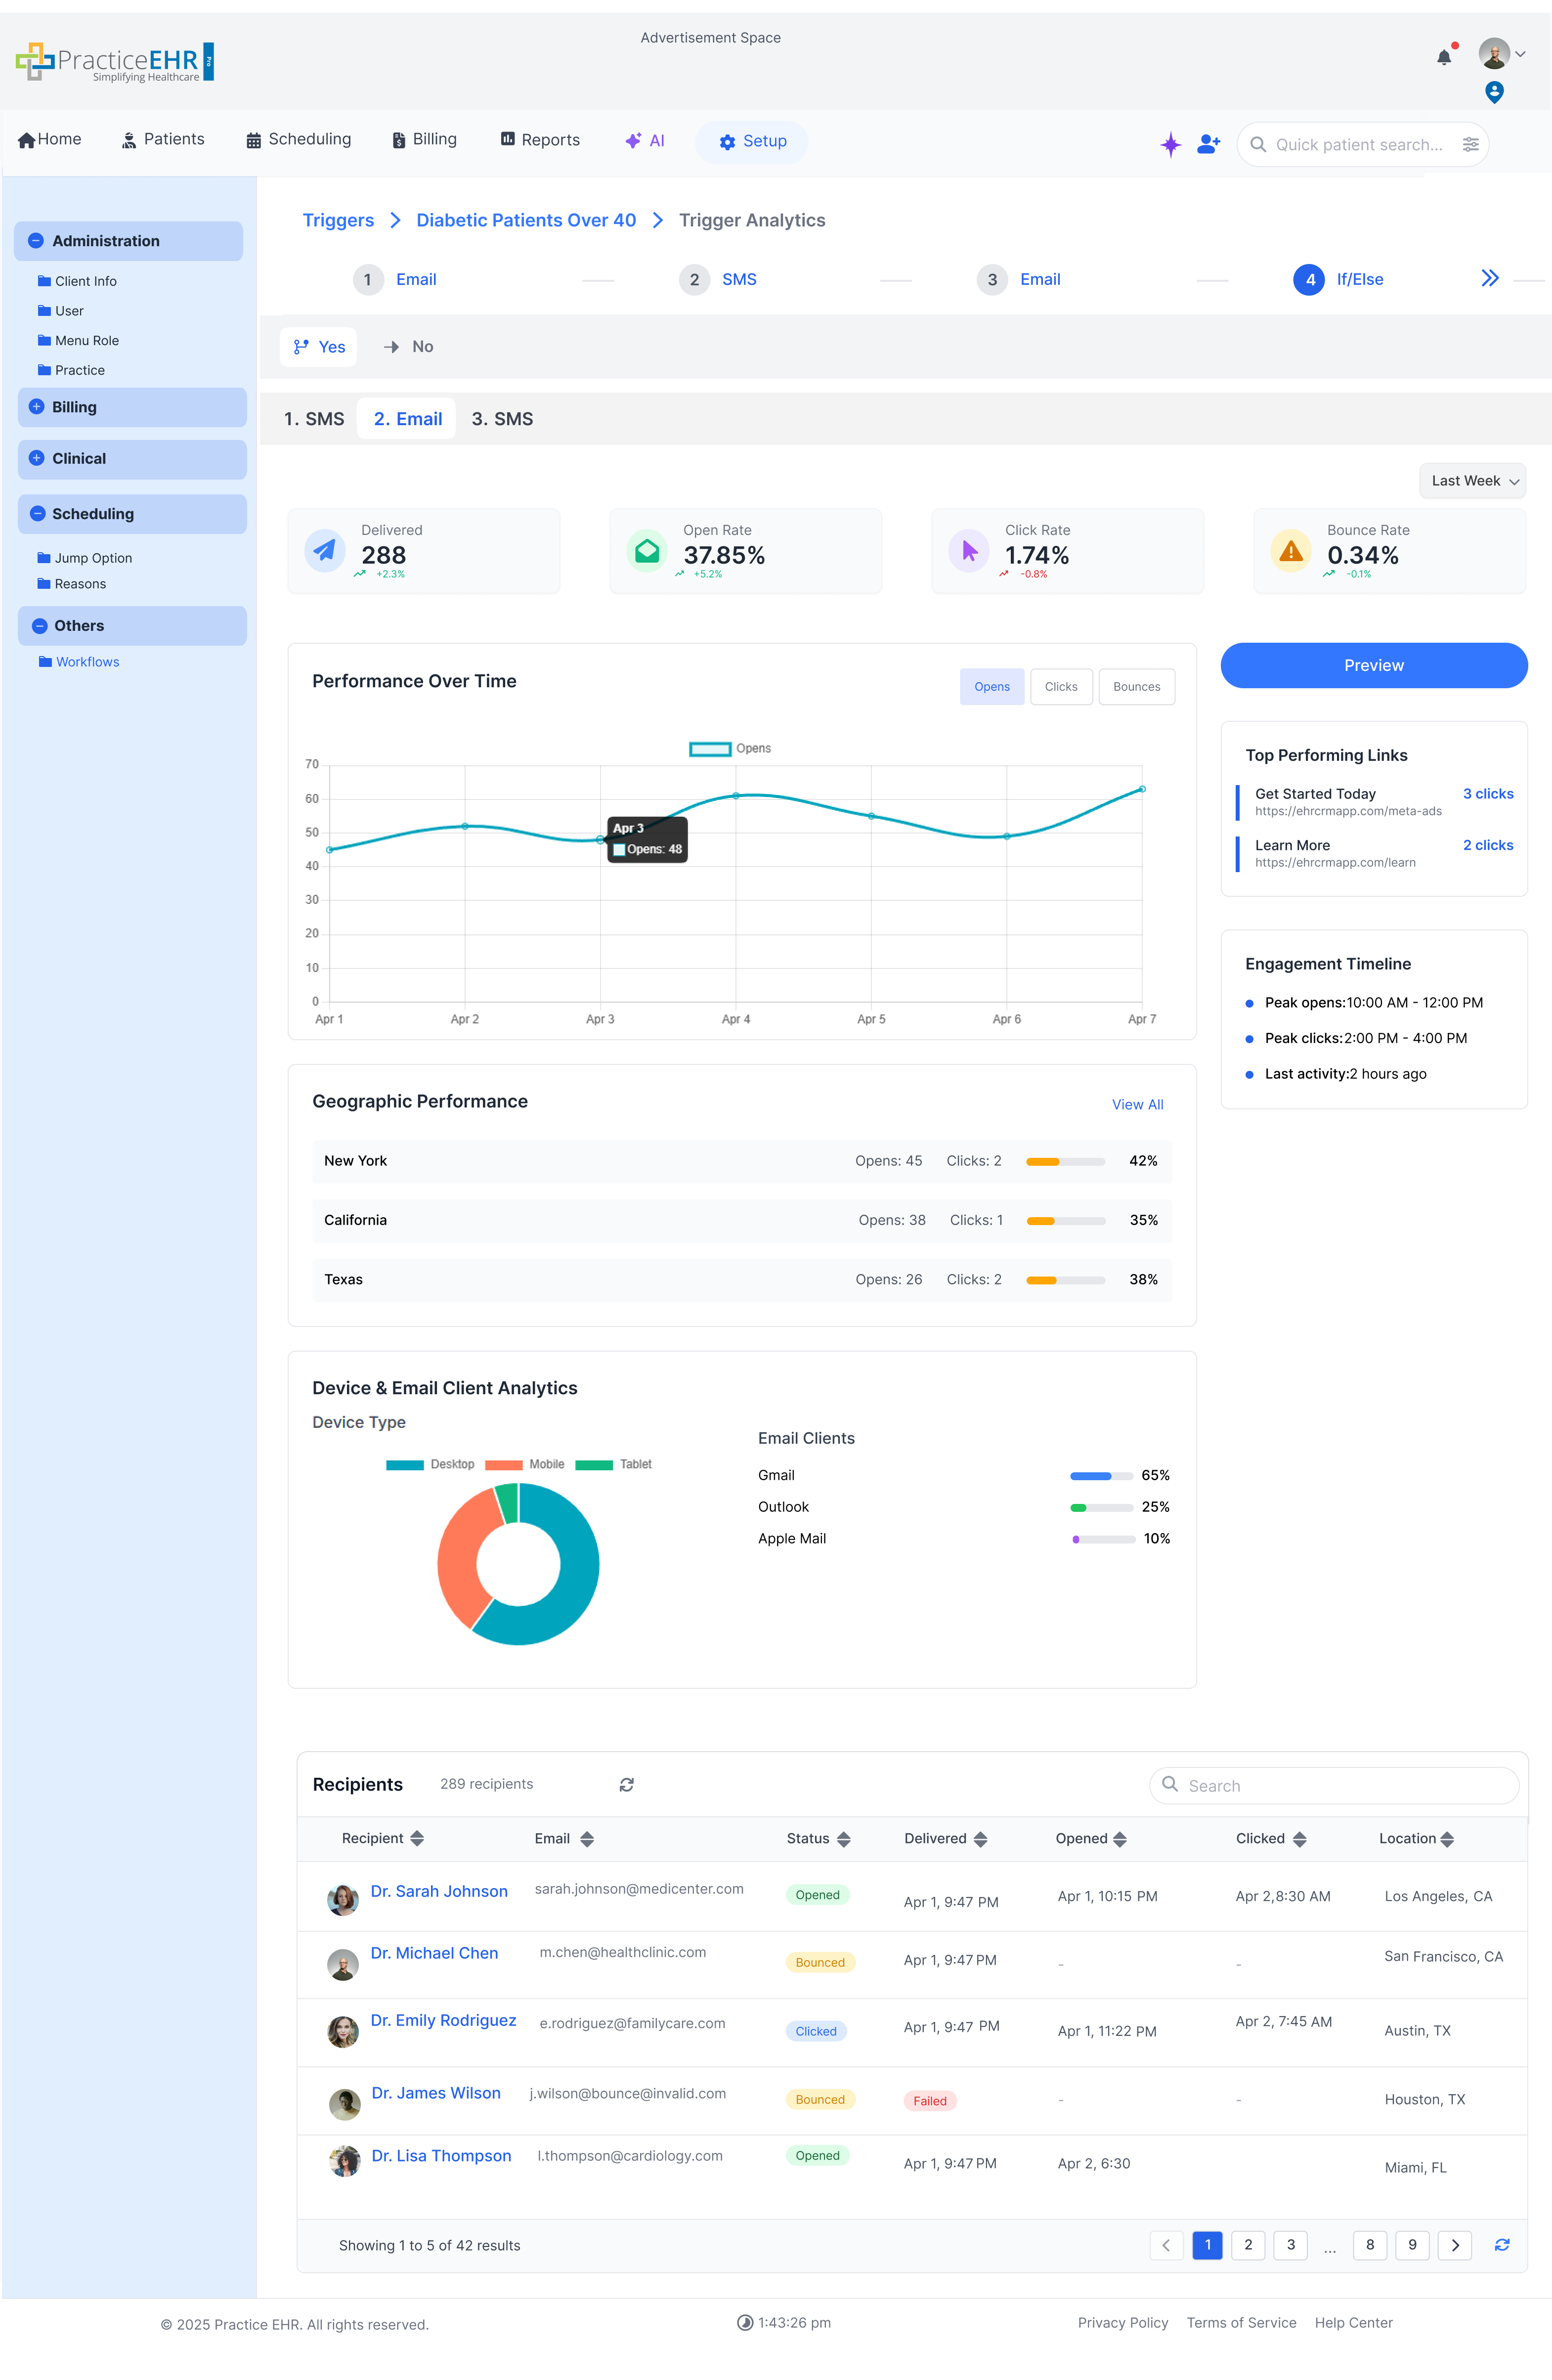
What you see
- KPI cards — Delivered/Sent, Open/Click/Bounce (Email) or Delivery/Open (SMS), with period selector.
- Performance charts over time (opens/clicks/bounces or delivery/opens).
- Breakdowns — geography, device/platform, clients/carriers, timelines.
- Recipients grid showing patient/contact status, timestamps, and outcomes.
Result grid — Linked Patients
The bottom recipients/patients grid shows who is linked from the selected Smart Lists and their latest engagement (delivered, opened, clicked/replied). Use the search box and column sorting to drill down.
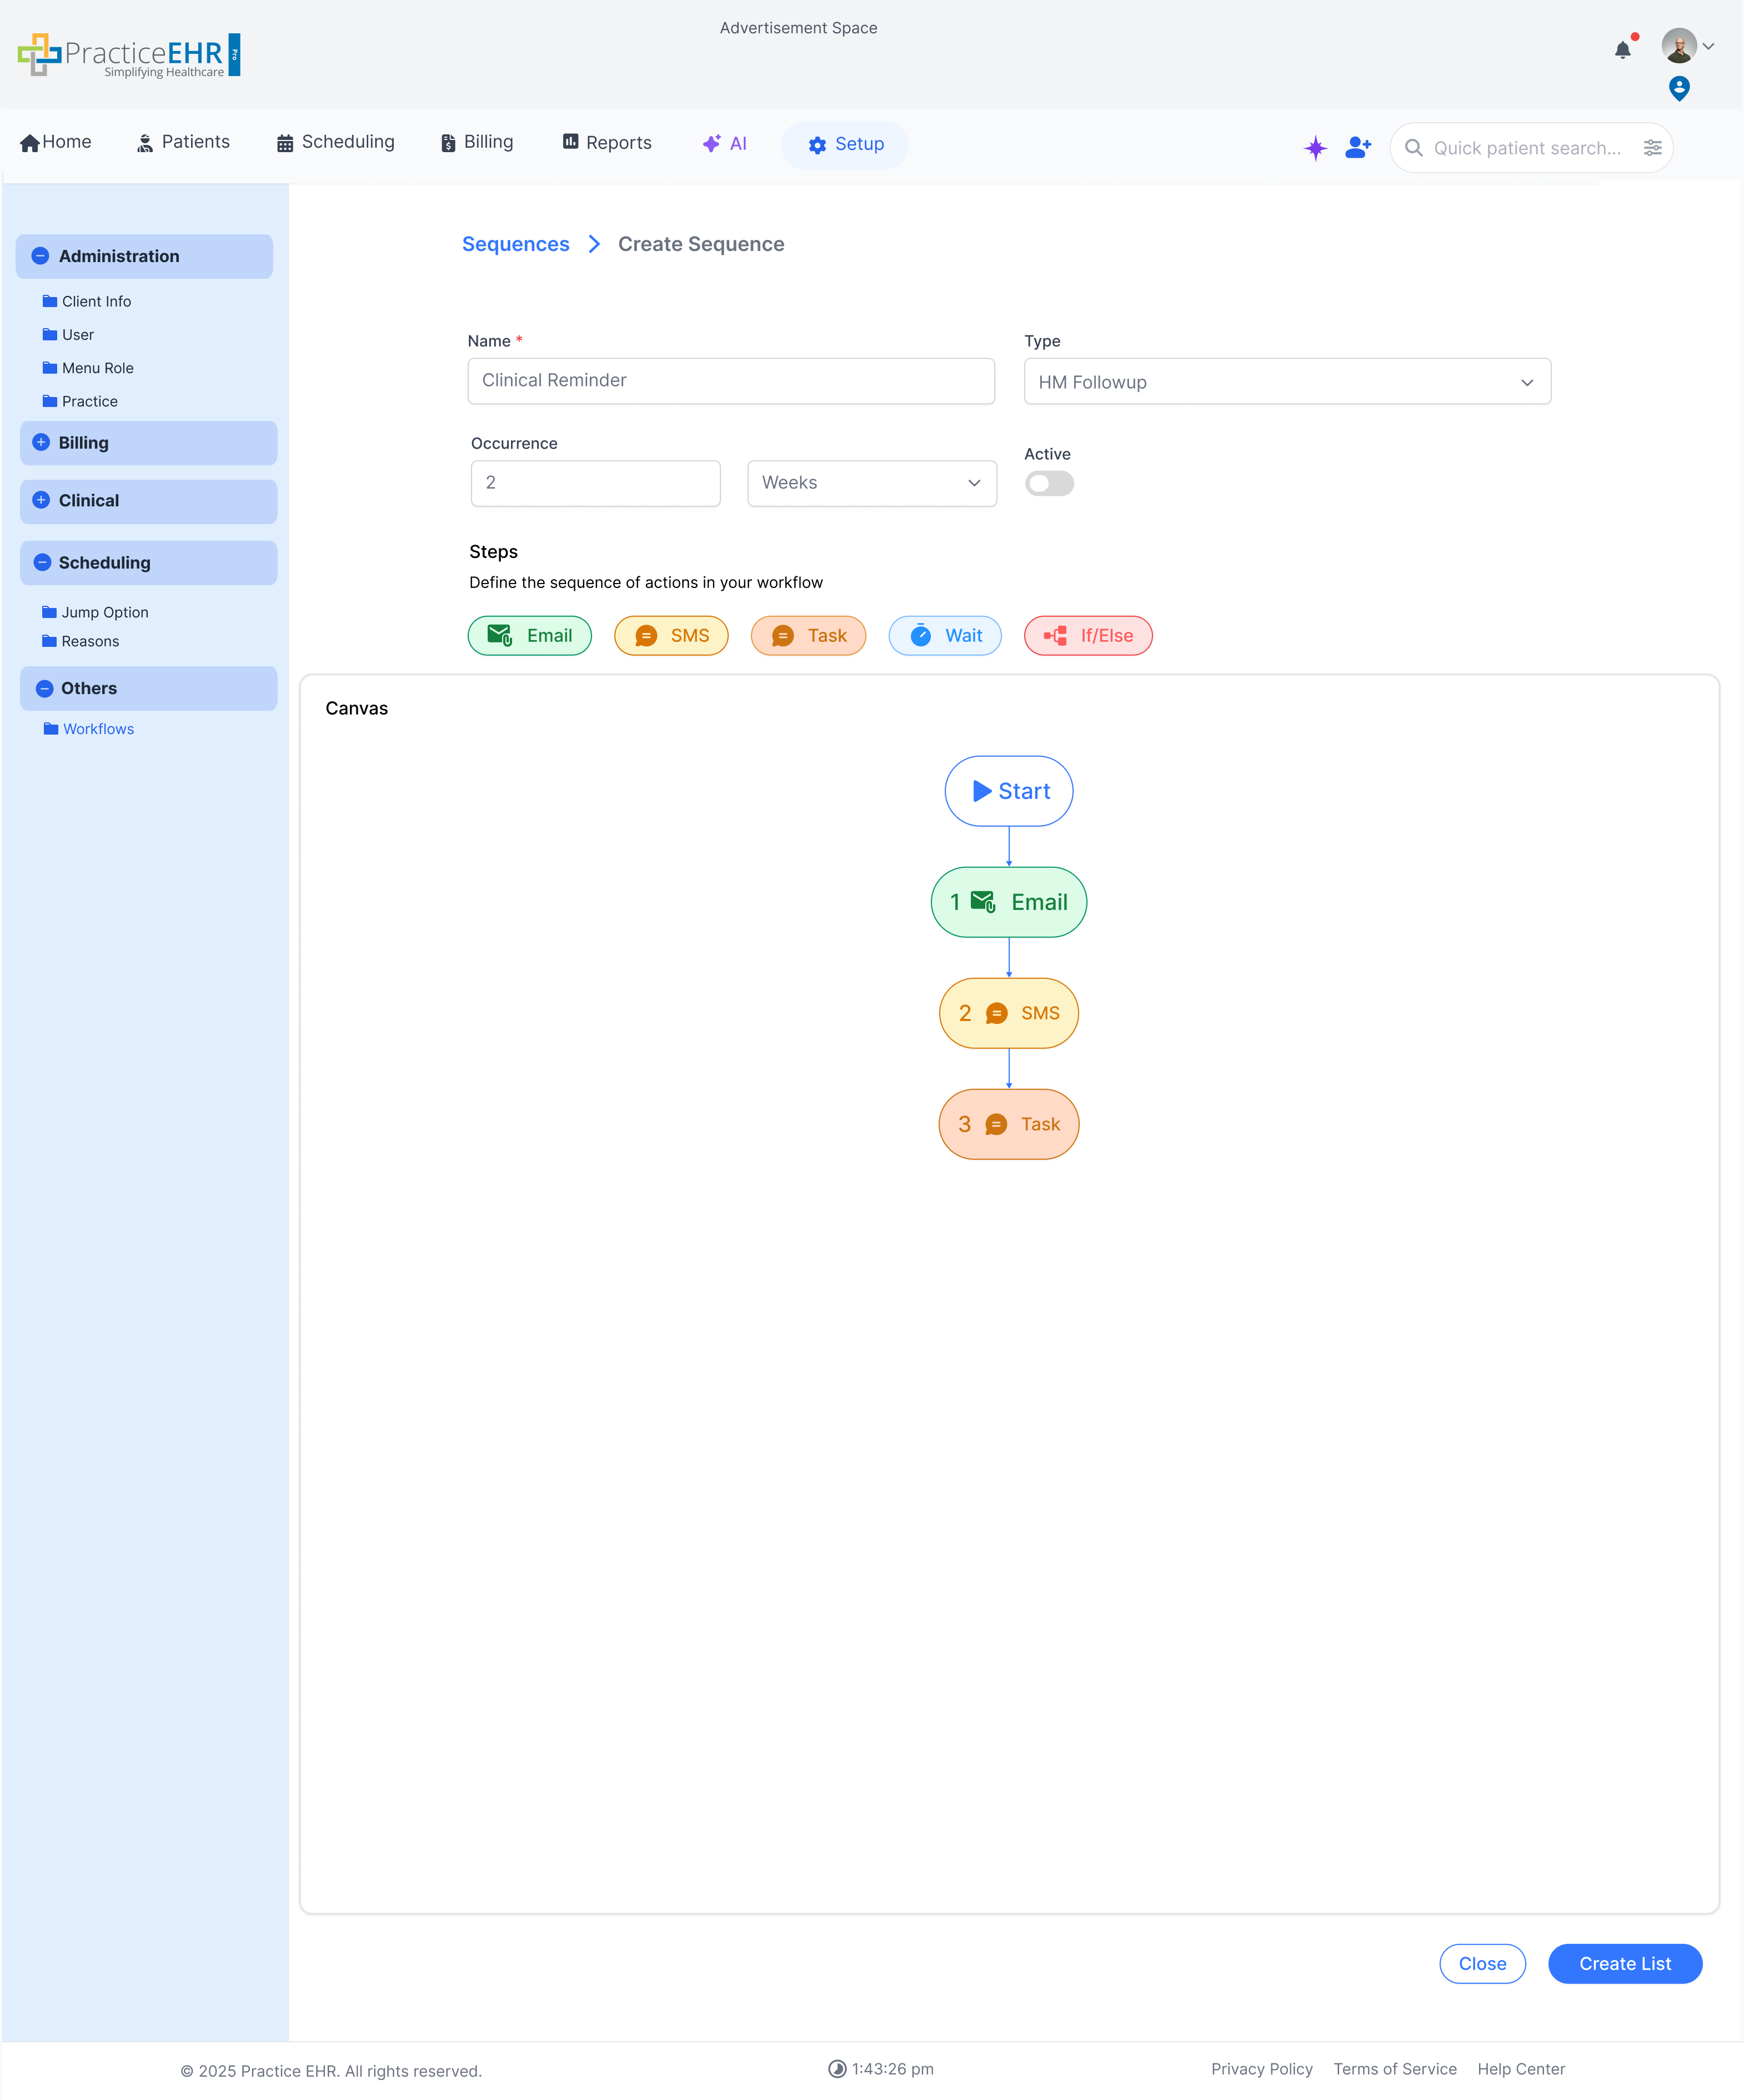
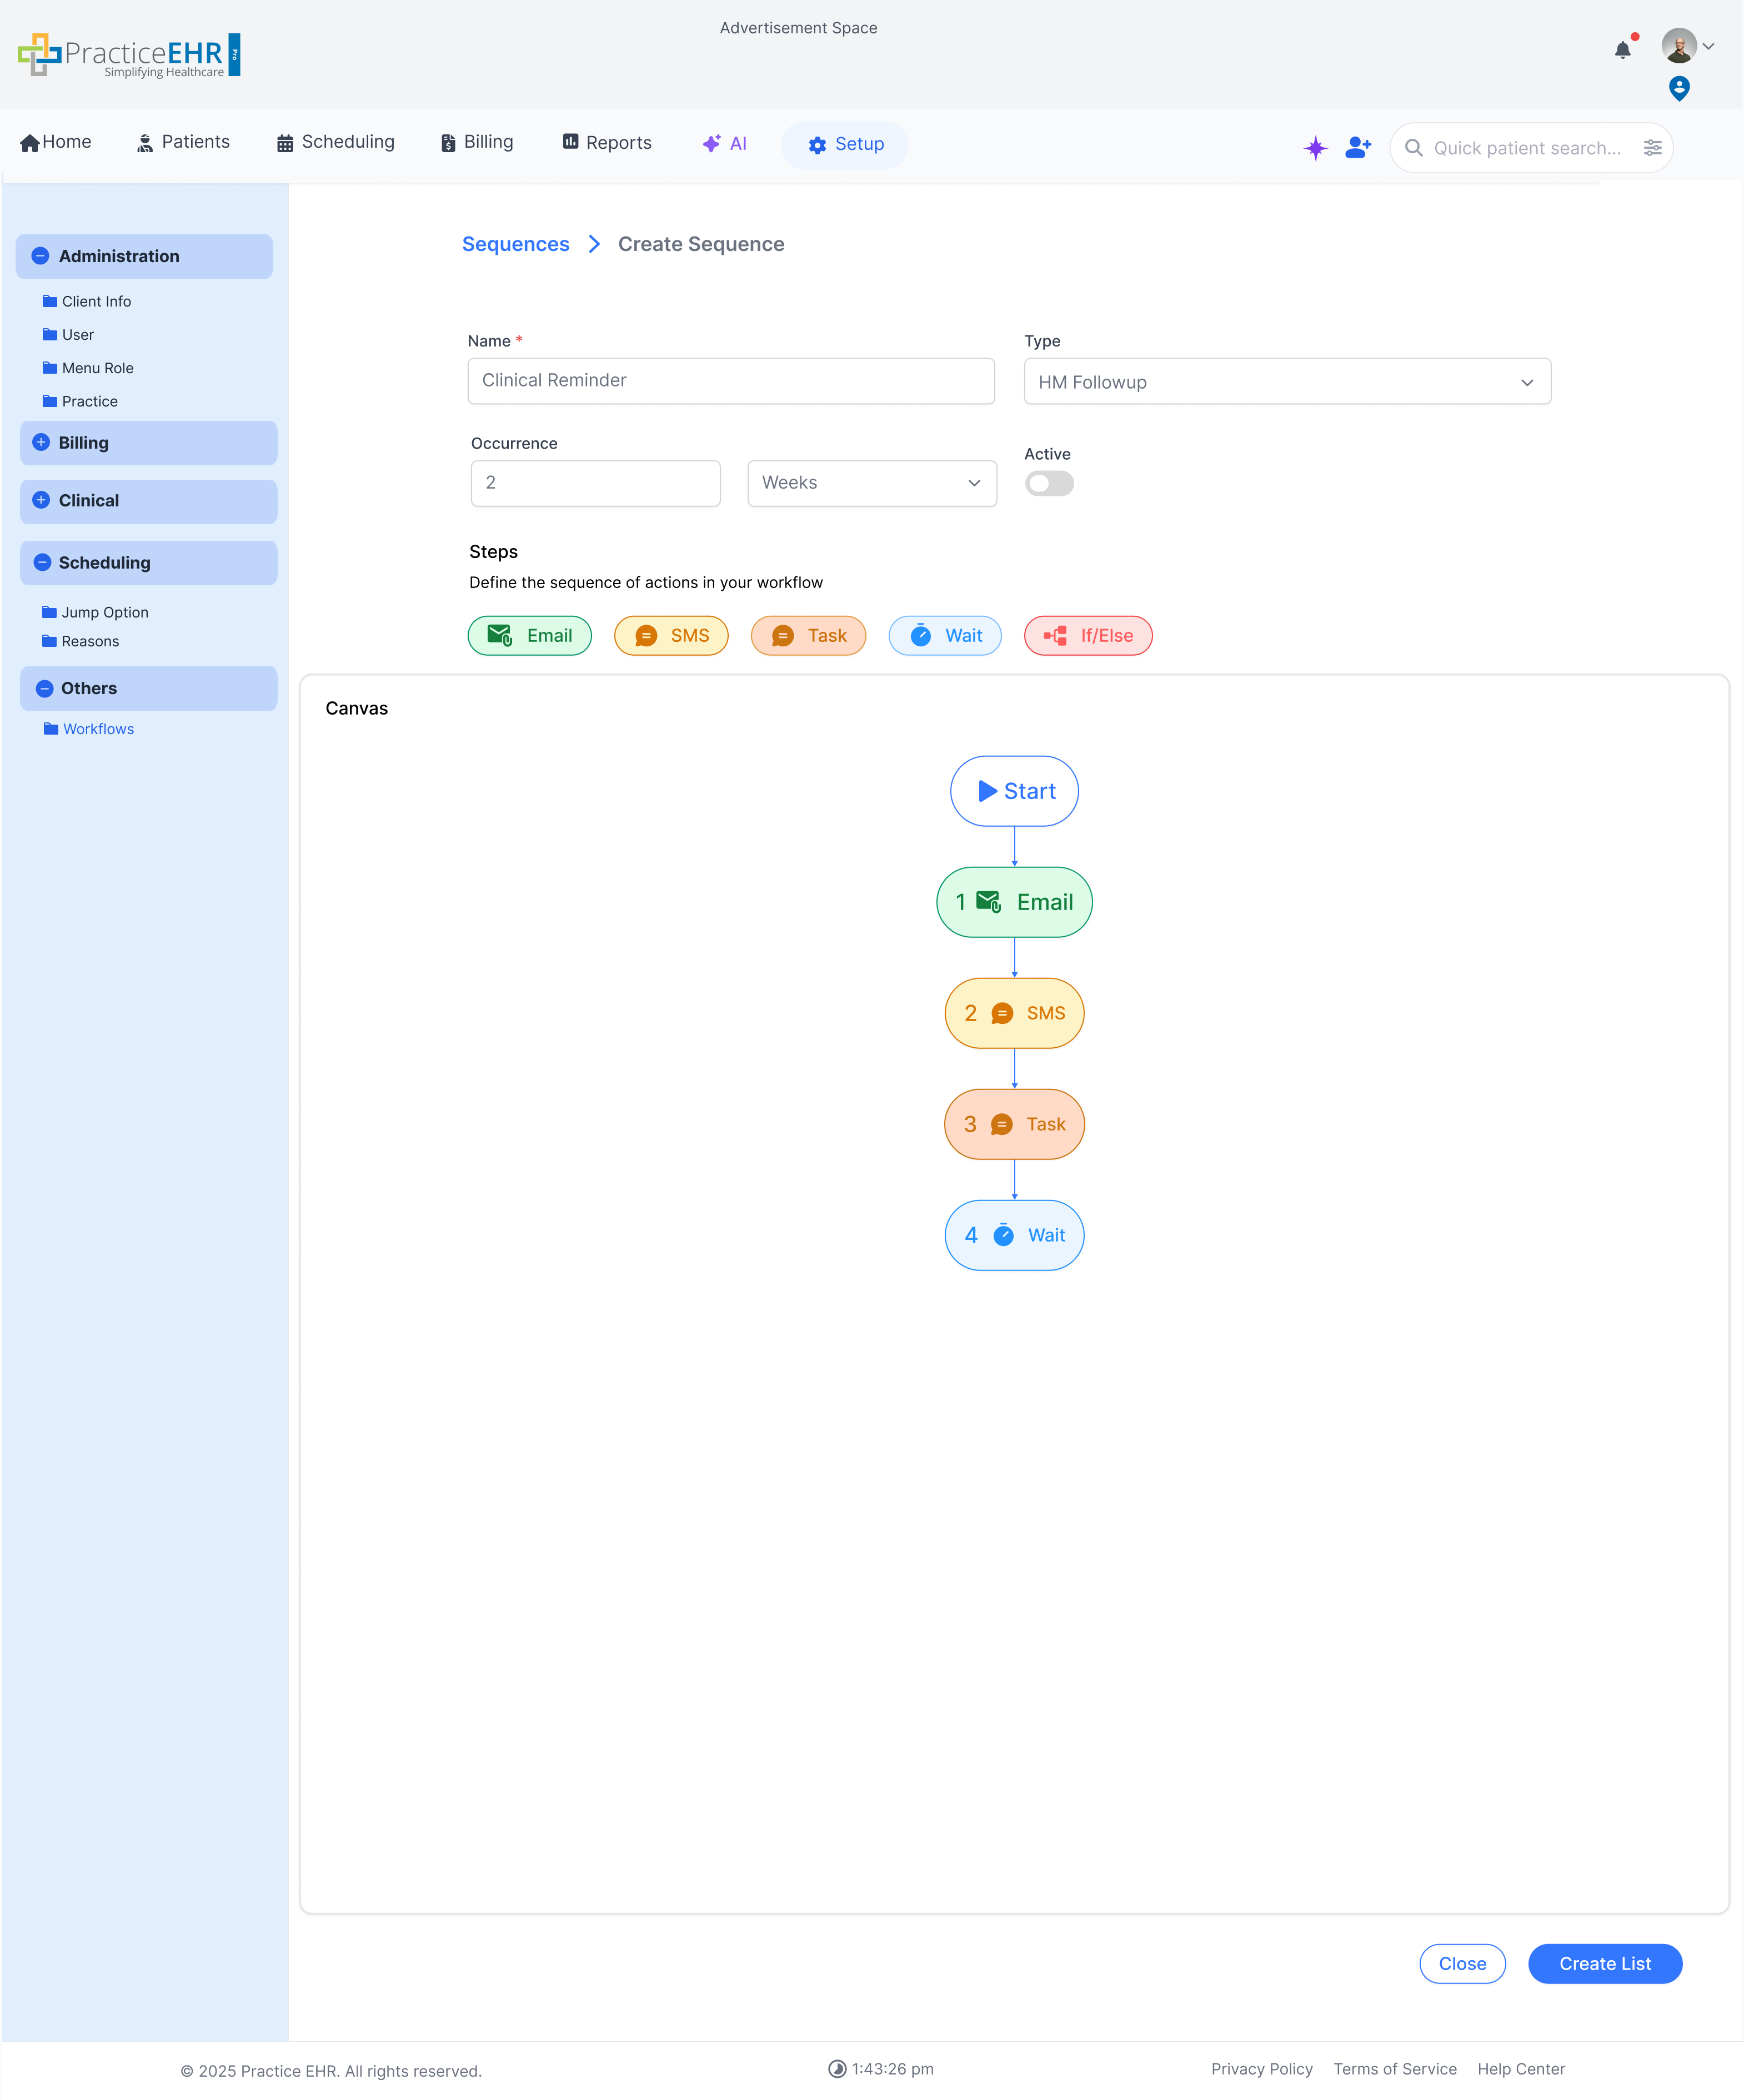
Sequences
Sequences are used to add specific patients instead of smart lists and triggers.
clicking on the blue arrow buttons allow you to switch between different screens.


Key Points
- Type field present instead of the smart list field where the user can select the type of sequence needed
- The rest is the same as triggers